
This is a long post in a two part series – if you’re just interested in seeing my latest project, feel free to check it out at my artstation here.
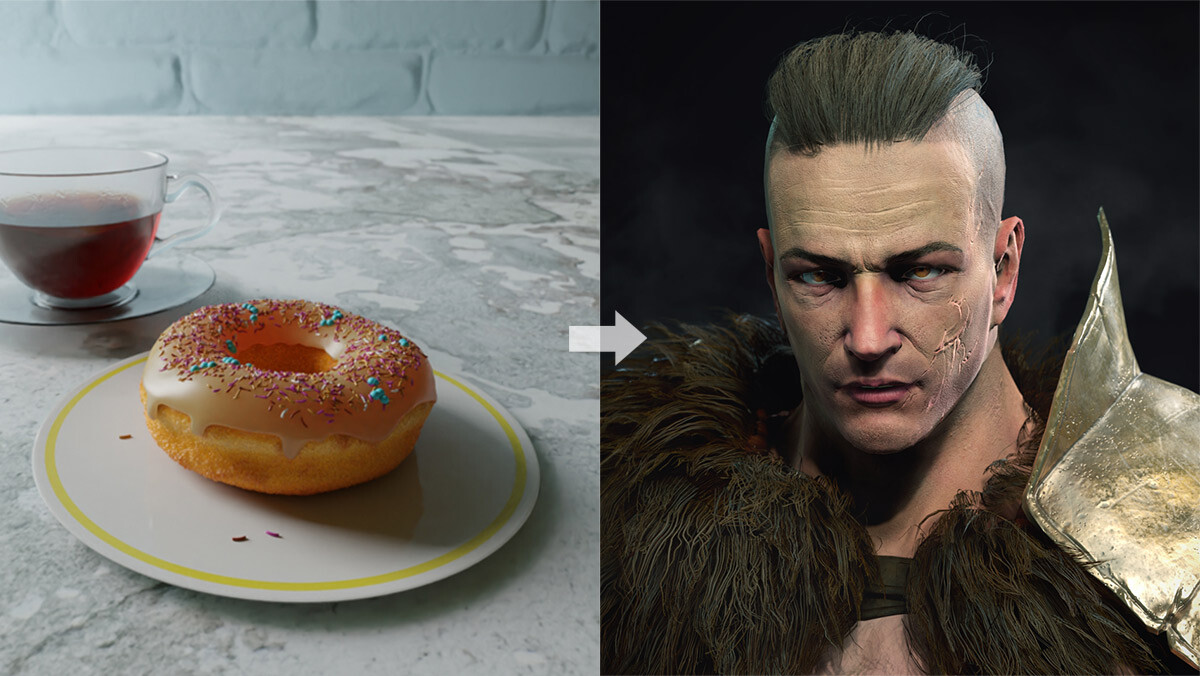
Since April of 2020, I have been educating myself in 3D. It’s been a long journey, and while I’ve spoke often about my experience, I’ve never actually put the entirety of what I’ve learned into one post. I was recently reading a blog post by influential Blender educator Andrew Price about his 2 year development in drawing and painting. It occurred to me that I’ve been doing much the same, but in the opposite direction – moving from 2D to 3D. Since we are both self taught, the journeys are remarkably similar: a lot of personal struggle on what can sometimes feel like an endlessly meandering path in the dark. And since April of 2021 will soon be here, it will nearly be a year since I started, a benchmark for what has been one of my biggest years of growth as an artist. Maybe it will inspire other 2D artists who are considering dipping a toe into the 3D realm like I was. Well, it was a toe at first, but then I took the complete plunge!
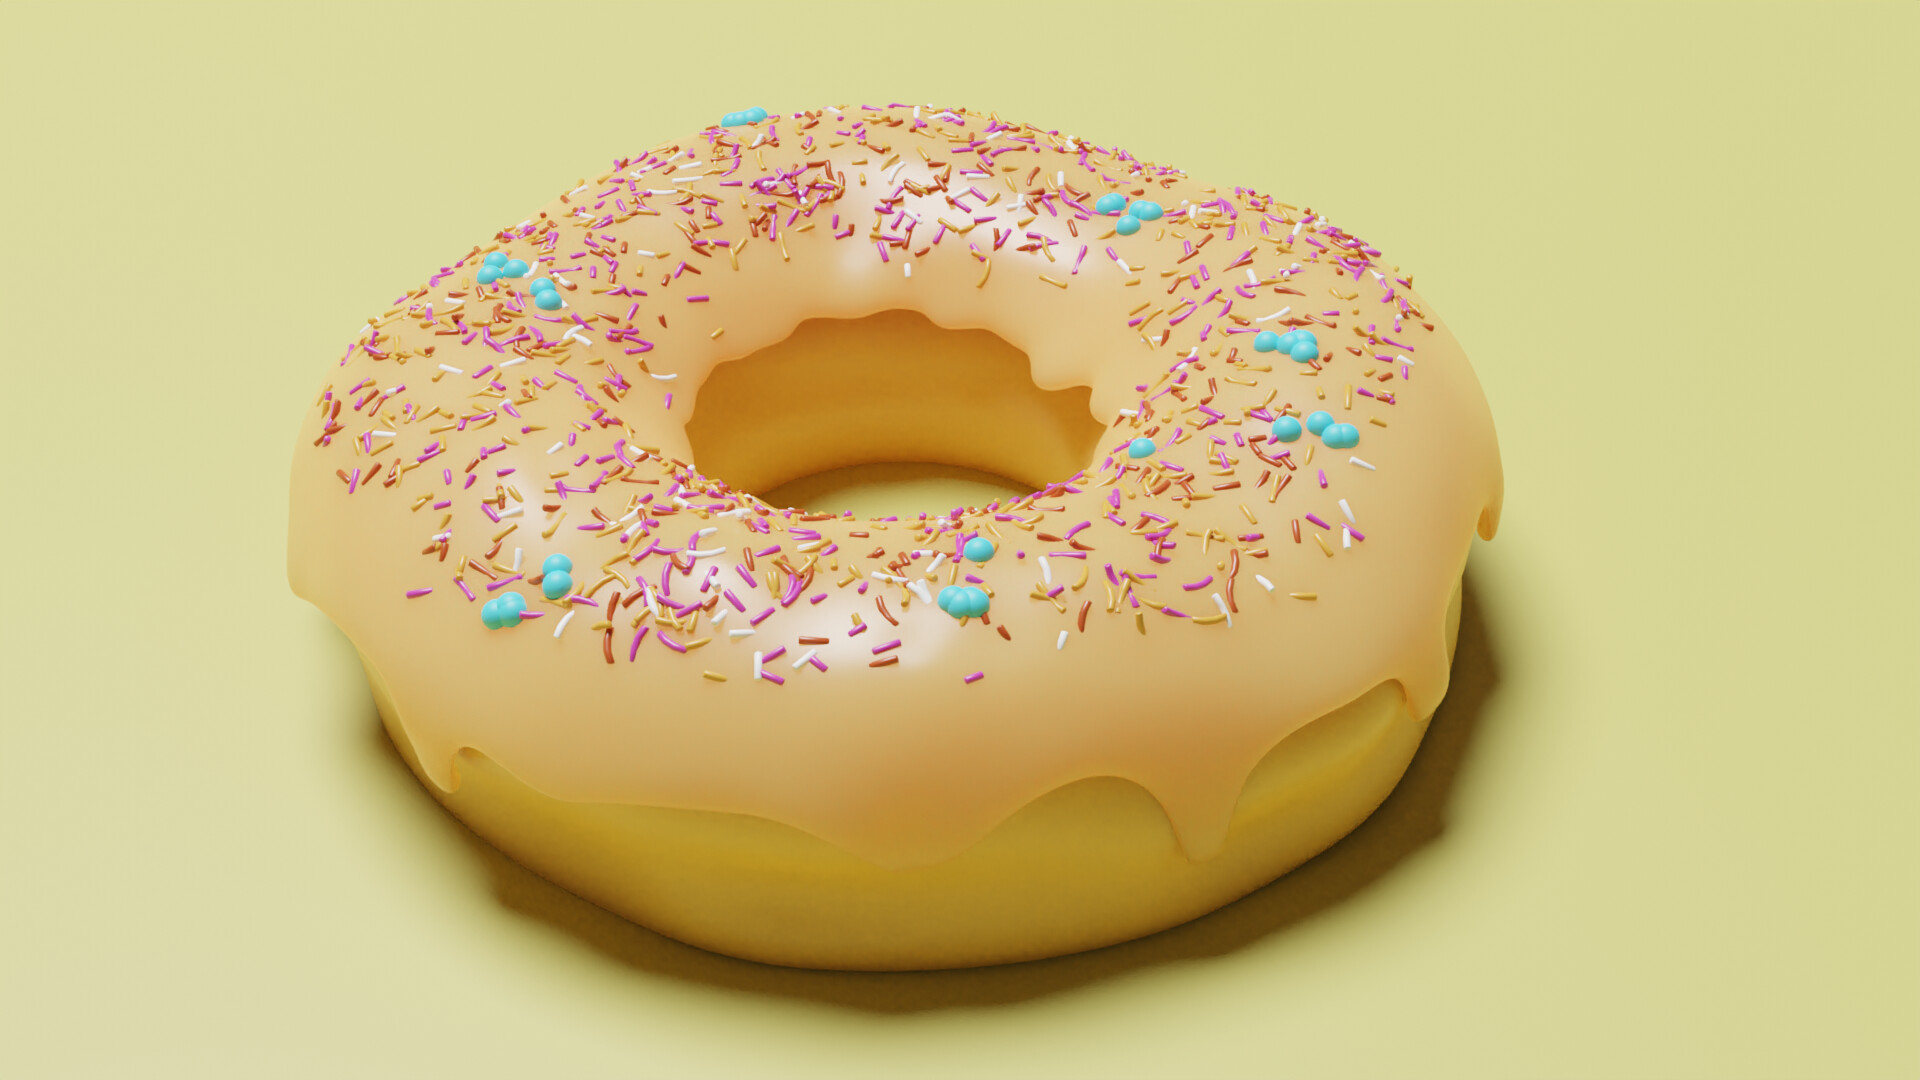
And here it is, my very first baby render. Back in April of 2020, I was considering how best to get started in 3D and was most attracted to the open source software Blender. I had opened the program before, but never managed to achieve much beyond a cube or cylinder. Going through Andrew Price’s famous Donut Tutorial opened my eyes. Looking at it now, I laugh to myself because it is so simple, but I learned a tremendous amount from this experience at the time. I remember following every video exactly, duplicating his instructions in Blender and being surprised at the results I was able to achieve. This experience has become so quintessential to many 3D beginners that it’s a bit cliche to talk about The Blender Donut now, but I would still recommend it to just about anyone looking to get started as an absolute beginner.
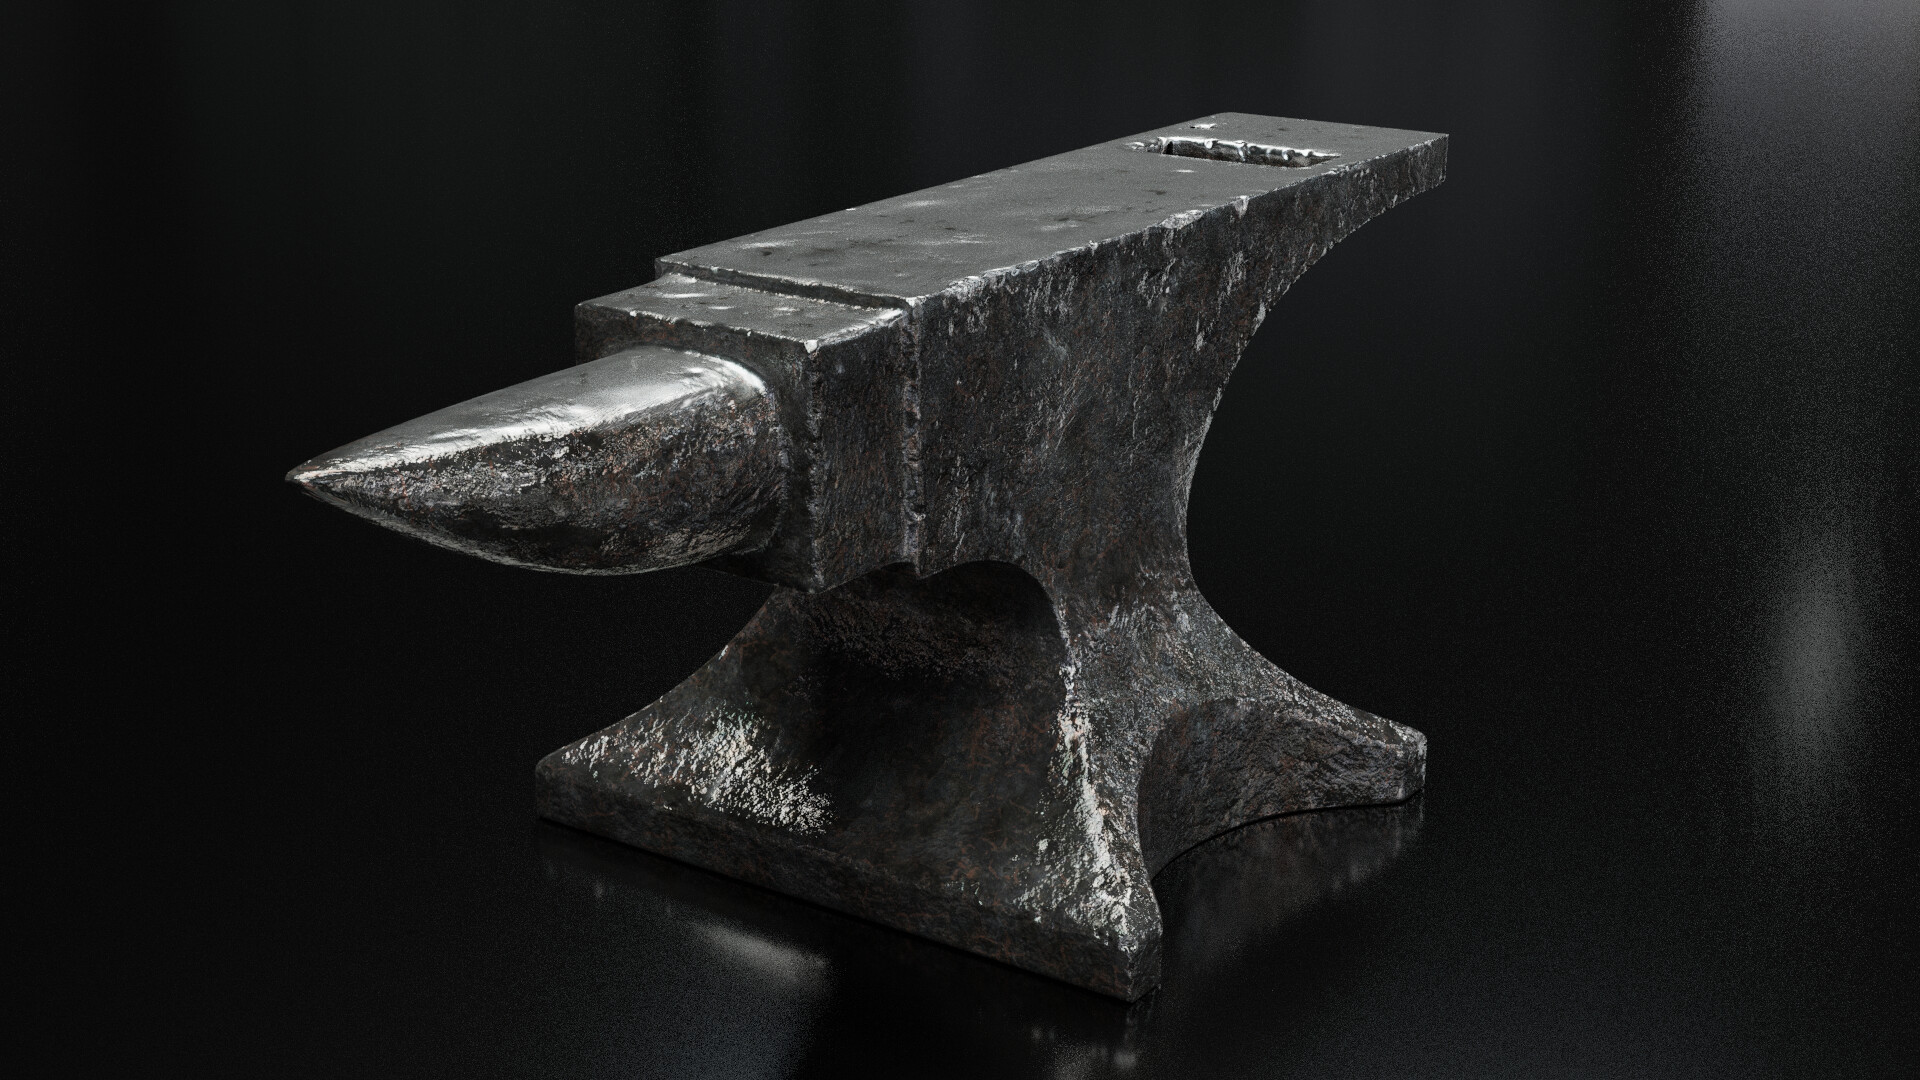
Having no idea what to do next, I decided to take another spin on Andrew’s tutorial series – the Anvil. The donut was satisfying but the anvil just felt more useful. It had hard surfaces, texture, and more complicated modeling and geometry than the donut. Also, this one was marked as “intermediate,” which I felt like I was ready for
It was more than intermediate at the time, it was infuriating! Somewhere in the middle Andrew throws in normal baking for adding textural information without geometry, and my mind struggled with the concept. Every bake I attempted looked off and I didn’t understand why. I was missing some key education here – the entire concept of what normals are, what image maps are, and how UV’s work. Andrew’s videos were giving me hints but I did not get the entire picture or how they related to each other. Regardless, I finished the anvil because I was determined to overcome it.
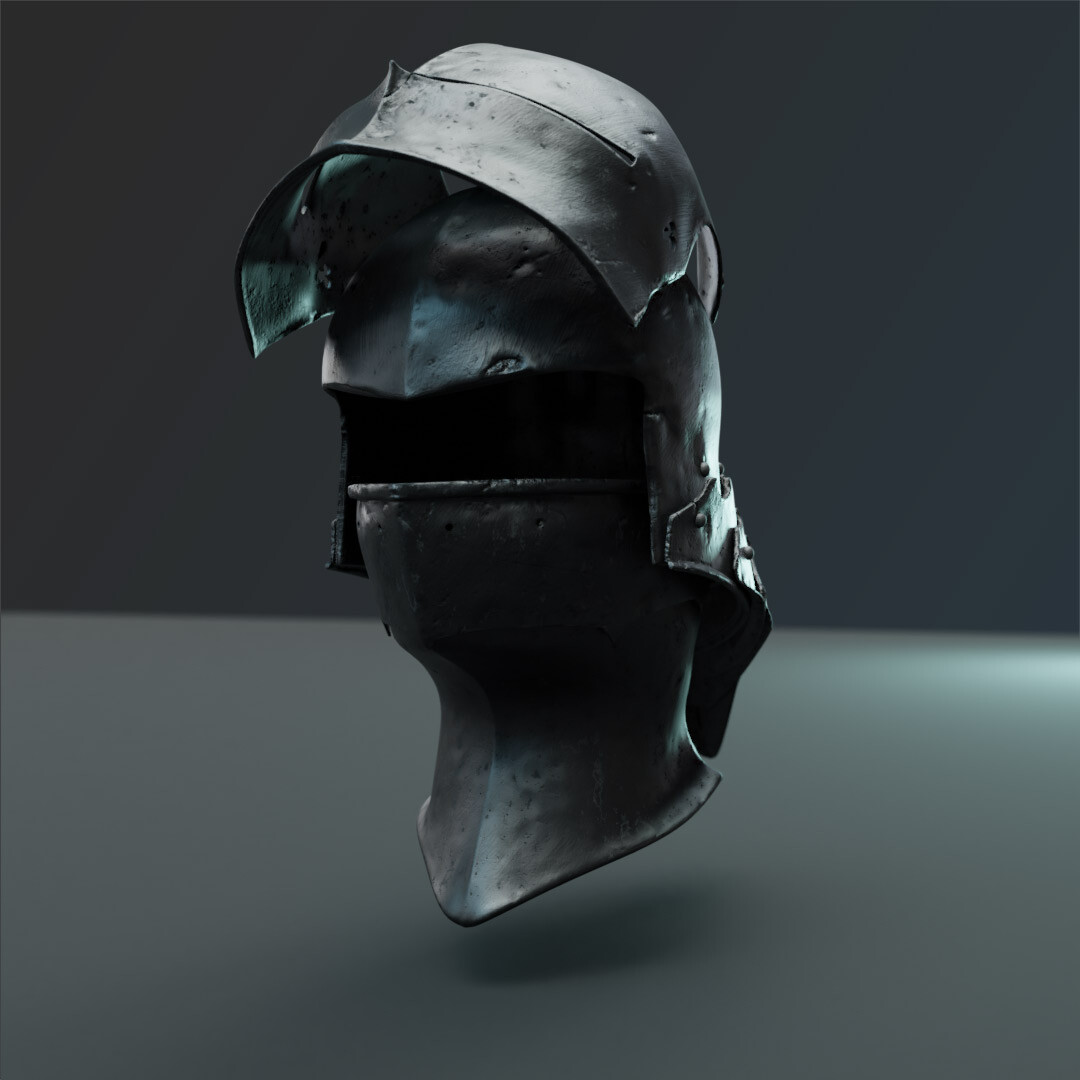
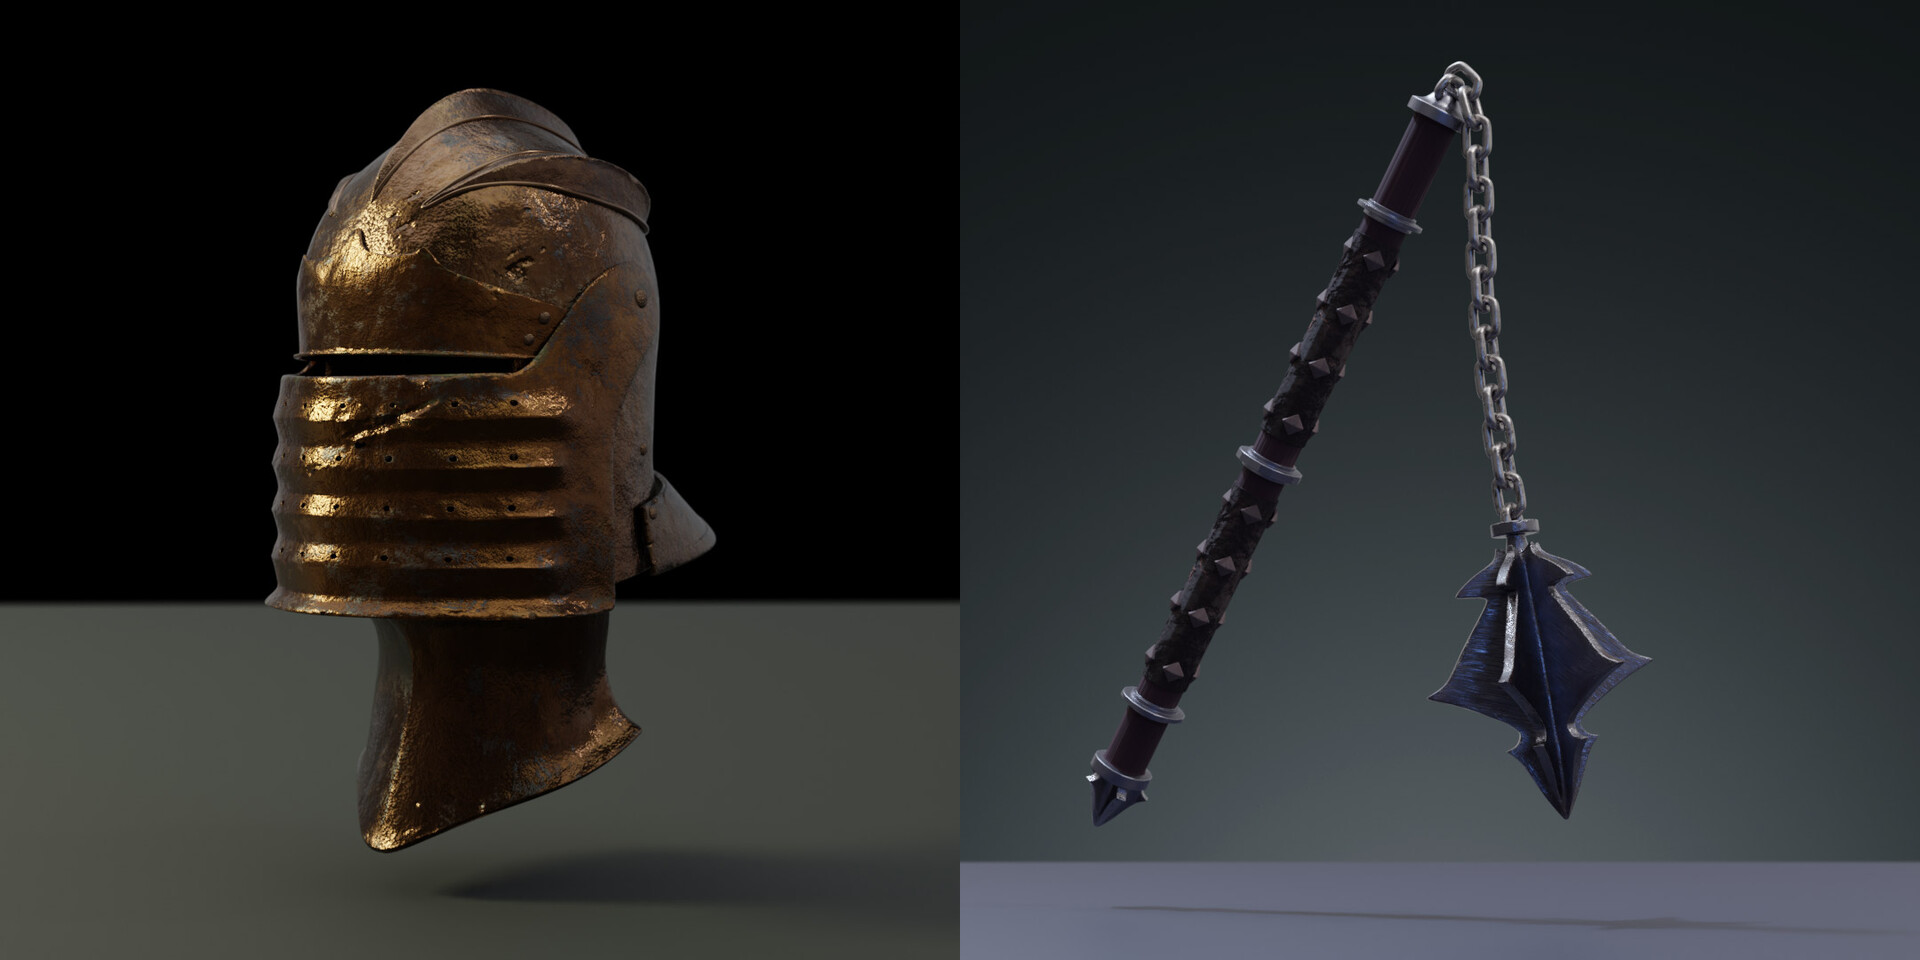
After the anvil I felt like I was ready to take the training wheels off and model my own object, so I chose something way too hard: a knight’s helmet. I remember trying to translate Andrew’s subsurface techniques to this and just banging my head against the proverbial wall over and over, wondering why it didn’t look right. At one point I needed to make a hole in the mesh where a screw holds the visor on, and I just spent hours trying to cut that hole without weird shading errors cropping up. My limited knowledge kept putting up restrictions on what I could achieve.
I began to research 3D outside of the Andrew Price method at this point. I learned that there was more than one way to model based on what the aim of the project is. Visual effects for film will have a different technique from modeling for video games, which is different from modeling for a 3D print, etc. This is so elementary, but being self taught, I actually didn’t know it at the time. I think this is one danger of learning via Youtube and other online sources. You get a very detailed education from one person’s point of view, and if you aren’t careful you will end up with gaping blind spots.
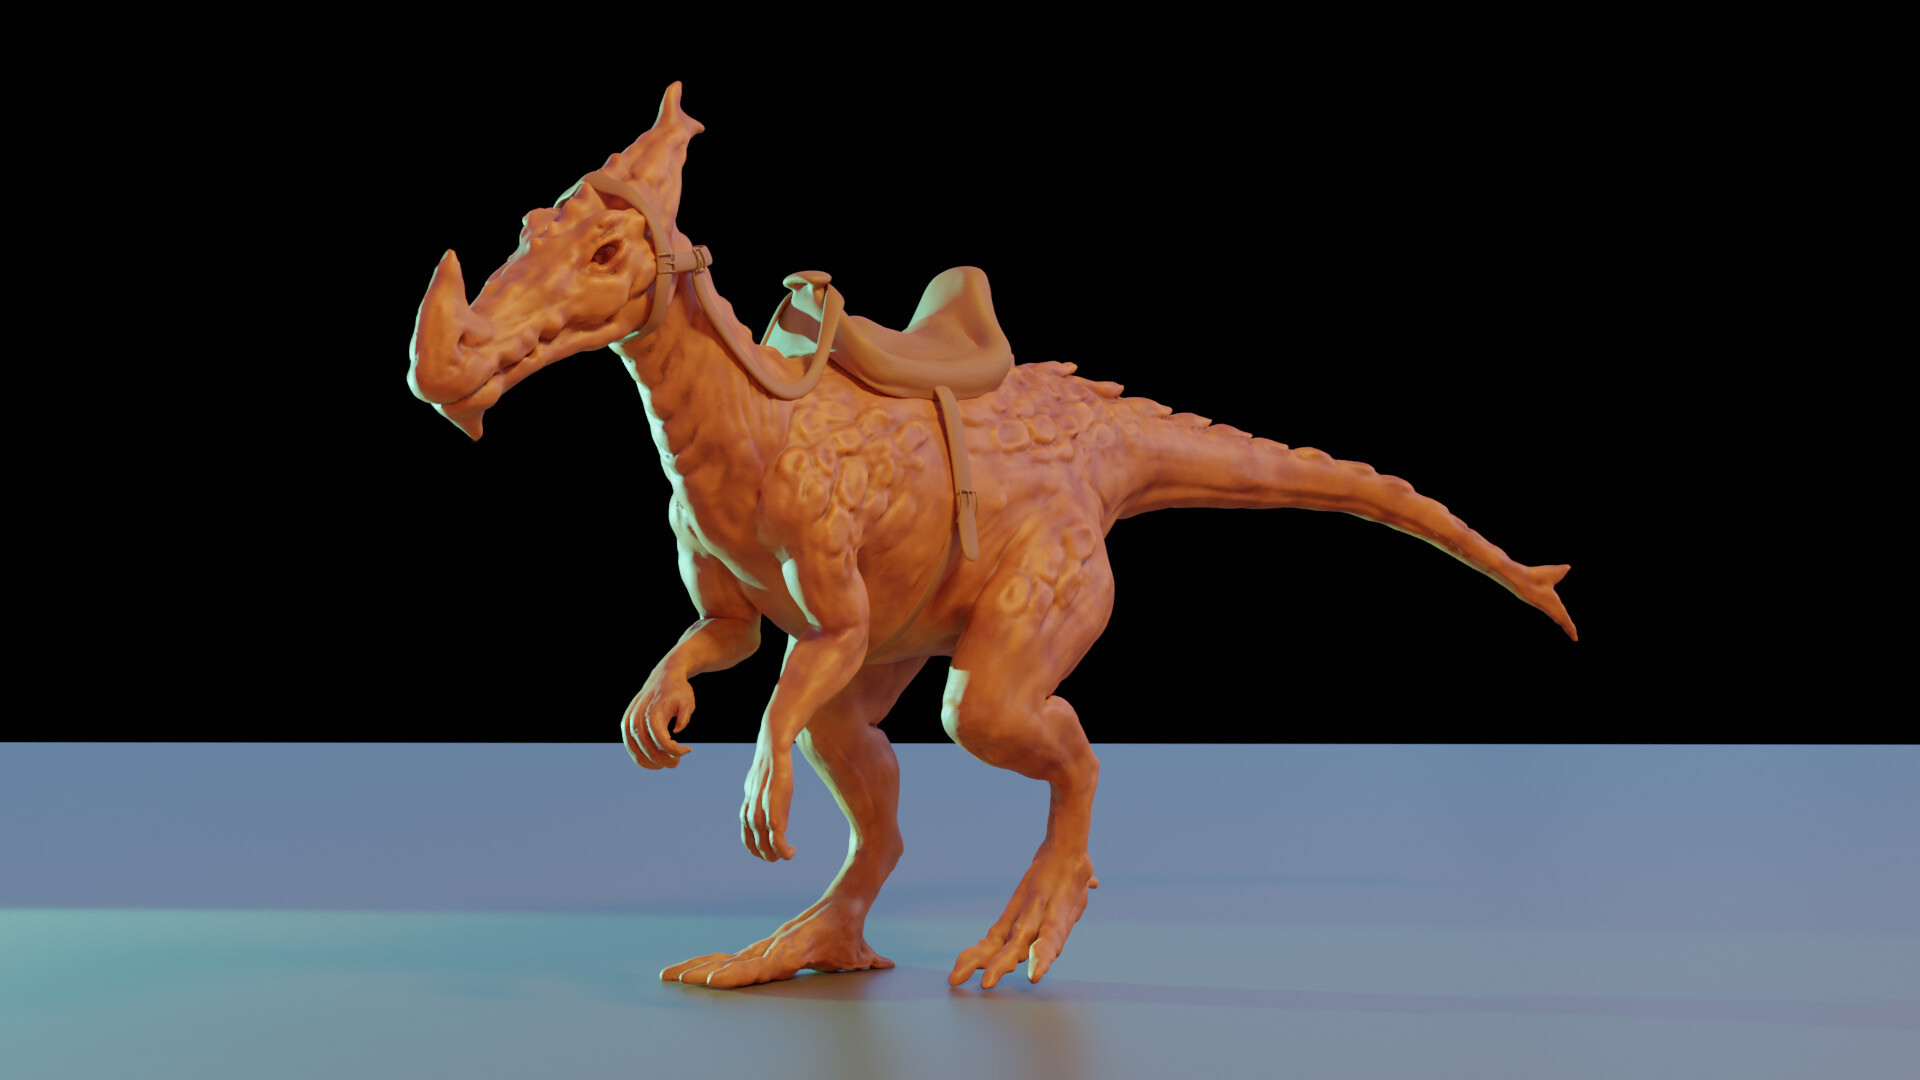
I returned to the safety of tutorials with this sculpted dinosaur by artist Zacharias Reinhardt. During my fledgling research I learned that Blender had sculpting tools and this approach immediately appealed to me. I had heard of digital sculpting in the program ZBrush but I wasn’t ready to plunk down the money for that program just yet, being such a beginner. I was still feeling the burn from the frustrations from the helmet attempt and if I could try sculpting – for free – why not give it a go?
I ended up having a lot more fun and I felt like the experience was more similar to drawing – a safe place for me as a 2D artist – and by the end I was really pleased with the result. I began to think more about characters and where sculpting could take me.
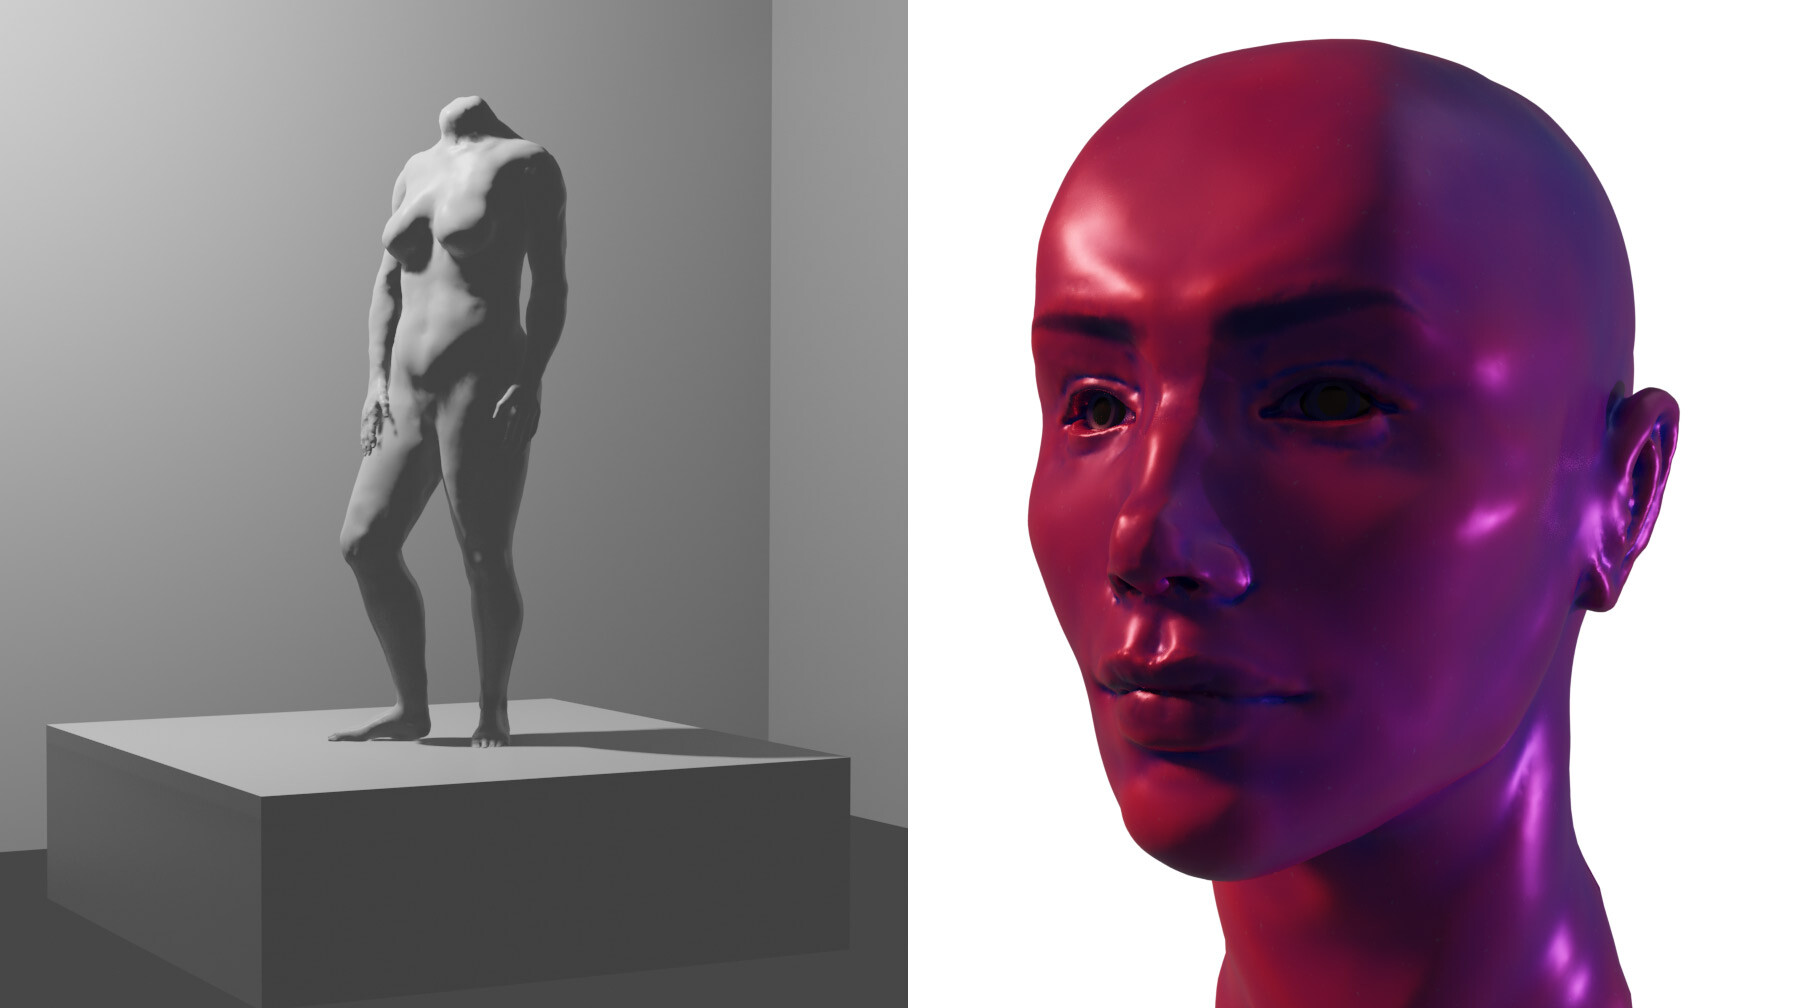
Following the dino, I started to experiment with the human form… and this is where things get immediately weird. A strange aspect of 3D is that a total beginner can, with guidance, model something like a glass of water and get a photorealistic render. The high level results are rather deceiving and can lend a false sense of proficiency. But modeling anything organic, especially people – a challenge like this causes the skill gap to become immediately apparent.
Being startled by this was a wake up call. But I decided to plow forward, recognizing that the problems in my sculpting were much more akin to problems in drawing – in other words, problems I have been encountering my entire life as an artist. I jumped back into tutorial mode with this video by Nikolay Naydenov on youtube and found his guidance very helpful, although he was in ZBrush and I was in Blender. The difference in software was adding difficulty to my learning. If I was to do it over again I would have bought ZBrush at this point, but I still didn’t feel ready for that step.
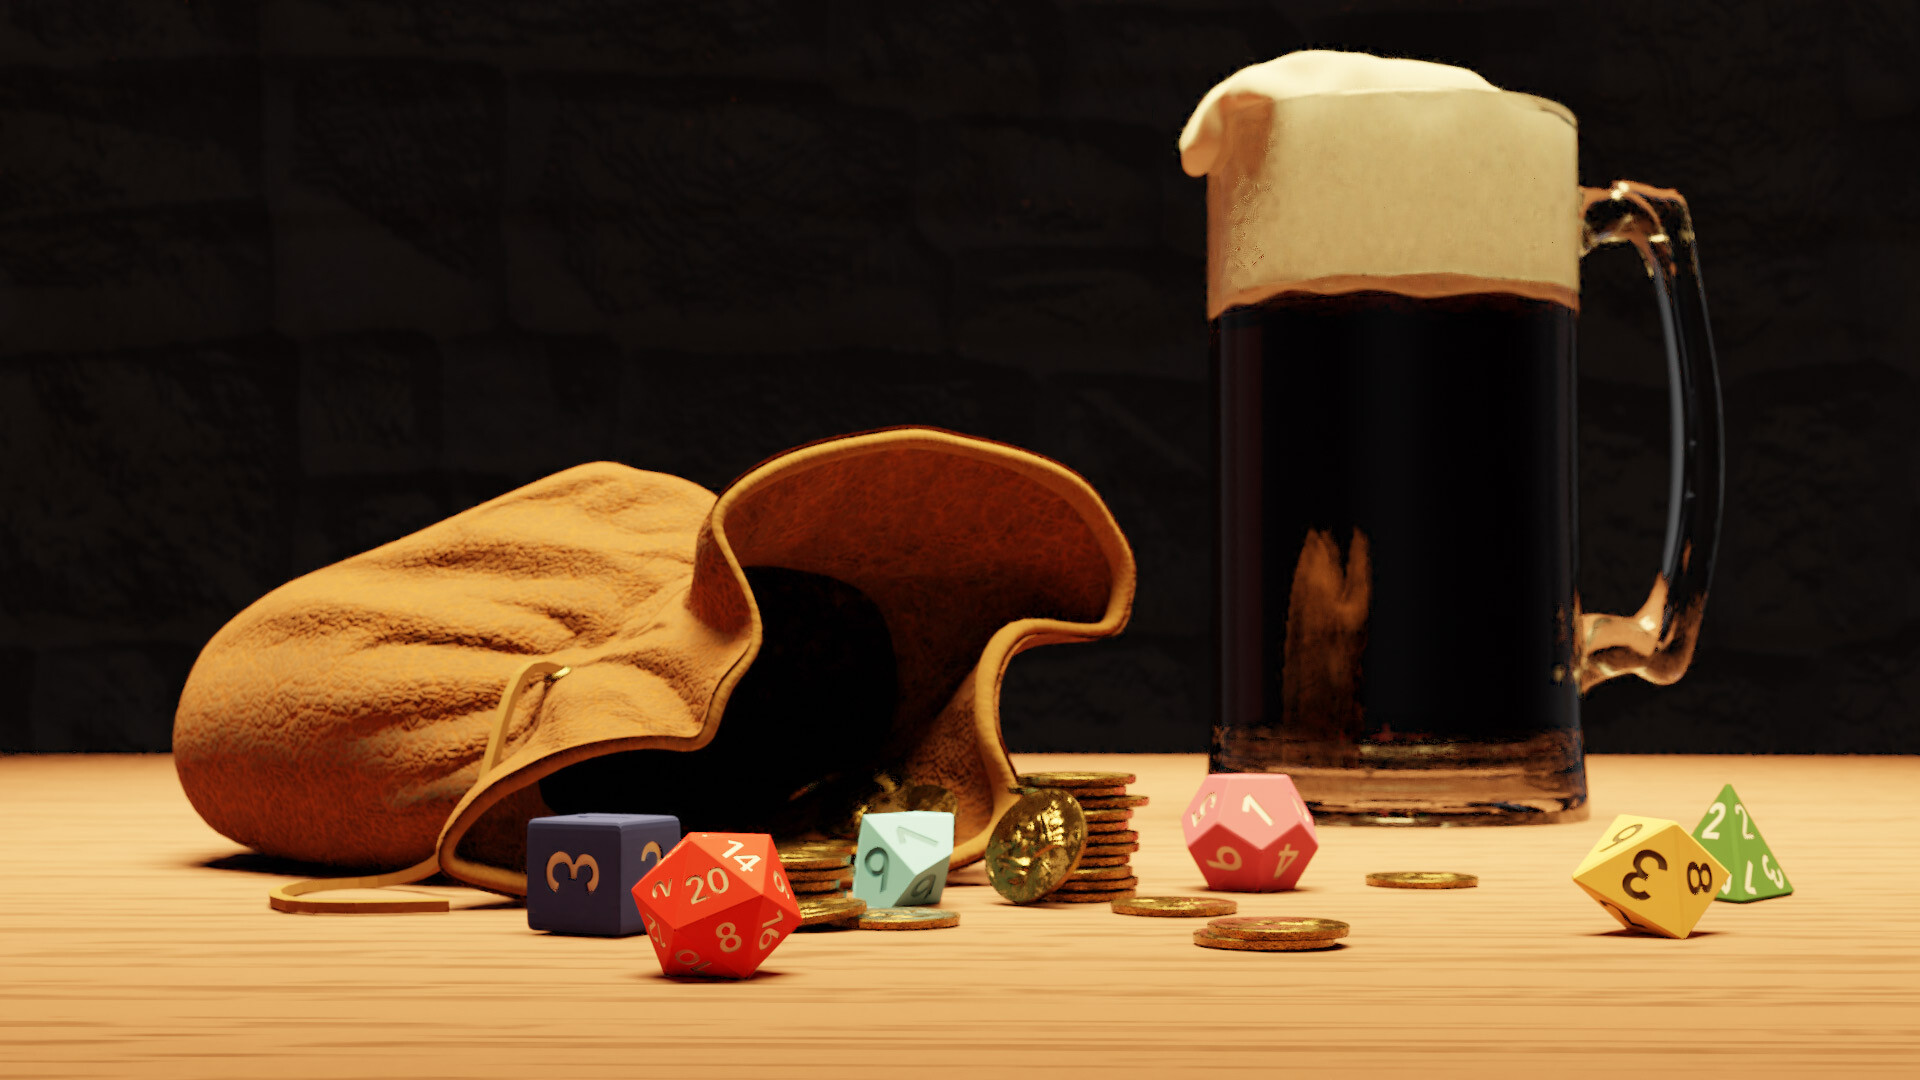
Following my failure with the human figure, I decided to return to objects again. They felt safe and like a place where I could break down my learning into smaller challenges. I attempted a still life and some more medieval objects.
I hit a wall after this batch of work. I was happy with some aspects but was confused by others. I still didn’t understand the proper method for applying texture to objects, despite having read a lot of theory. I reached out to a friend in the industry to get his honest feedback… and WOW, I truly learned how much I didn’t know.
He told me some things I should have probably covered at the start, and showed me how important a proper education in normals, UV mapping and texturing is for a video game artist. He also showed me just how bad some of my topology was and why that was important.
I began to read many more articles. Some days I spent just reading and watching videos without modeling at all. It felt like I was in a dark land with a tiny, weak flashlight, but at least I had this crummy map with me, the kind you have in a video game when you’ve just started to explore a giant world. The map might be woefully incomplete, but little by little I was slowly filling it in.
The conversation with my tutor made me realize that I knew almost nothing about the texturing process. I learned that although Blender is a fantastic all-around 3D tool, it wasn’t great at texture painting. I branched out to my first alternative 3D software, Substance Painter. I started with a texturing tutorial from Allegorithmic and learned a surprising amount! Putting my creative desires to make something new aside and just learning about texturing allowed me to really just dig into the texturing process.
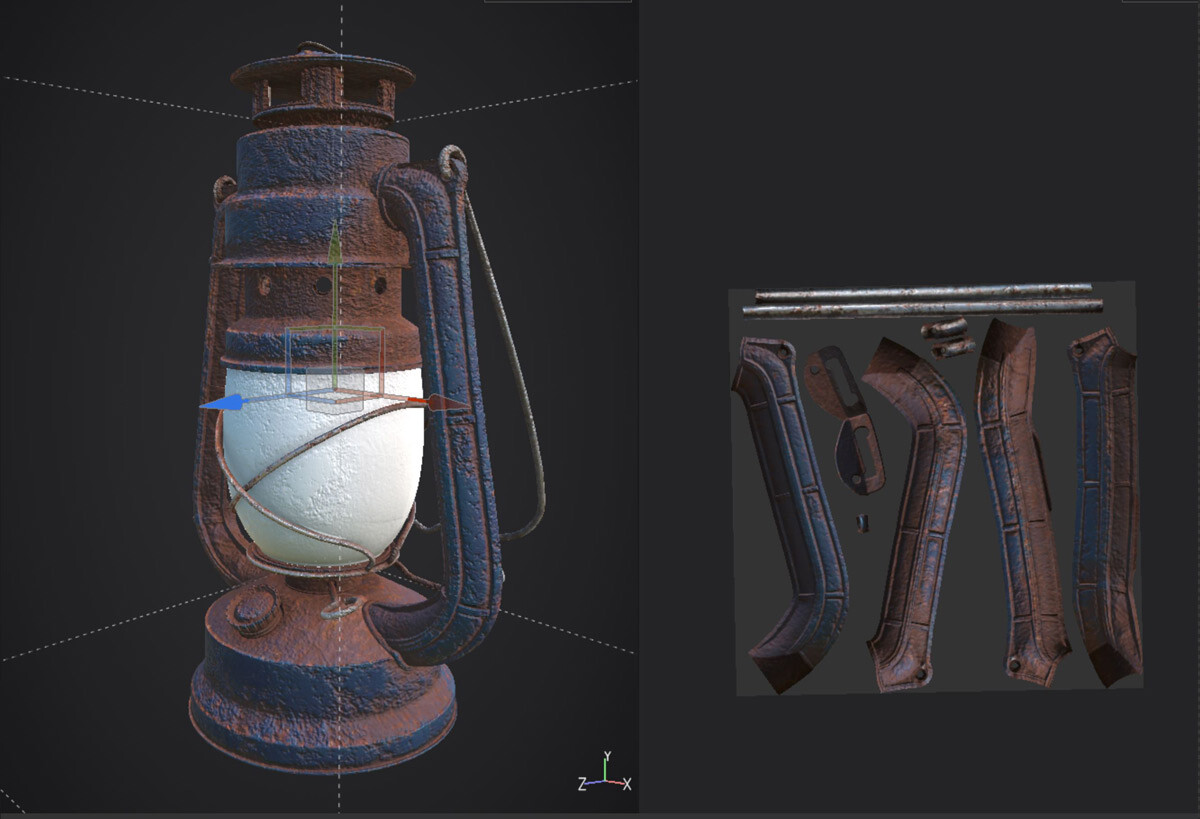
At this point, several things started to become clear to me. I realized that the Physically Based Rendering (PBR) workflow was something that REALLY appealed to me. I’m a realist in my 2D work so it came as no surprise that I enjoyed realism in 3D as well. Before the lantern, I really only knew how to apply procedural shading in Blender and felt very limited by that tool. But PBR was an eye opener!
I thought I had figured out the texturing process, so I went back and tried a human again. Whew, this was just awful. Sculpting issues aside, my skin shader was so weird that I had to just quit at a certain point when I knew I had completely lost control of this model. There were too many problems to name and I didn’t understand SSS at all, not to mention hair and eyes. I was staring at a seemingly impossible goal, the creation of a human face in 3D, and I knew I wasn’t ready yet.
Having failed yet again, I decided to get back to basics. I turned my gaze towards another issue that I still didn’t fully understand: normals. I spent more days scouring articles and forums and I felt like I just didn’t get it. Even now when I try to explain normal maps to friends and family I come up short because the concept is just so foreign if you don’t experience it directly.
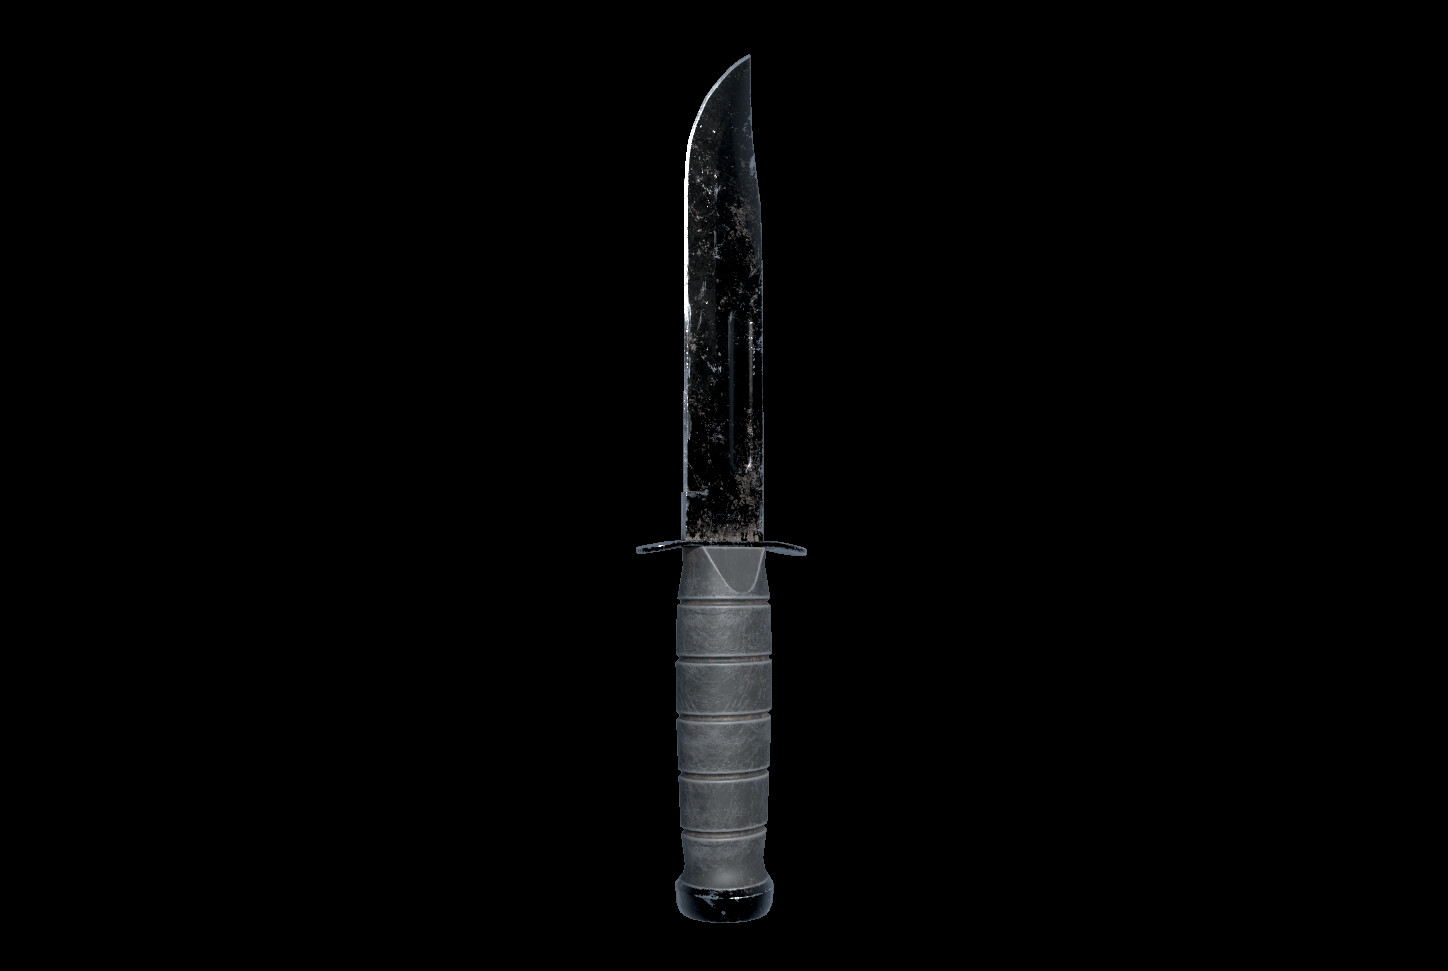
I experienced another revelation when I came across this knife game asset tutorial by Chris Plush at CGMasters. It immediately appealed to me because I could model the knife in Blender, a program I was already familiar with, and then texture it in Substance Painter. And all along I would be using a video game workflow! Chris finally explained surface normals to me in a way that actually made sense and it was like a big part of my map suddenly became bright and clear.
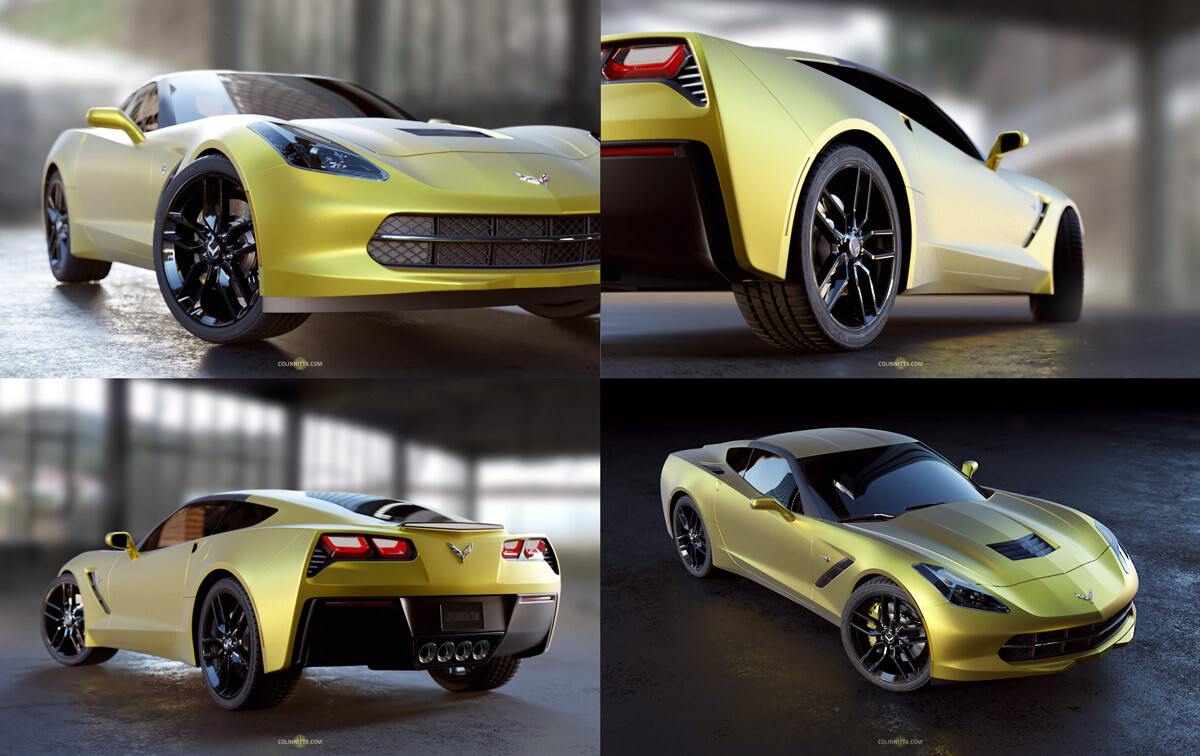
I immediately wanted to learn more from Chris so I spent money on my first paid tutorial, Master Car Creation in Blender. This… was intense. I spent more time than I’d ever spent on a model before, roughly two and a half weeks, following all thirty odd hours of Chris’ tutorial series on the Corvette Stingray. It was back to subsurface modeling techniques like Andrew Price, but explained differently and more in-depth. More than anything, it forced me to go really deep with Blender and get a hang of the modifier system and also understand some hard surface modeling fundamentals. The final results were a big confidence boost and I proudly shared my renders on social media
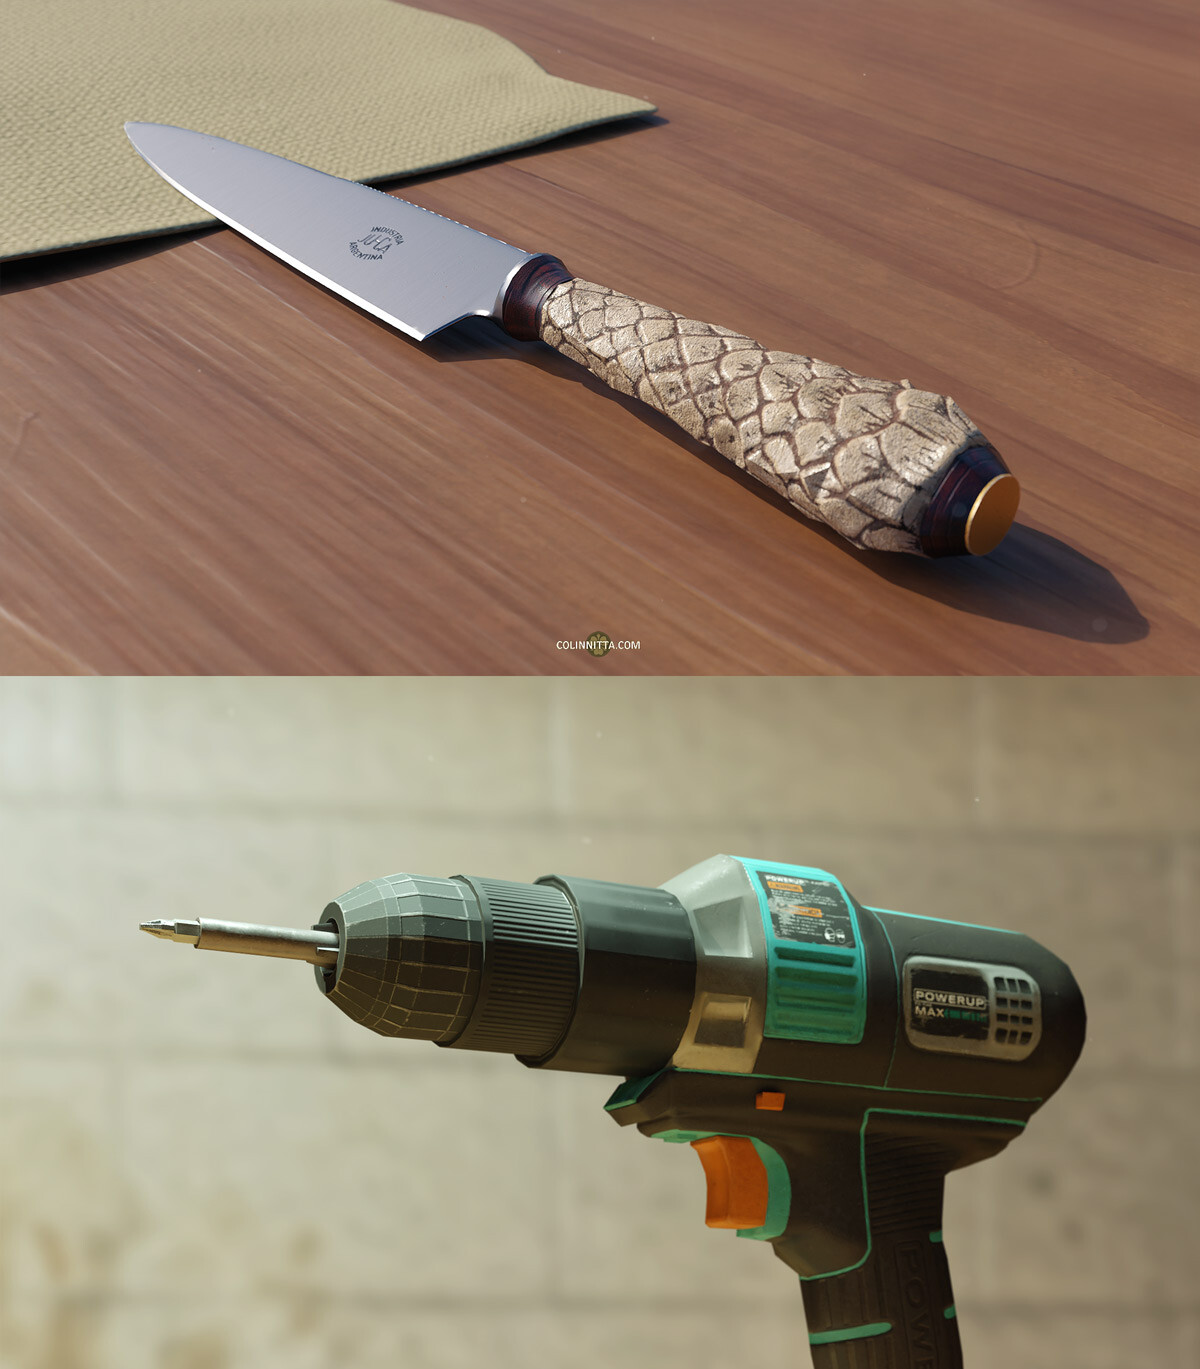
I wanted to execute what I learned so I practiced on some more objects, utilizing my hard surface skills in Blender and texturing in Substance Painter. I continued to push my renders, going for a look of an object in a real scene, playing with lighting and contrast. More steps along the path, and evidence for myself that I could do it without a tutorial.

My spirits lifted, I decided to return to my old nemesis, the human figure. This time I decided to just purchase ZBrush. The $800 price tag finally felt like I could justify it. I knew sculpting would be my happy place and after reading tons of articles, I realized that ZBrush was still the industry standard, despite Blender’s forays into the space. After installation, I immediately dived into a female anatomy course by Nikolay Naydenov.
For learning anatomy and sculpting, this course was great for me. I learned a ton. But I failed when it came to retopology, low poly and texturing. Darn, another blank spot on my map! I didn’t understand how poly count is distributed and why an area of focus like the face might have more polys than other places. My final result was incredibly low res because I just didn’t understand to retopologize correctly.
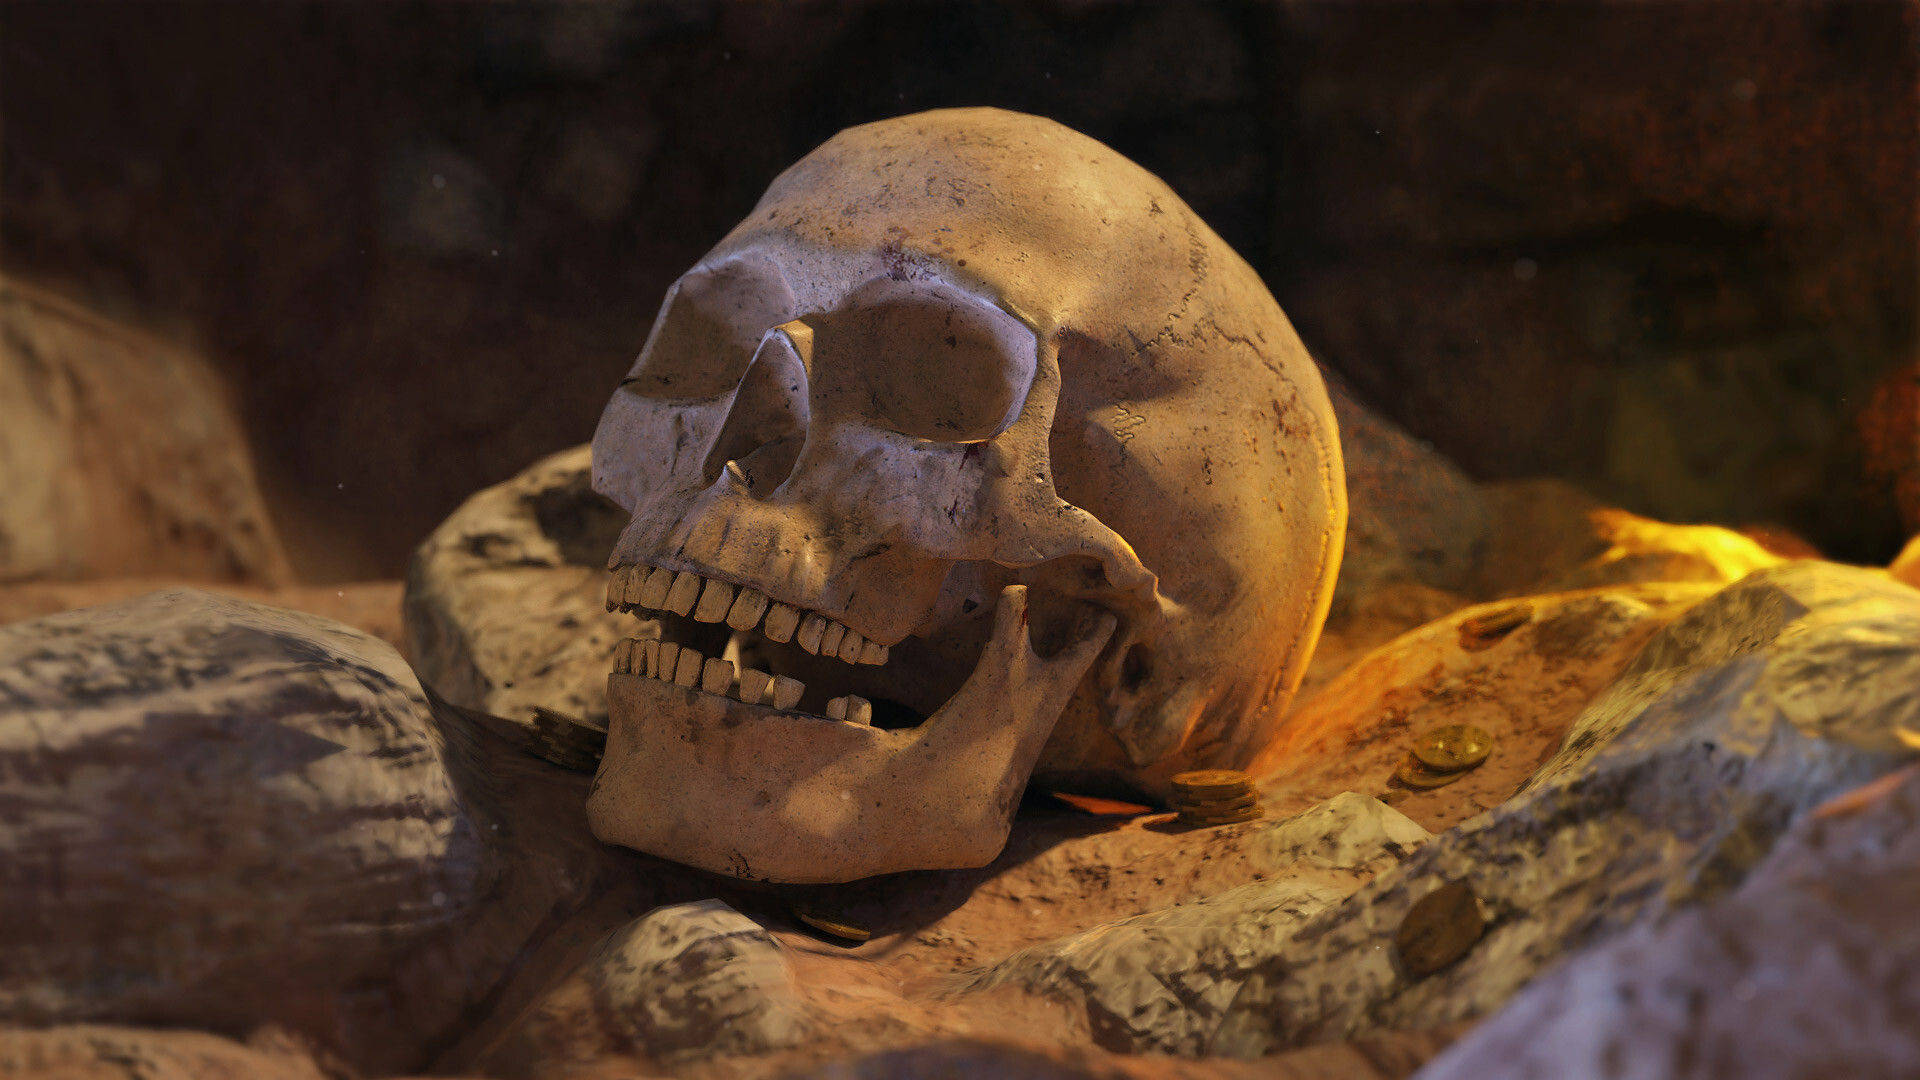
It was around this same time that I was learning ZBrush that I worked up this skull study and got some really interesting results just by experimentation. I was seeking a better final result in my renders and realized just how effective good lighting can be. Again, my skull was really low res – suffering from the same bad topology as the female study – but somehow it worked better here. In some cases, lighting can make a model look better than it really should, which is what happened with my skull. Another discovery!
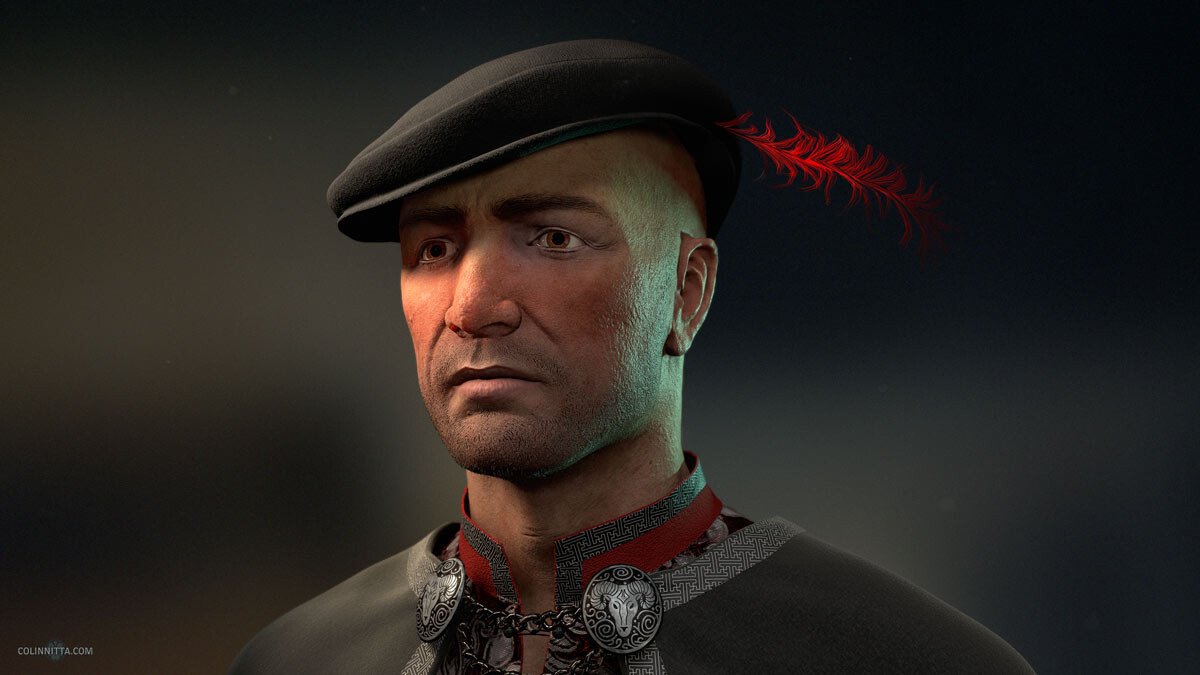
I spoke to another mentor on what I could improve upon and how to increase my learning. He told me about the philosophy behind poly count in games and why it matters. Poly count can be a really confusing topic, so he helped to dispel some of my misconceptions in this area. After this conversation I decided to just focus on a portrait and see how I could improve my lighting and also tackle human skin. I picked up another program, Marmoset Toolbag, to improve my final renders and again eagerly jumped in.
And I met another wall. I must have tweaked this guys skin for over a week without success. It was deeply frustrating to feel like I had learned so much, only to have it all fall apart with a broken skin shader.
I went back to articles and tutorials, this time focusing on skin, eyes and hair.
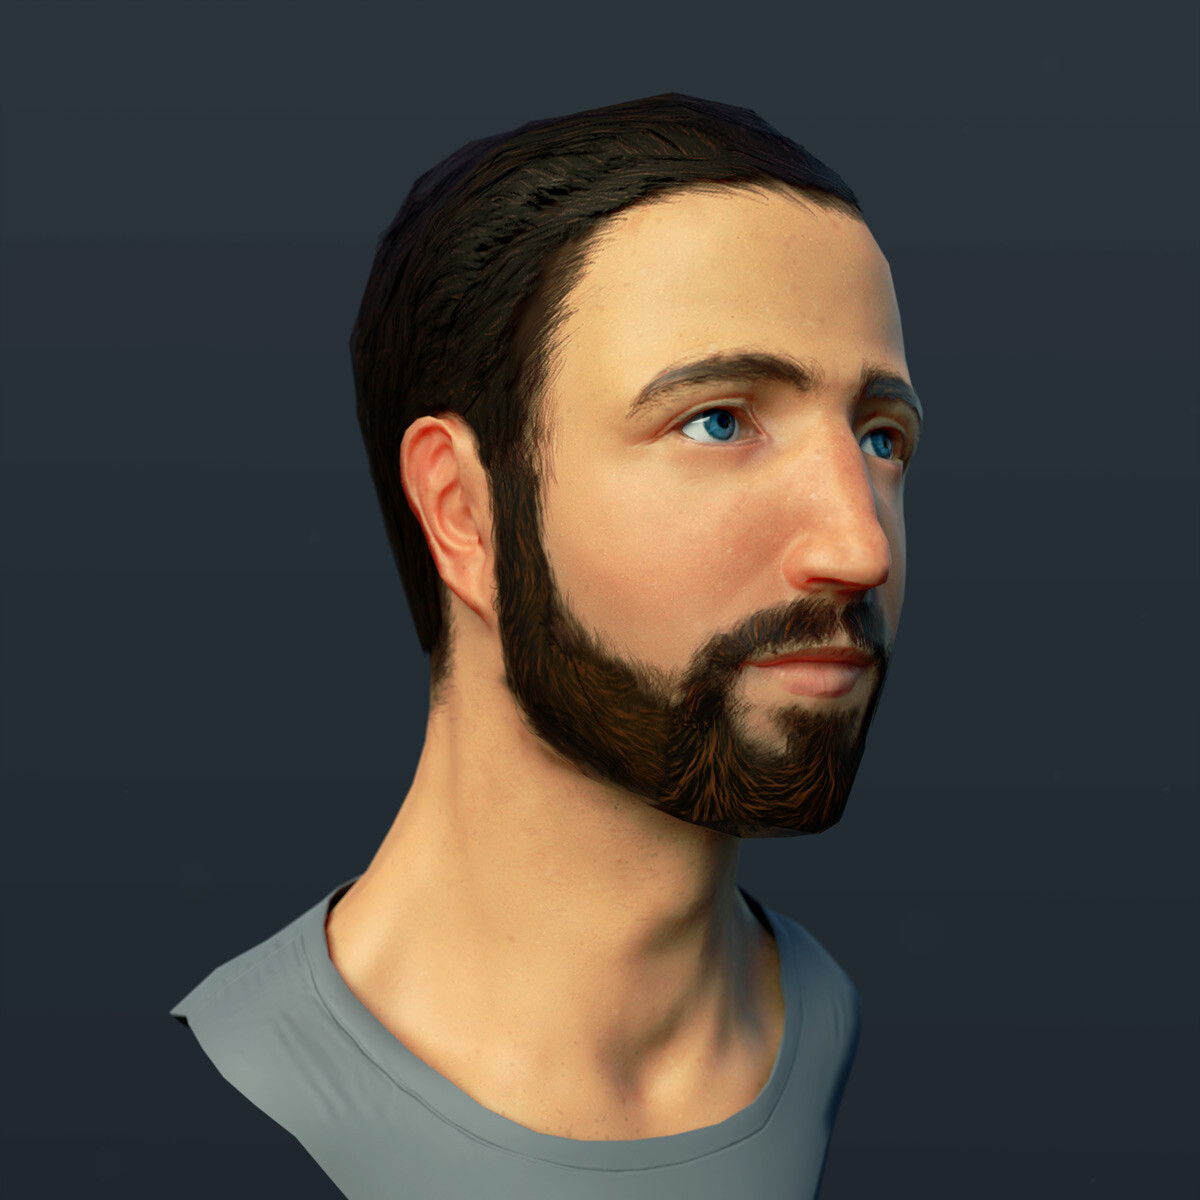
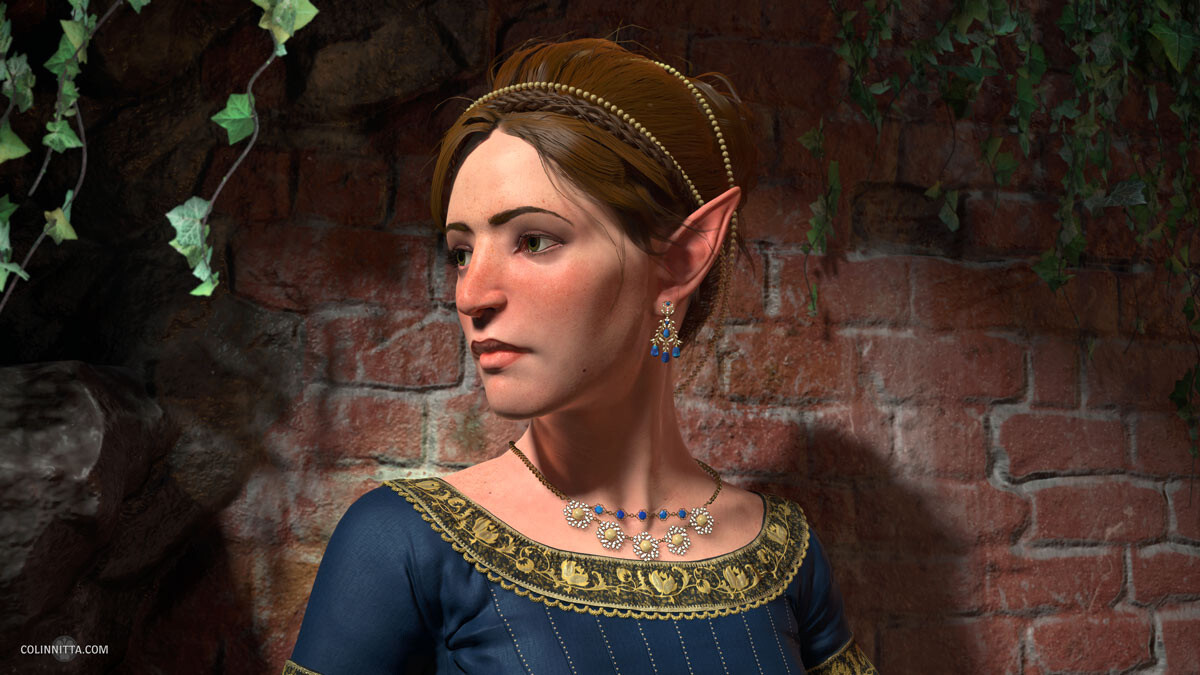
A marmoset post on skin and another one on peachfuzz, eyes and hair helped me tremendously here as I began to really get in the weeds on some complex shading issues. This was an attempt to wrap all that learning together. I can see where I’m really pushing – for example, with her hair – but it isn’t quite working with the overall flatness of its shape and the lack of textural variation in color and specularity. The skin is also too warm and the eyes lack life. But I was learning some deep core lessons all the same. The question was, where to go from here?
Next – From Donuts to Barbarians: My Year of 3D Education, Part 2