
This is a two part series about the making of my real time character Master Koi - check out the project here.
Like many others, I have this problem where I have about a hundred ideas in my head at any given time. Whenever I'm starting a new personal project, the hardest part is choosing. I go through an agonizing process of sifting through many potential concepts until I finally arrive at what I want to do.
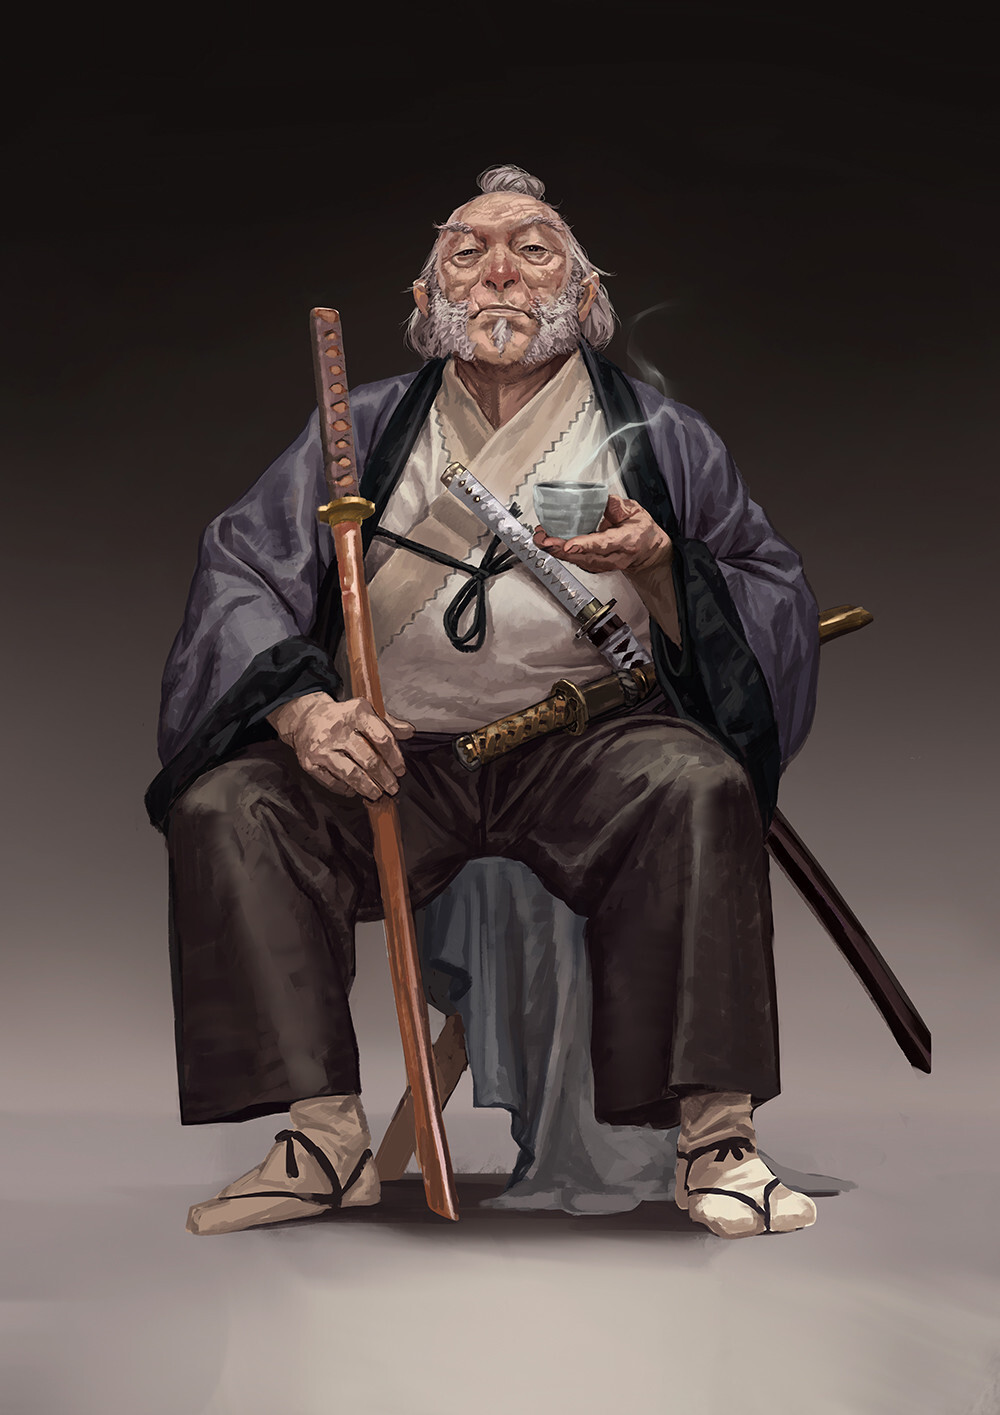
For some time I'd been toying with the idea of an elderly character. I don't see it done so often and there is so much interest in the wear and wrinkles on an aged face. Some time ago, I came across this concept work by Silviu Sadoschi and it just stuck in my mind. Eventually, it found it's way to the number one spot for my next personal piece.
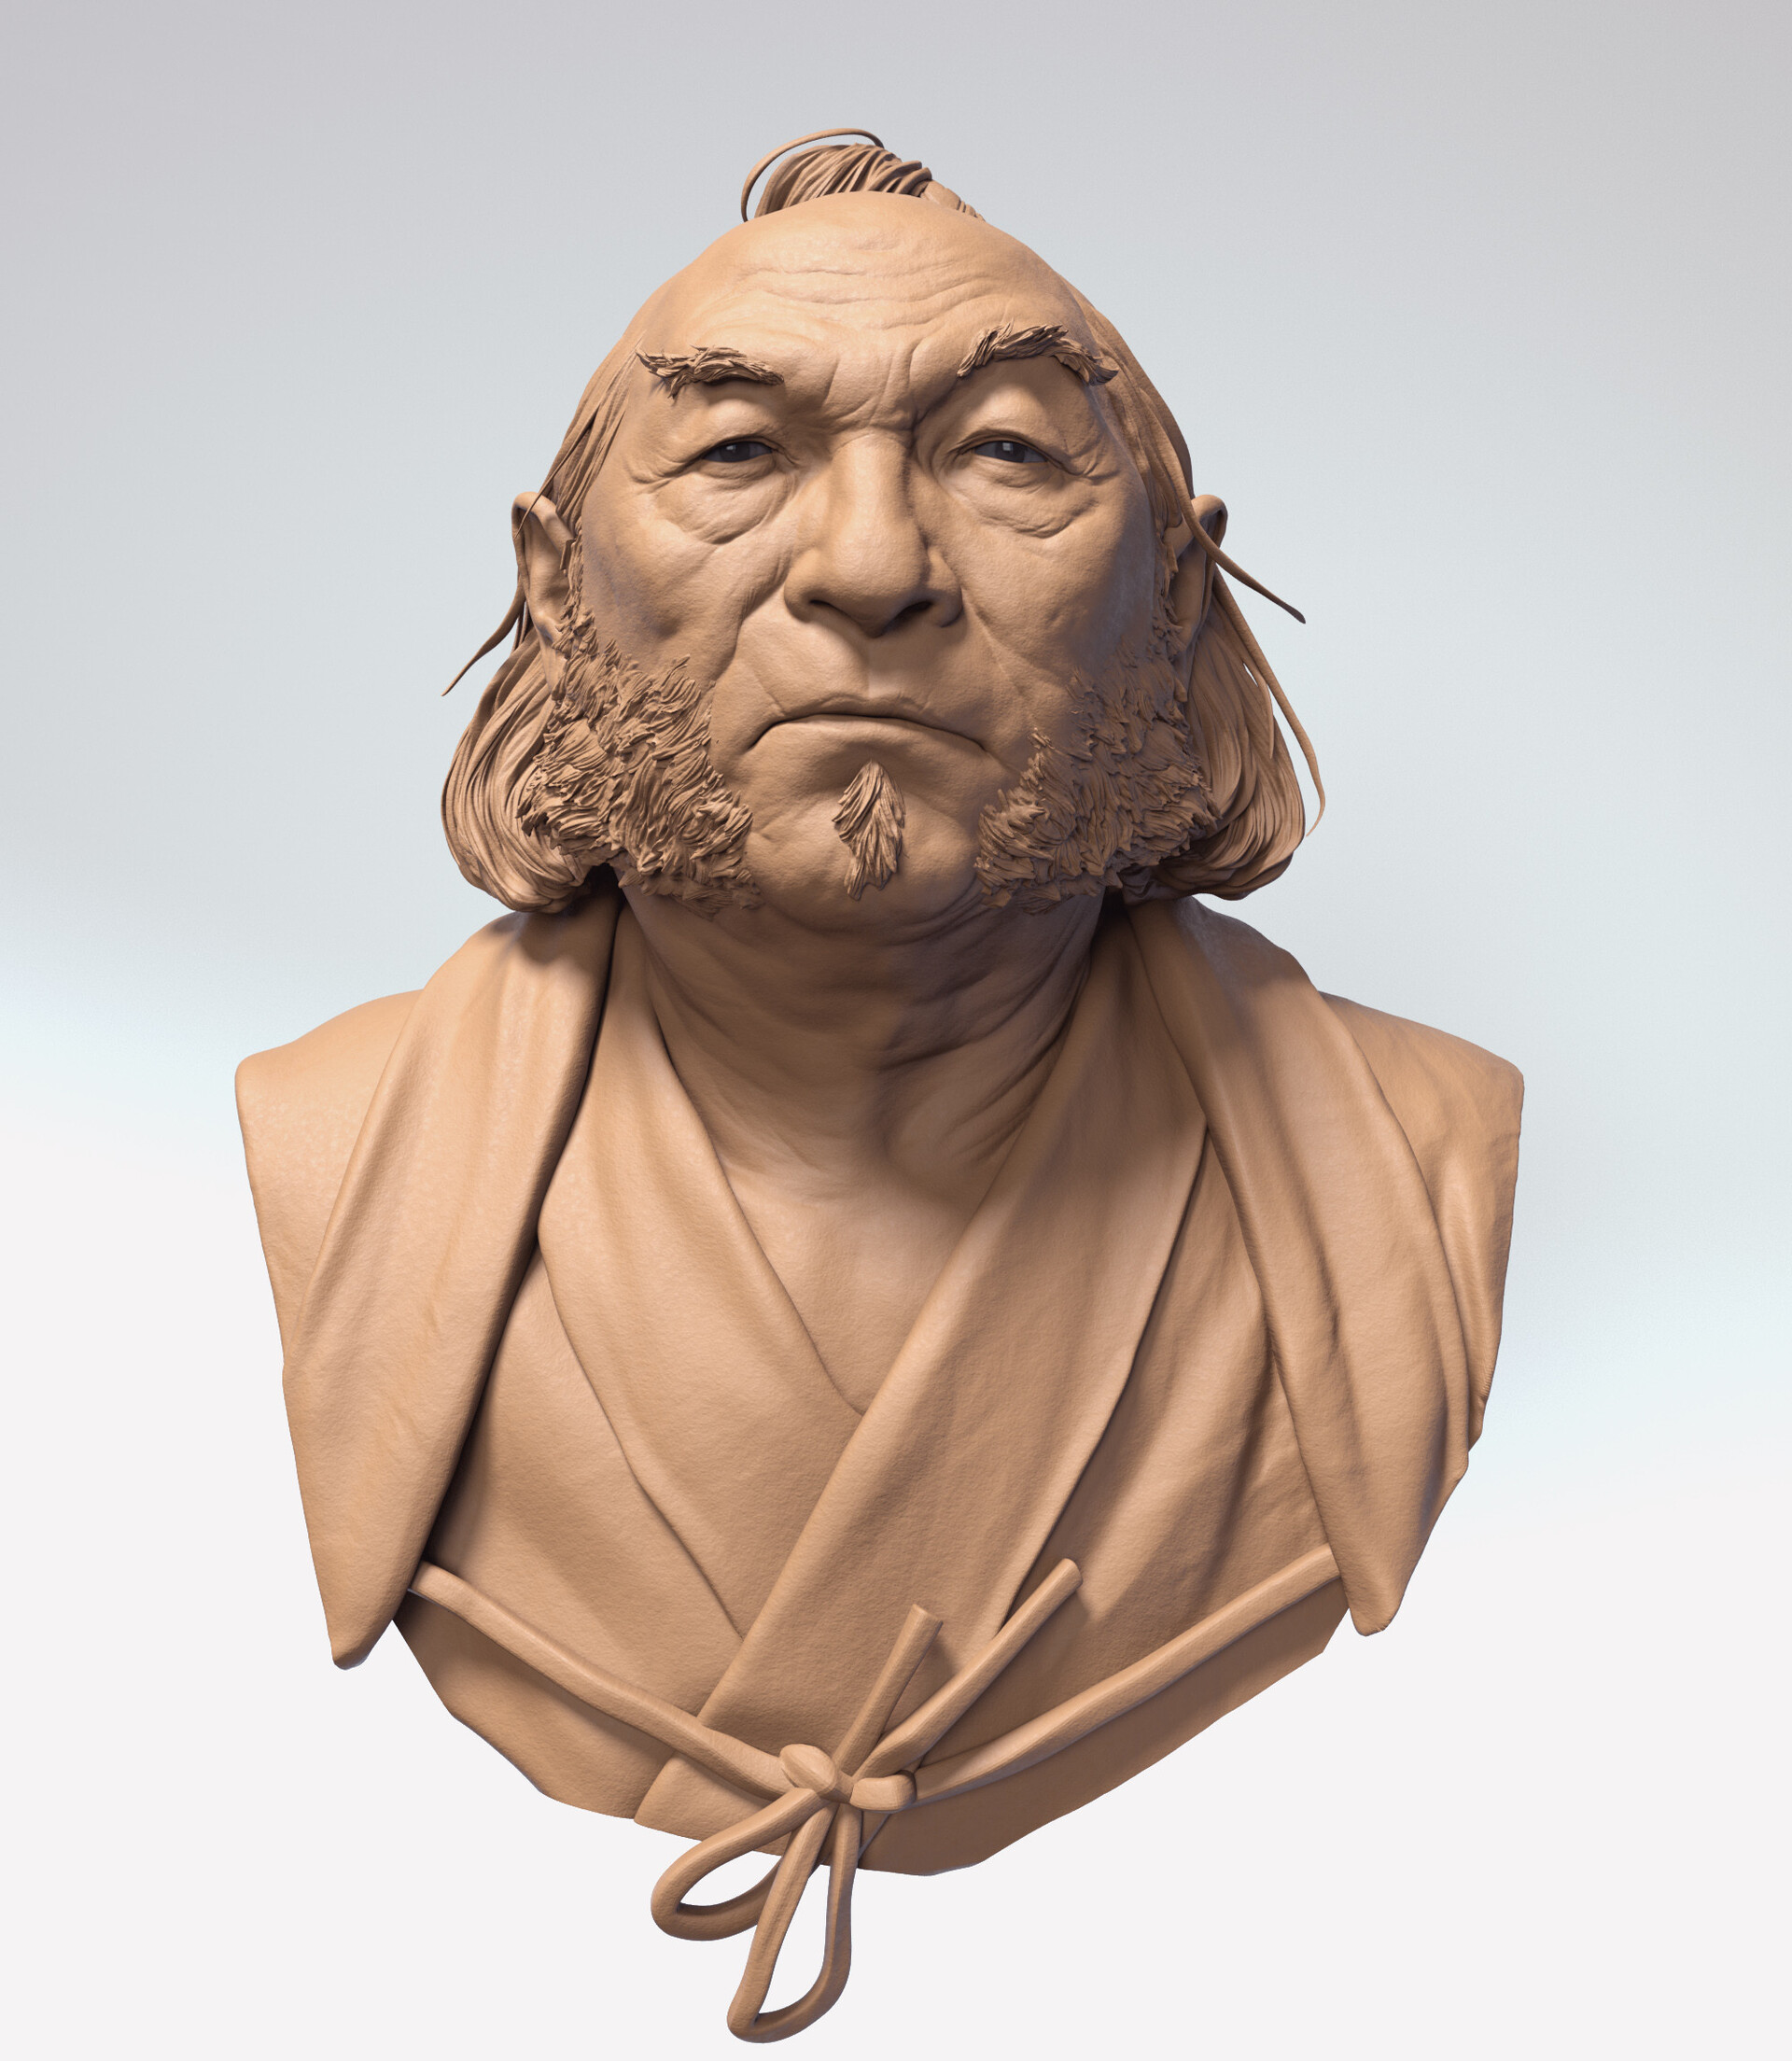
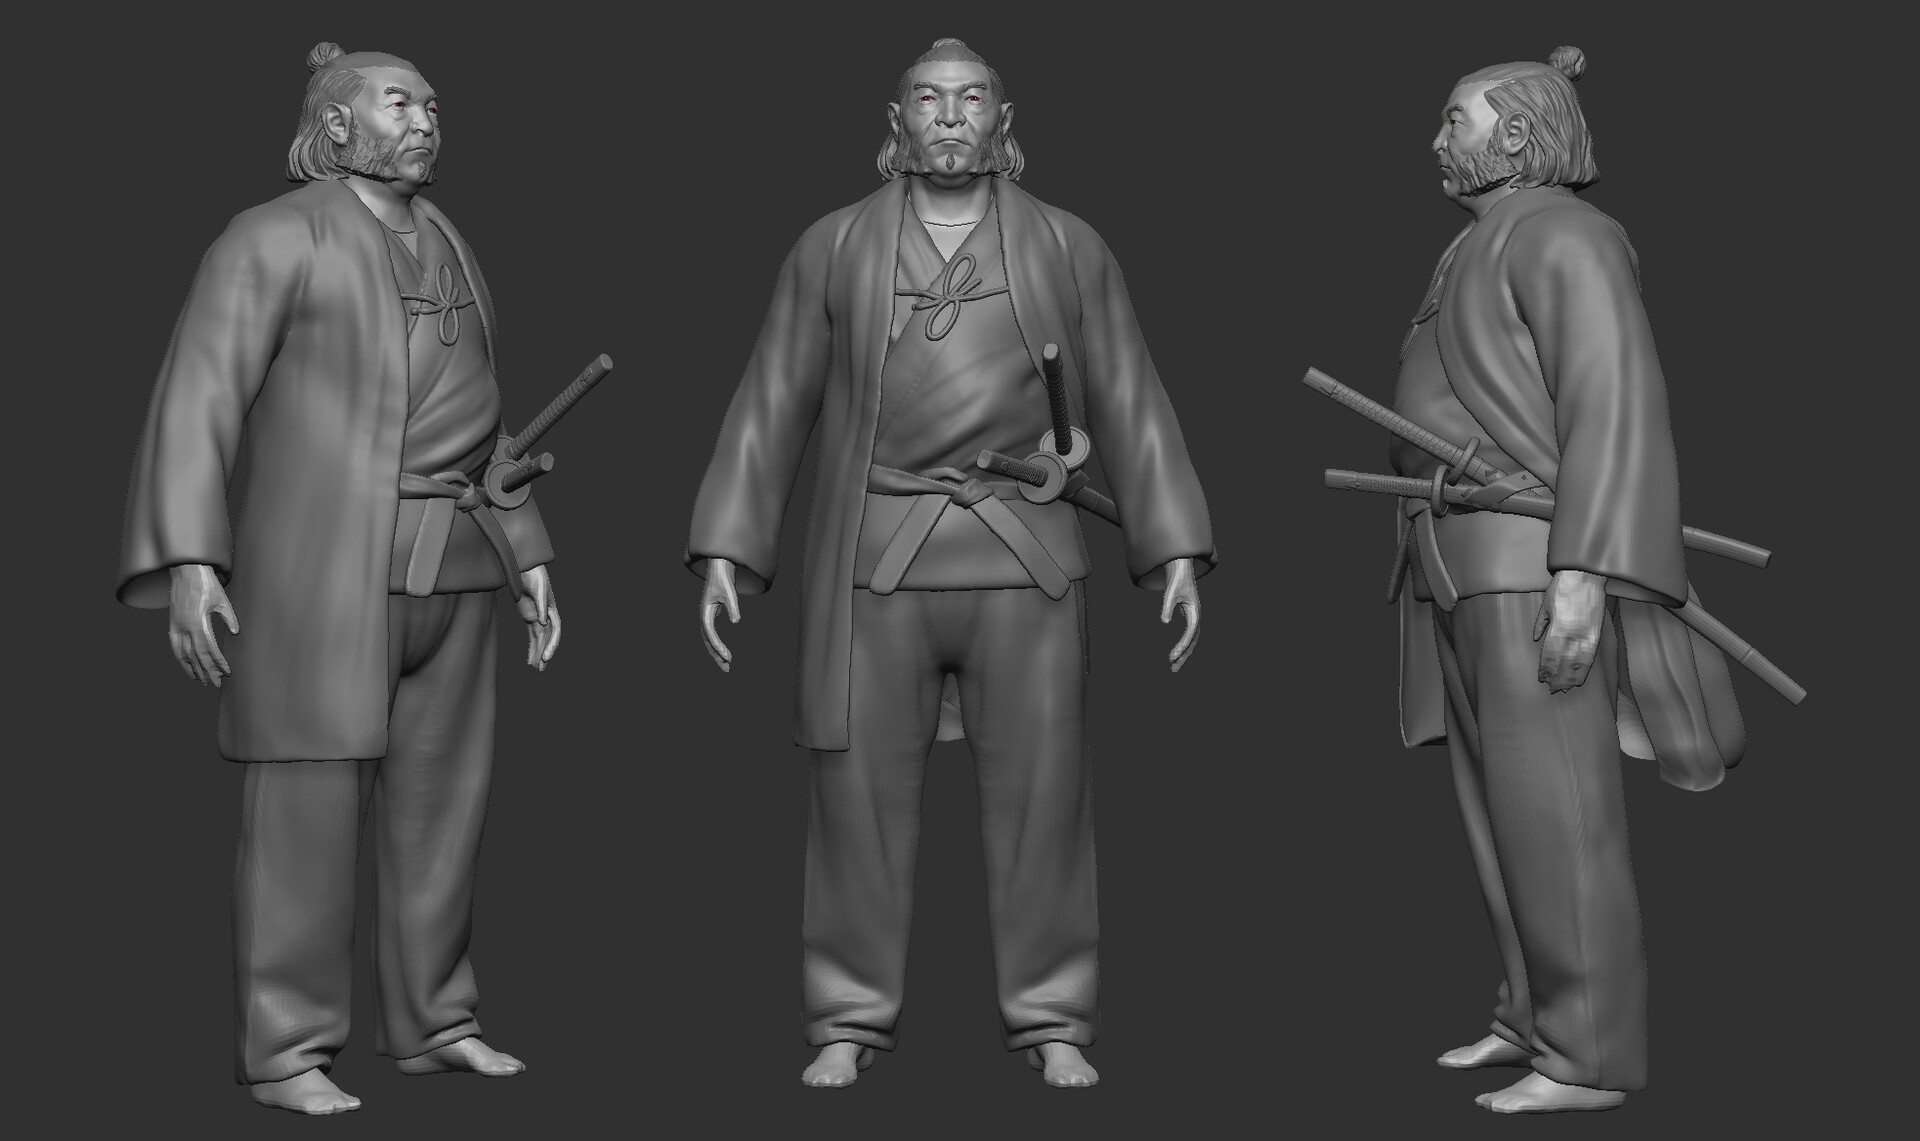
Moments after I settled on Silviu's concept, I discovered it had already been sculpted by Maria Panfilova. At first, I was dismayed; she'd already done such an incredible job! But then I realized there was some real discoveries to be made here. I loved the gestural, flowing nature of her sculpts and the way she'd characterized the Old Master. And I wanted to understand the forms she was creating with such elegance, so why not make it a master study? Besides, as Maria had only done a bust, there was still plenty of room to iterate with a complete head to toe sculpt with full PBR texturing, optimized for real-time. So with two parallel concepts in hand, my journey began.
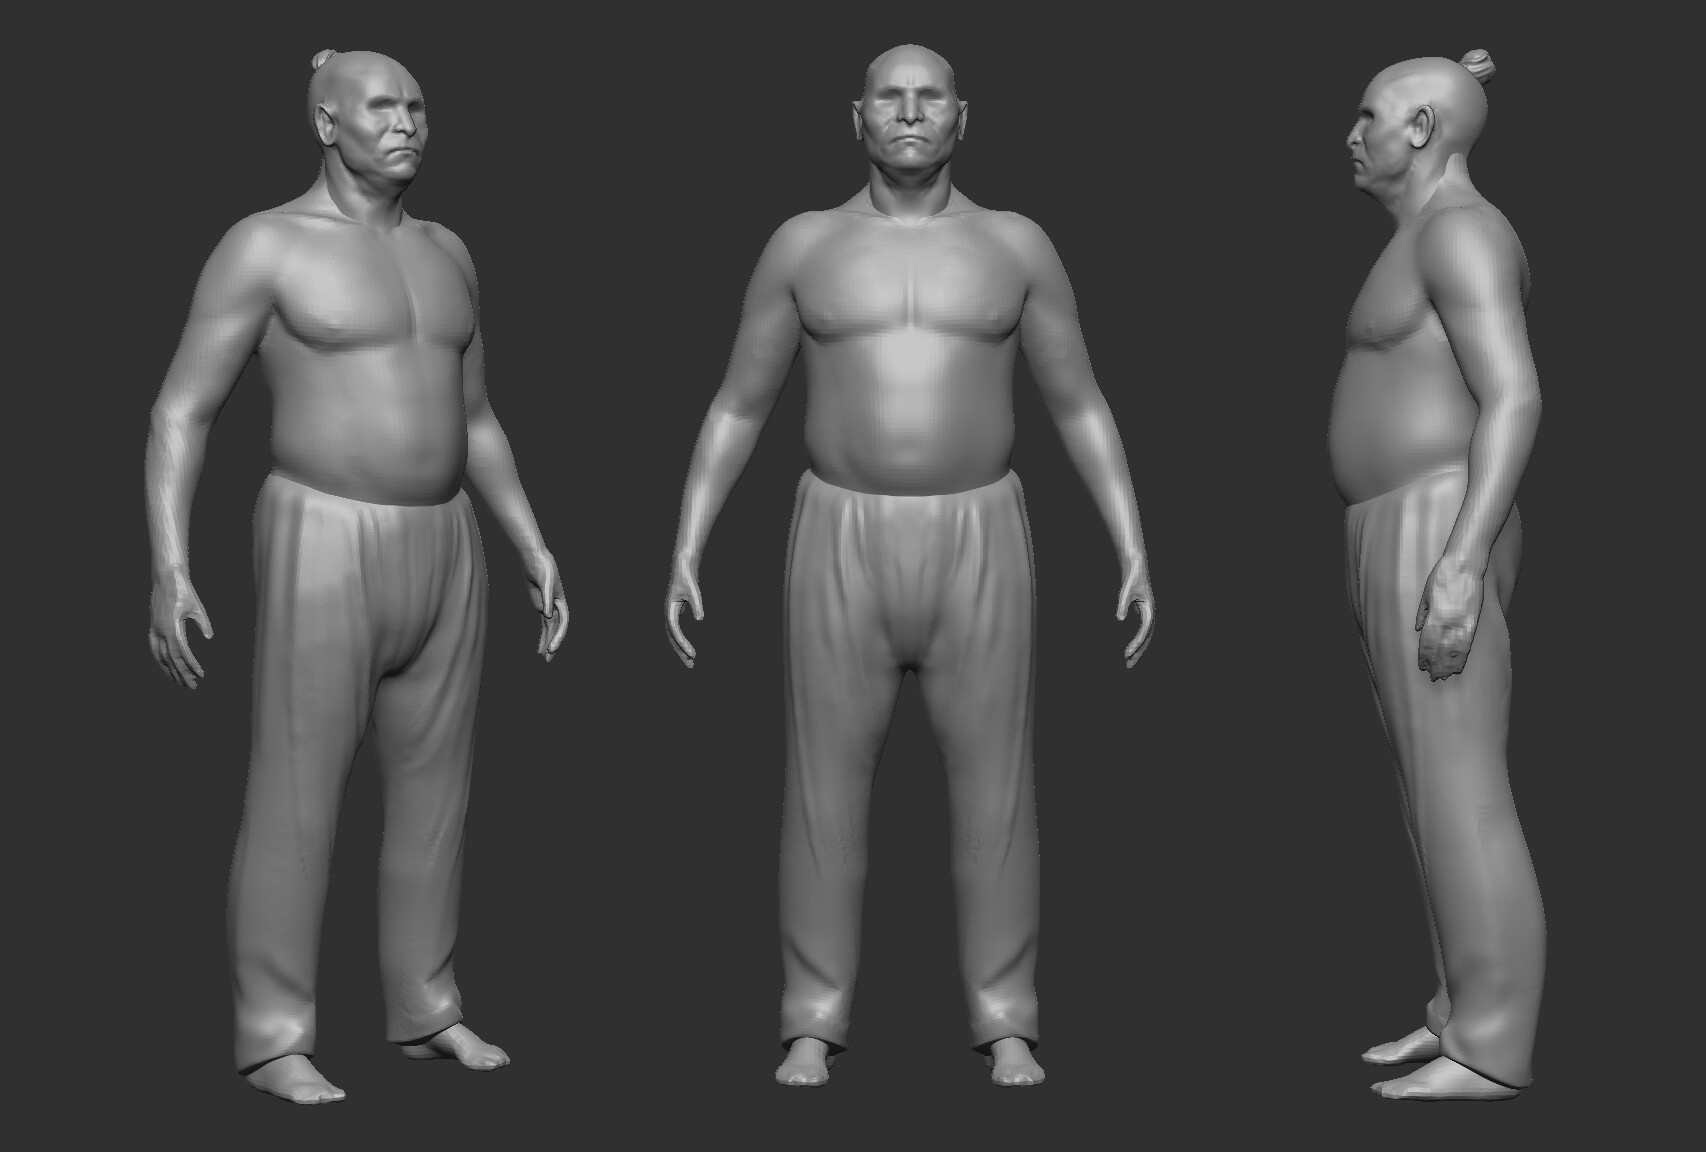
There aren't a lot of "old man" base meshes out there so I found it easier to start sculpting him from scratch. I also find I make more deliberate choices when working this way. One tricky thing I needed to resolve was how much fat he should have. I wanted him to have a belly but still look like he was physically capable. In other words, he's a fighter that's past his prime, but can still school the young ones!
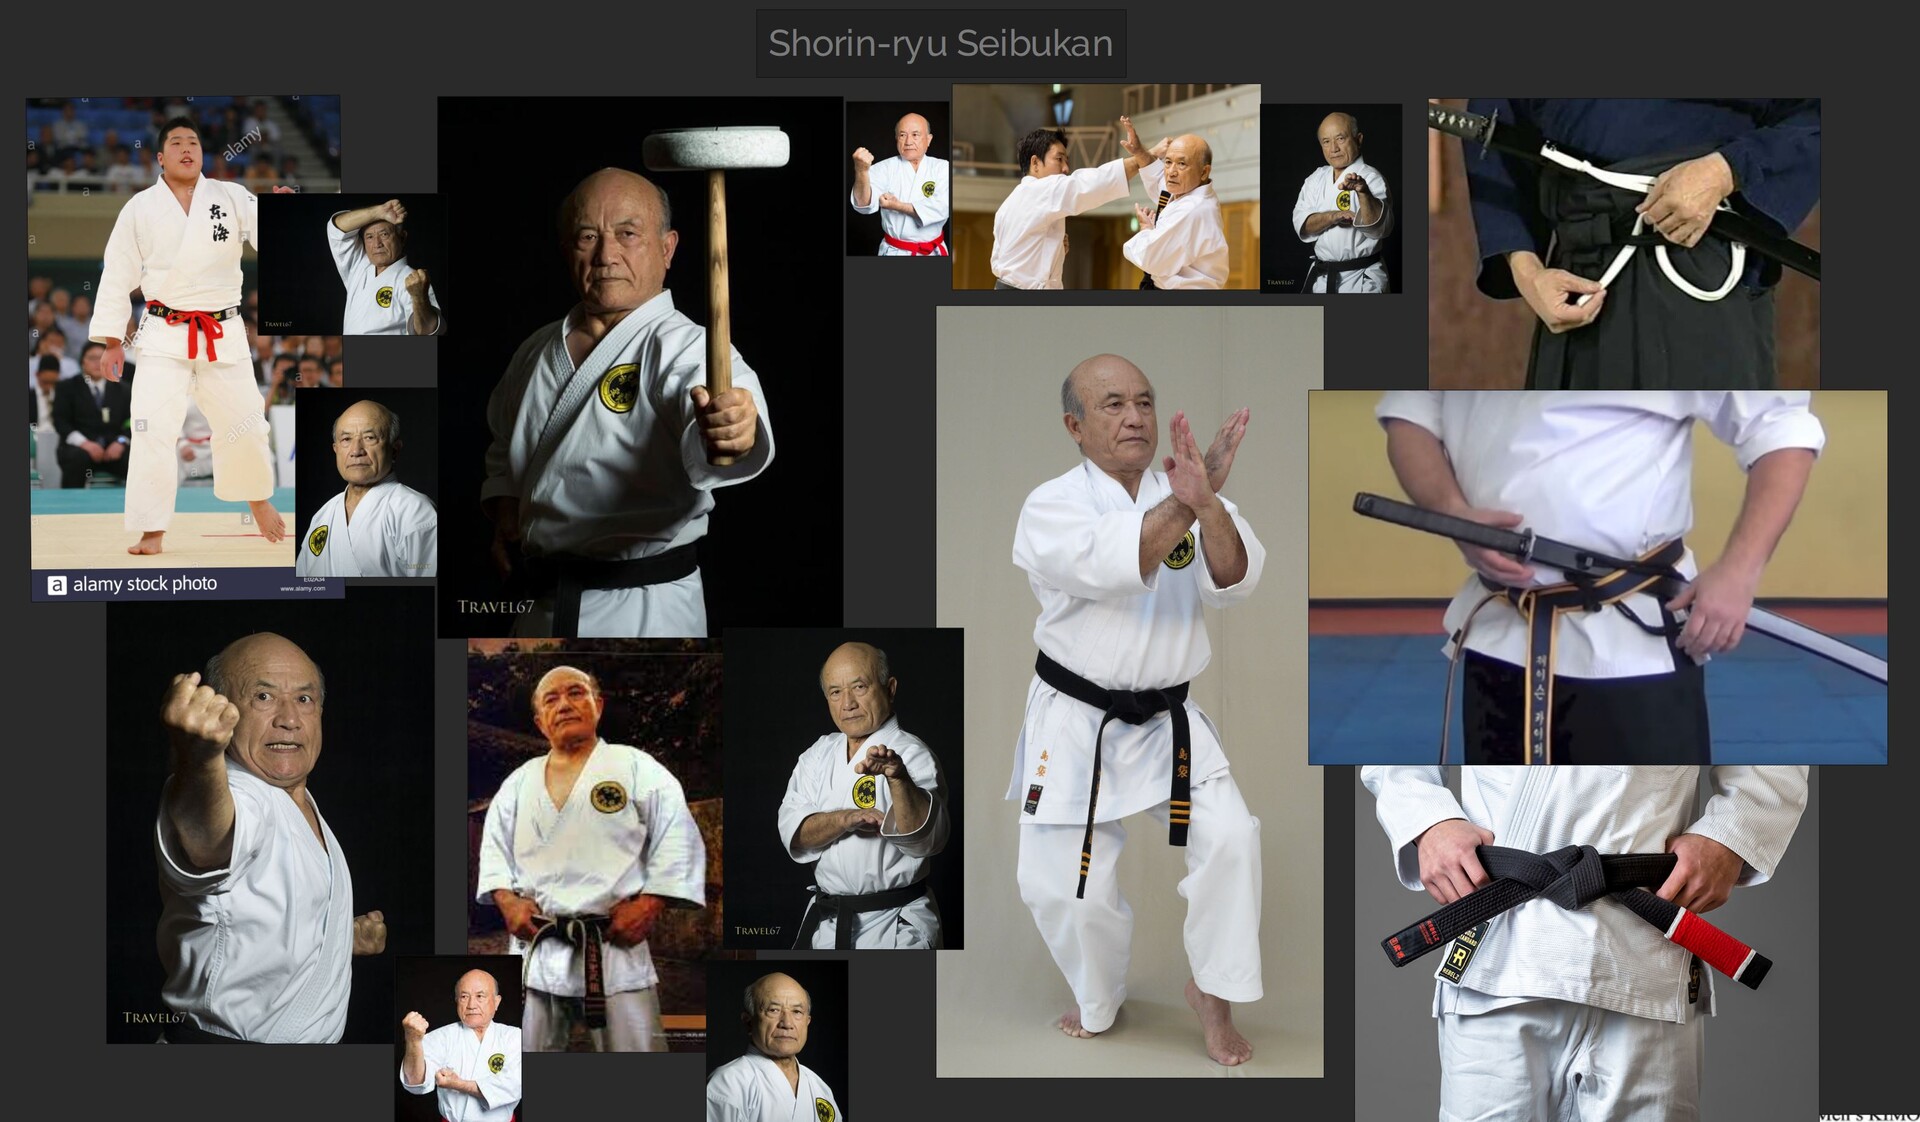
I look at a ton of references when I'm starting out so I can nail the right feeling. At first, I was studying anatomy references of the endomorph body archetype, but they were much too flabby and weak looking. Eventually I came across images of judo fighters and this one in particular, Shorin-ryu Seibukan. He had the right look: aged, but still very fit. He has some fat but you can tell the strength is just underneath the surface.
After establishing his body type I move to getting all my elements blocked in as soon as possible. This rough stage is really important for me to get a basic idea of silhouette before jumping into any fine detail. Rough cloth sculpting is always somewhat embarrassing for me to show, but I recognize its value in planning out a workflow. When it comes to super intricate fold work, I typically carve out those problems for Marvelous Designer. For example, the area where the coat drapes around the sword hilts would have taken much to long todo by hand. But the rough block in gives me a road map for what I want to achieve. The importance in having this can't be overstated!
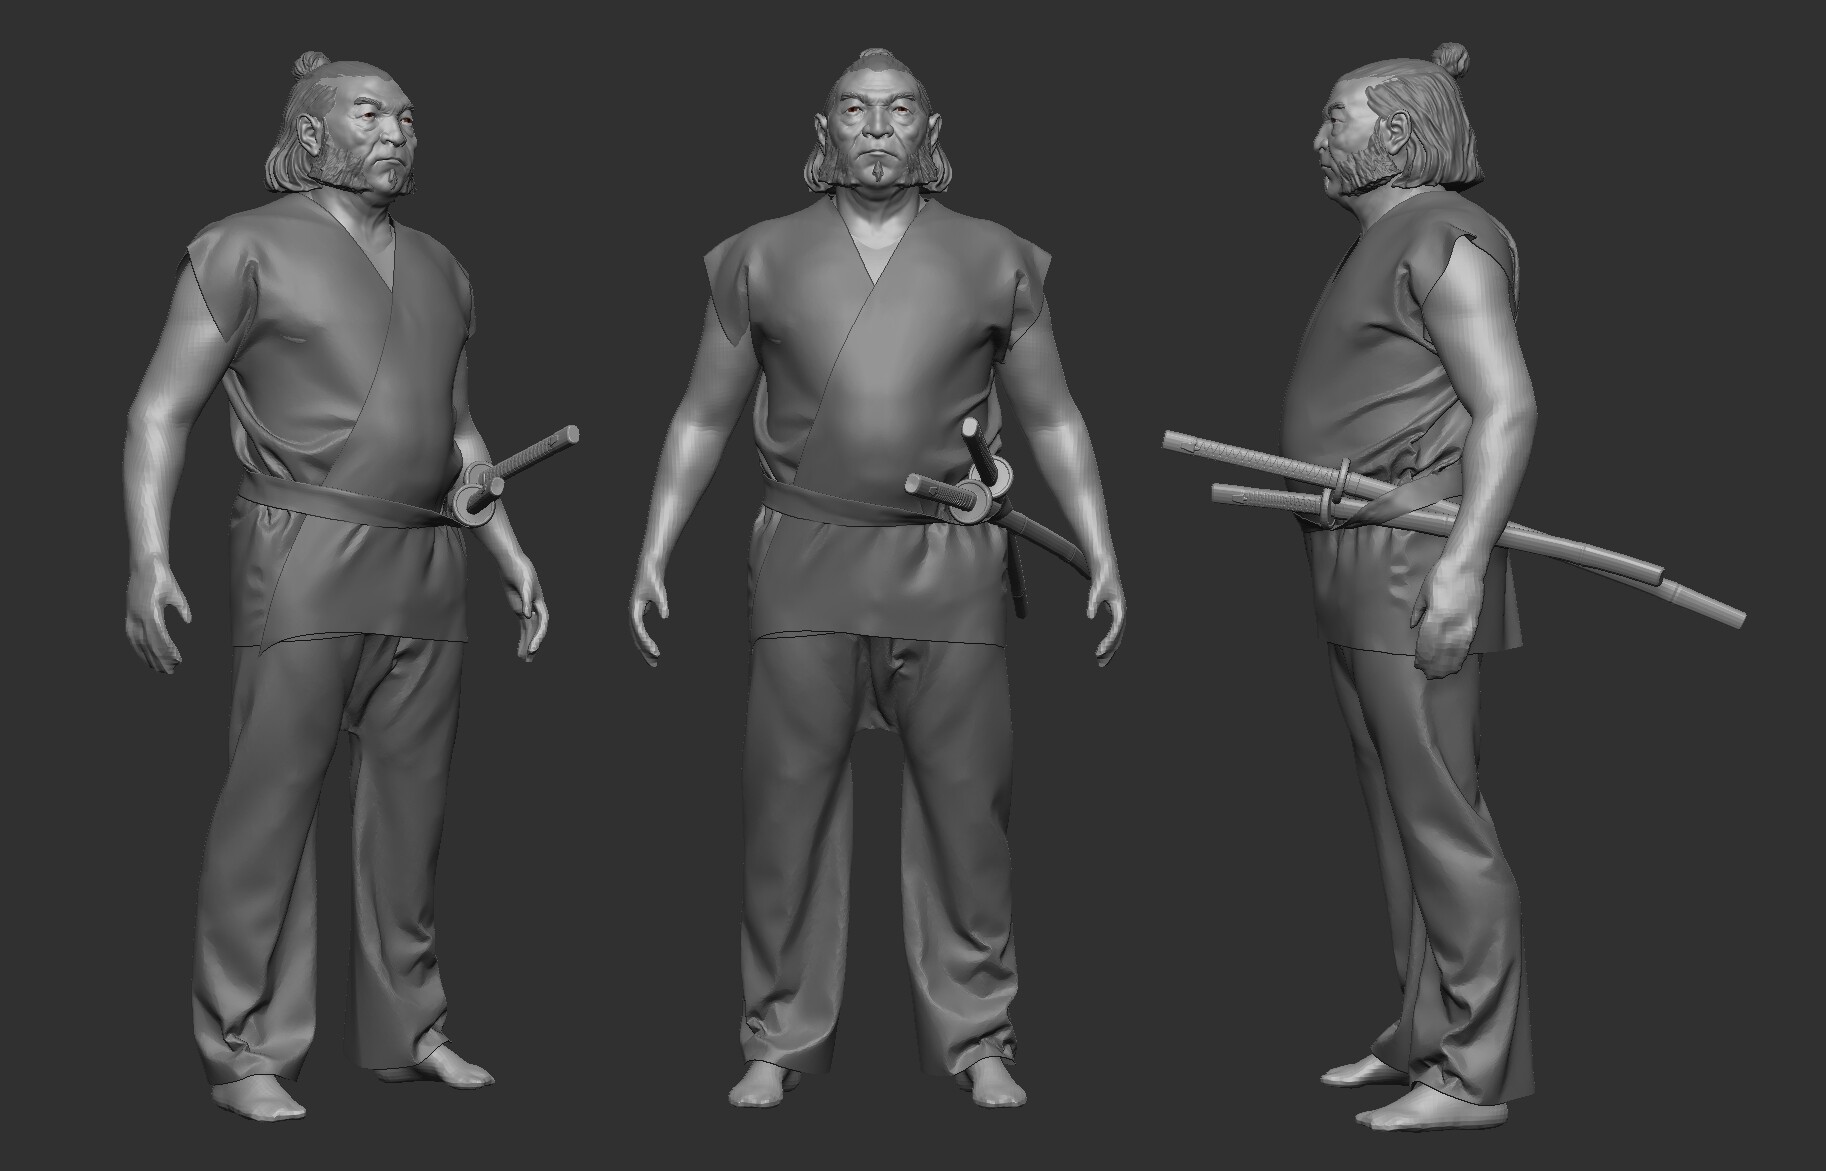
Here is the first pass with cloth meshes imported from Marvelous Designer. He had a karate style gi underneath his coat, so I decided to build that out first, treating it as a kind of vest. The cloth simulation from MD showing how the diagonal cut of the garment would affect the compression folds going around the back of the torso and under the belt was pure gold! There are some things you just can't imagine, regardless how much reference you have to work with. The pants came out very bell-bottom hippie style, so they needed some tweaking but already, things are looking pretty cool :) I also tweaked his anatomy a bit further, broadening the shoulders to create a stronger stance.
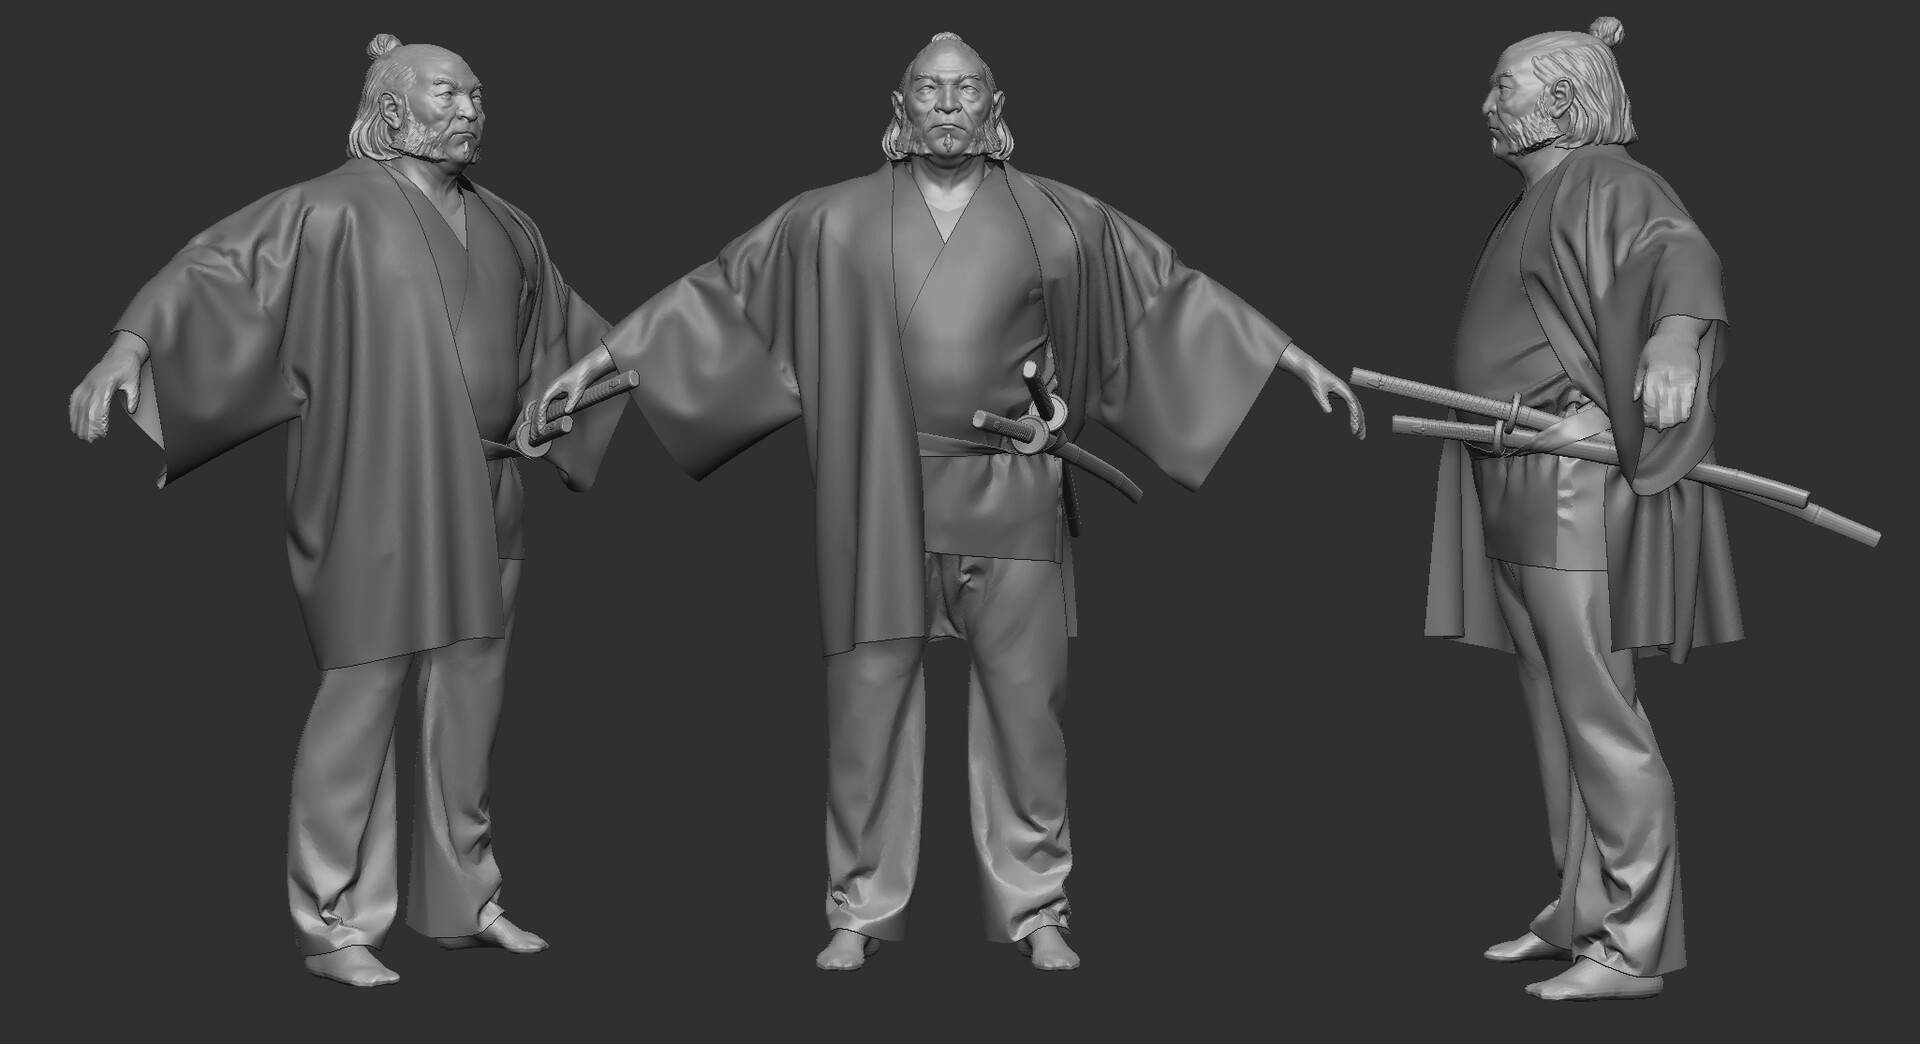
Finally I get the coat in and I realize this character is about 90% cloth. I did not realize those sleeves were so darn long! I double checked pattern templates for haori coats and they indeed have this incredibly long drape to them, so long that I had to raise his arms for a more appropriate A-pose. I knew I wanted to rig and pose him later and didn't want a bunch of issues caused by deep compression folds baked into those areas.
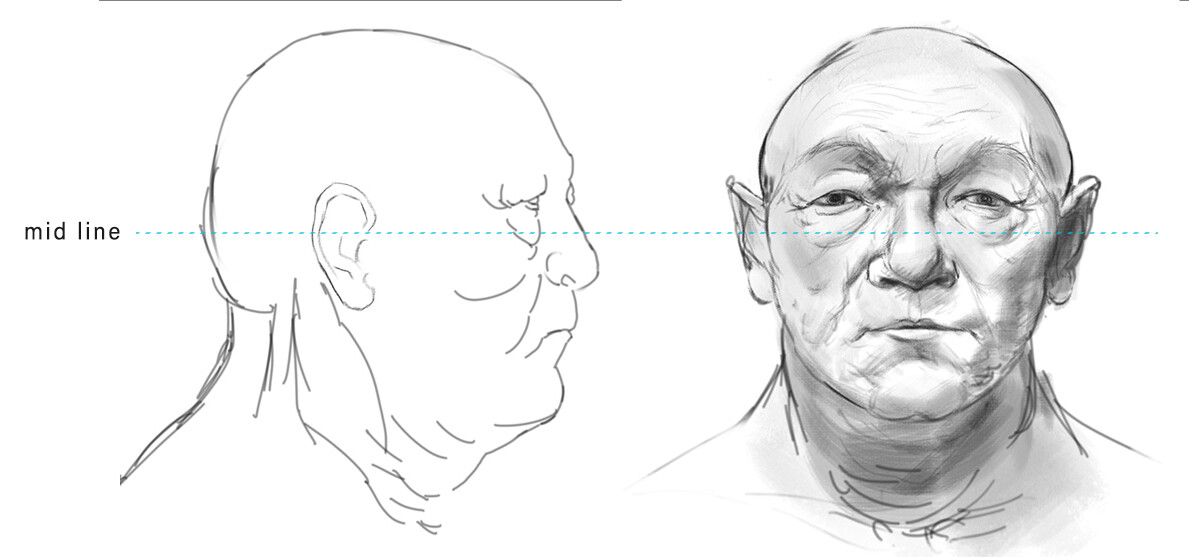
While I am working on the body and clothes, I am periodically returning to the face. It goes without saying that this character is primarily driven by the face. Before getting started in that critical area, I did some quick studies to understand his facial proportions. From looking at Maria's sculpts, I knew that this character's eyes were placed unusually high in his head. But how high? All the renders of him in front view have his head tilted slightly back, which made it more difficult to understand. So, I made a frontal study, using a tracing of her profile view as a guide.
This was crucial because it allowed me to know that those eyes are REALLY high. There is an old joke amongst artists in drawing groups that when a model with unusual proportions walks in the door, all the artists ask, "What's wrong with you? Didn't you read the anatomy book?". It turns out that all the old rules, eyes in the middle of the head, five eyes wide, etc., come from idealization, not reality. We all know this intuitively, but the real world offers a much wider array of proportional variety than what you see in books that all use the same formulas that go back to Michelangelo's David.
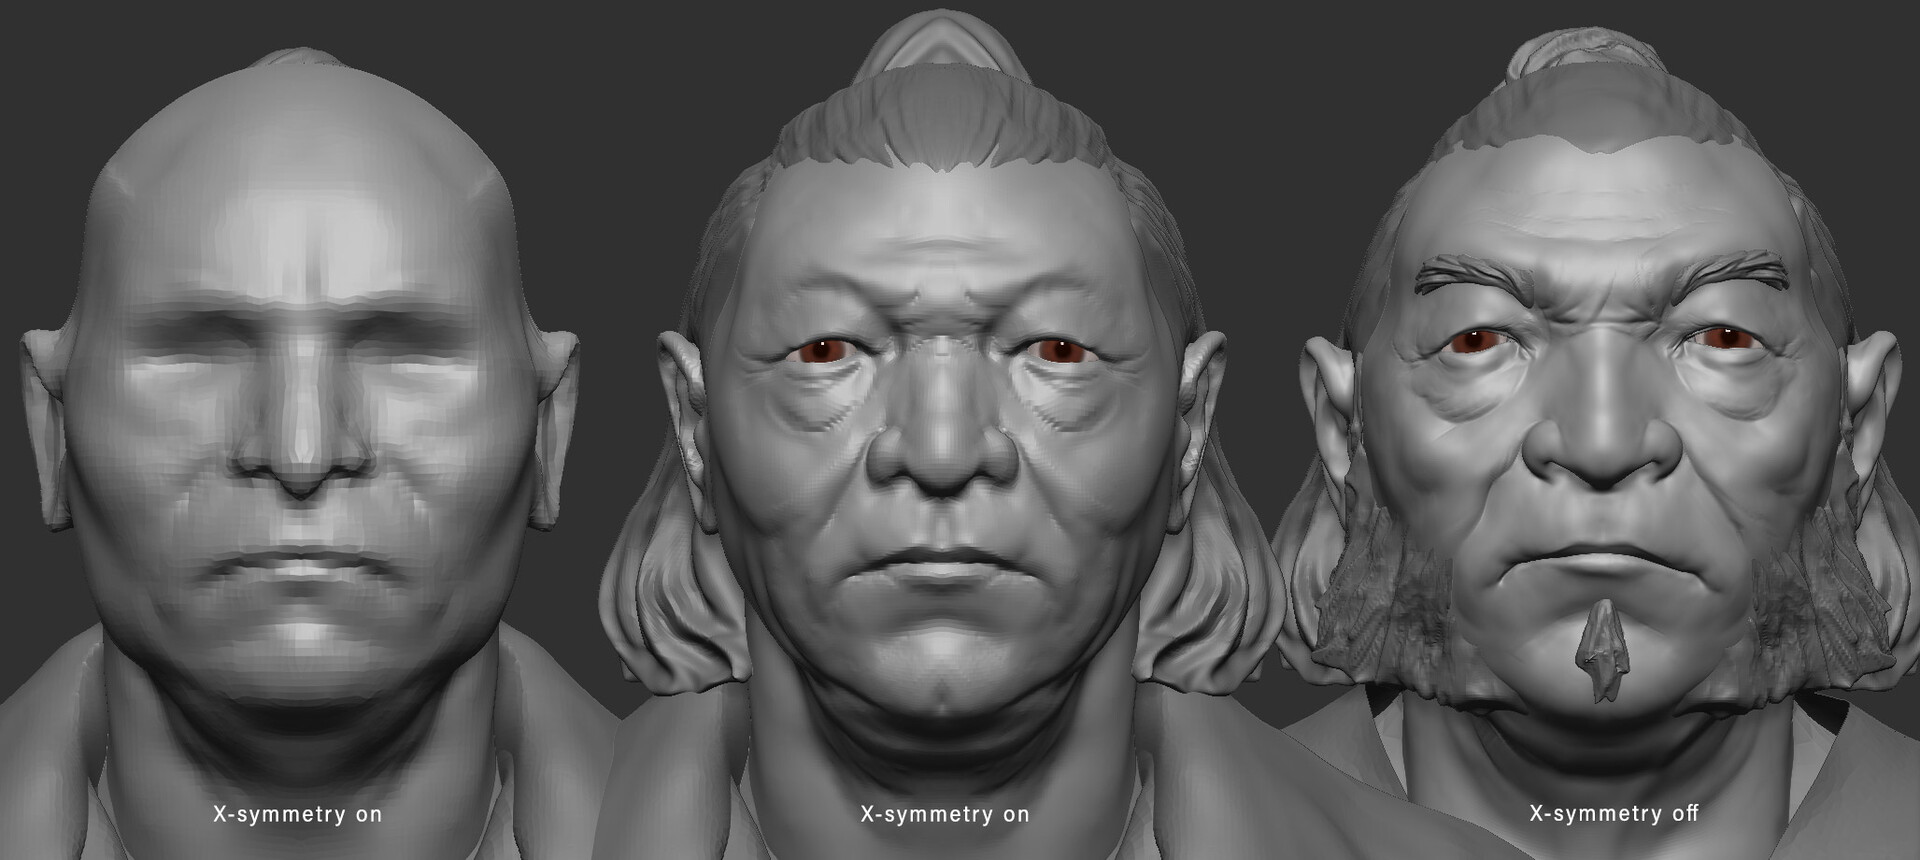
Studying Maria's sculpt while I worked on the face also made me realize that there was a lot of asymmetry contributing to his overall character. Skin folds droop on one side farther than the other, wrinkles spiderweb in slightly different directions with lots of organic variation.
Leaving the safe zone of symmetry can be frightening! There is a natural tendency to want to hold onto it for the obvious efficiency benefits. But traditional sculptors never use symmetry and look what they manage to achieve. I always remind myself that one of my favorite sculptors of the 19th century, Jean-Baptiste Carpeaux never worked with symmetry. And his work has a timeless feeling of beauty that I am always seeking to emulate!
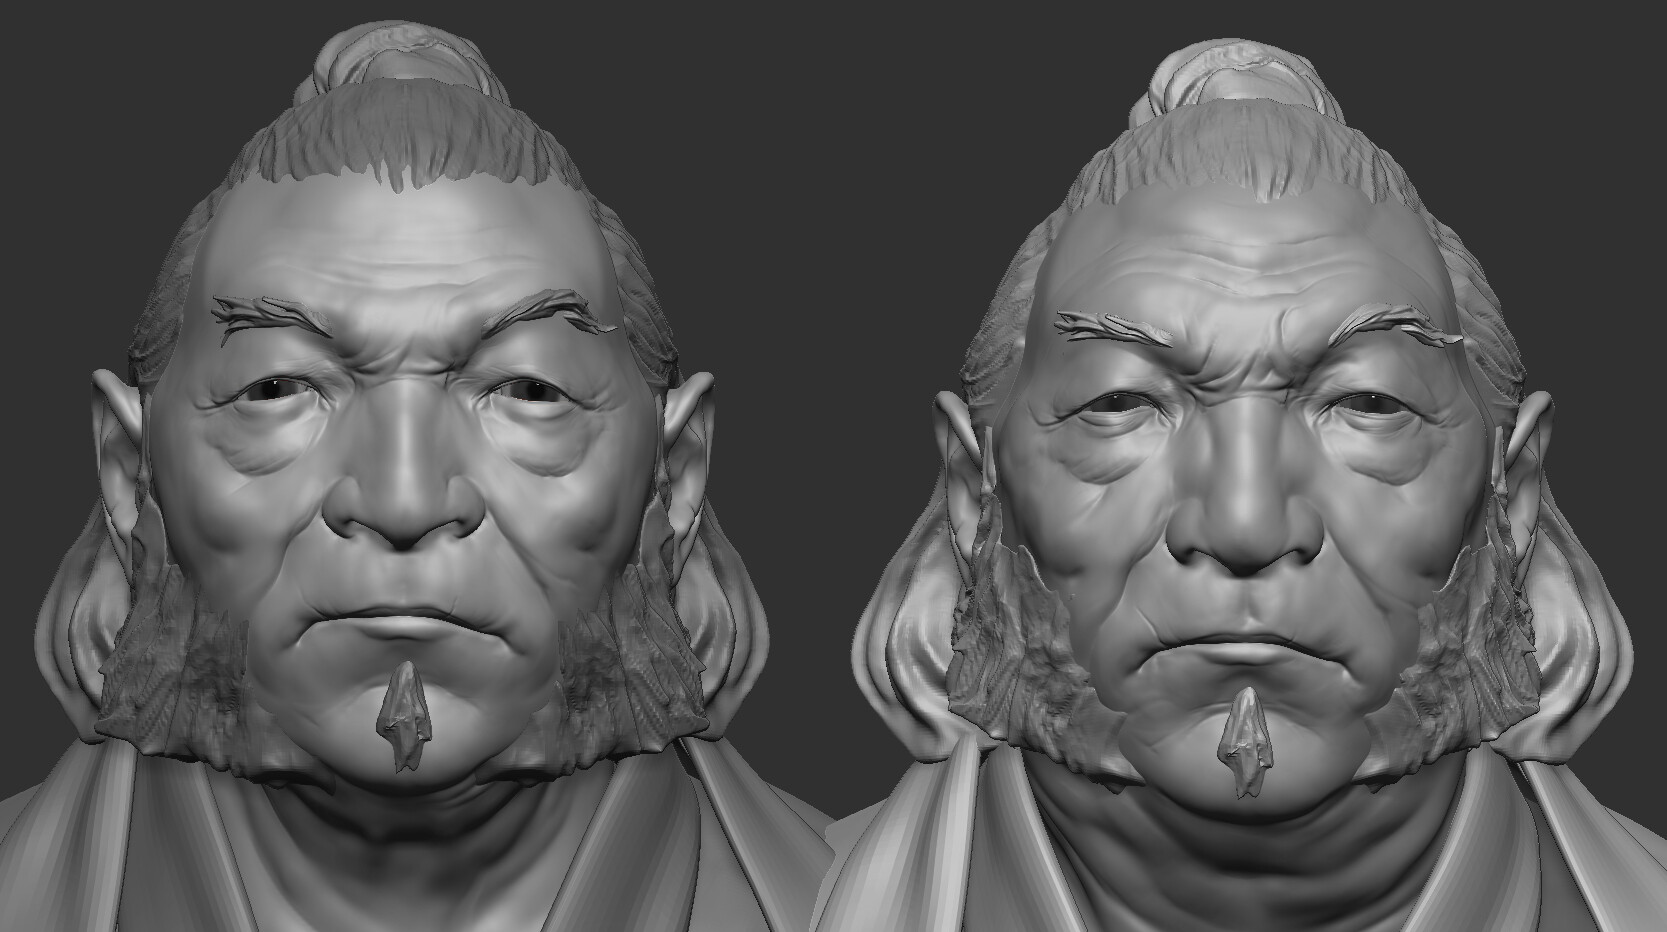
You'd be forgiven for not spotting the difference between these two in-progress shots. But there are a lot of small changes that together make some big improvements. Some small proportional tweaks were needed and the shape of the eyes and their surrounding sockets was initially too flat. The face was also lacking volume. Anytime I felt like I was losing focus, I checked Maria's sculpt to see how I measured up. This was always a startling experience! There is something very clarifying about putting your work next to someone that you admire and spotting the differences. But hey, that's what master studies are all about :)
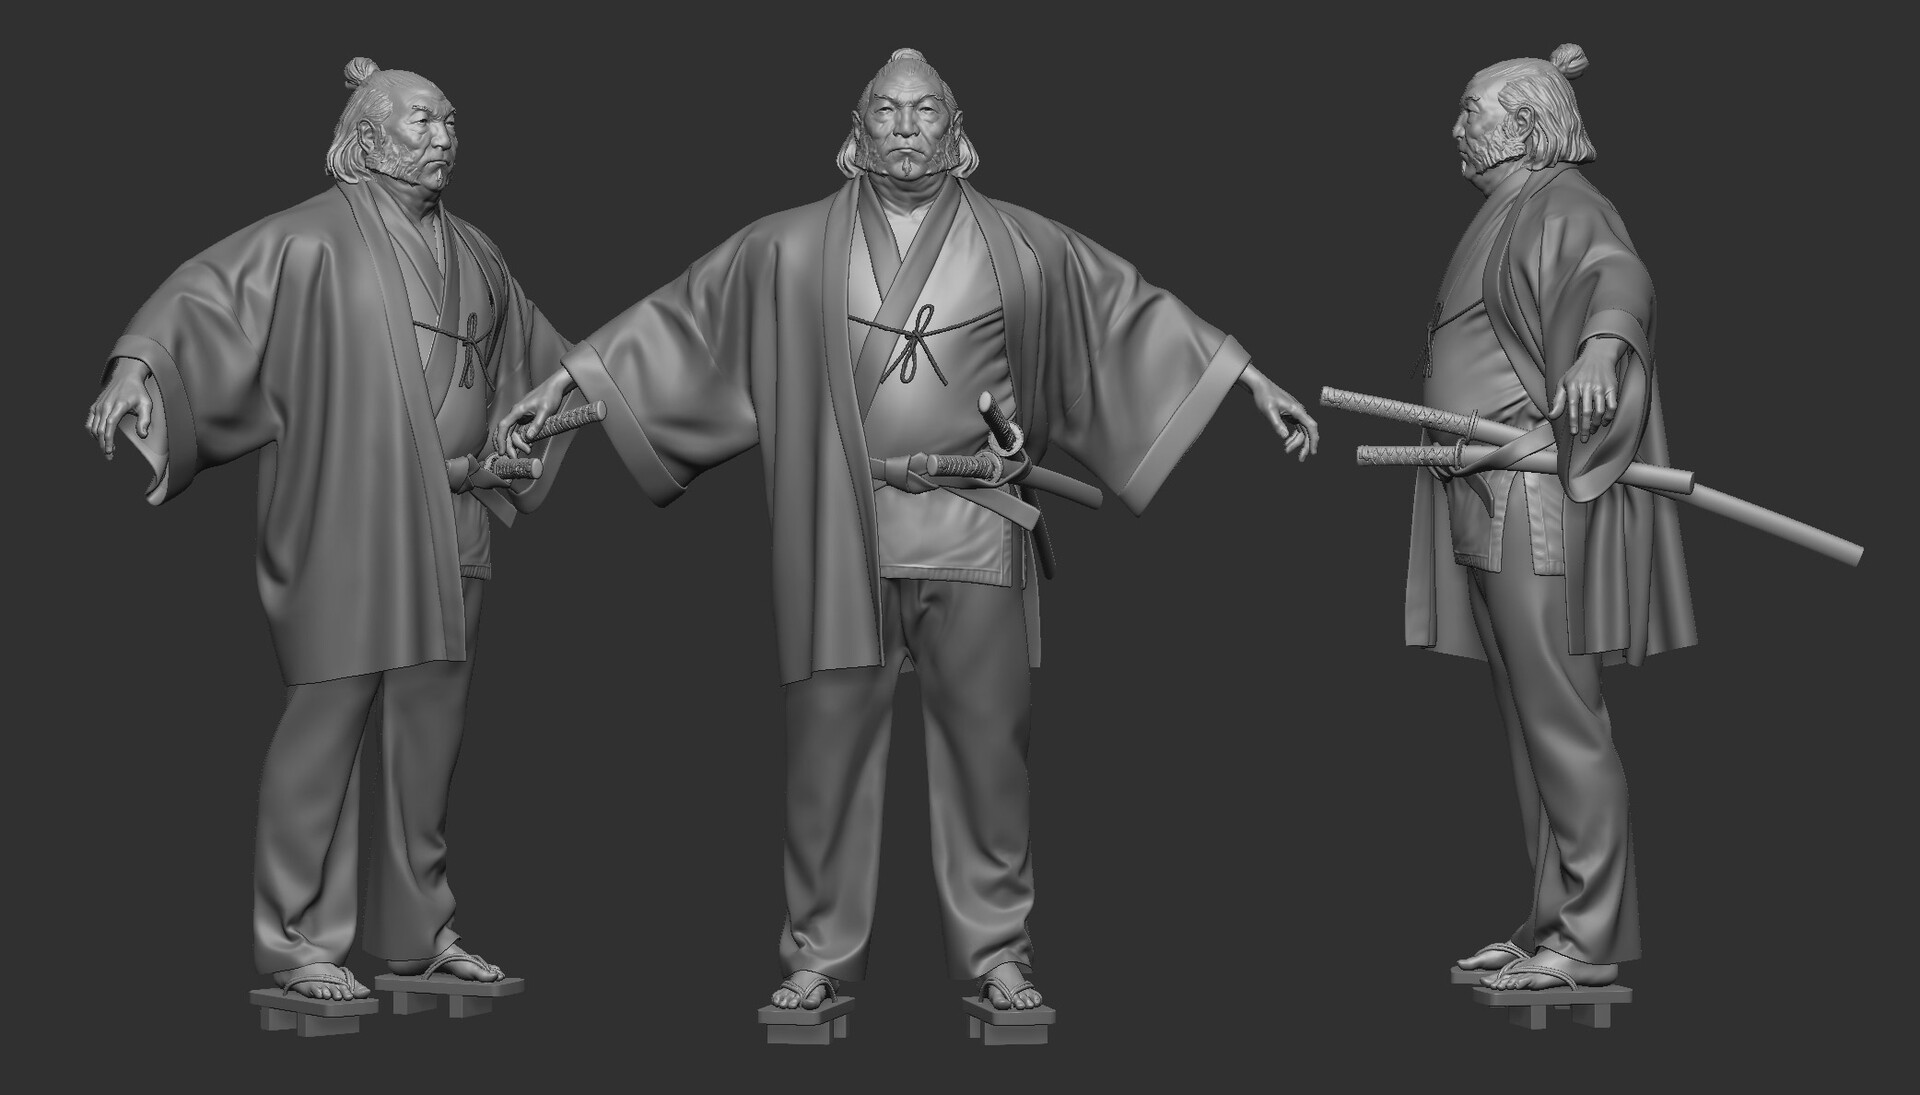
After I'm feeling happier with the face, it is really just a matter of overall refinement on the other elements. Using the MD meshes as a base, I work the cloth folds further, accentuating certain areas and smoothing out others. Even if I'm relatively happy with what MD puts out, I always give them a pass in ZBrush to make sure the clothing feels organic and not too sharp and stiff the ways it comes out originally. I also added hem details and additional wrinkles in areas that get a lot of wear, such as the bottom portion of the tunic that has a lot of memory folds from being cinched by the belt and bent by the pelvis.
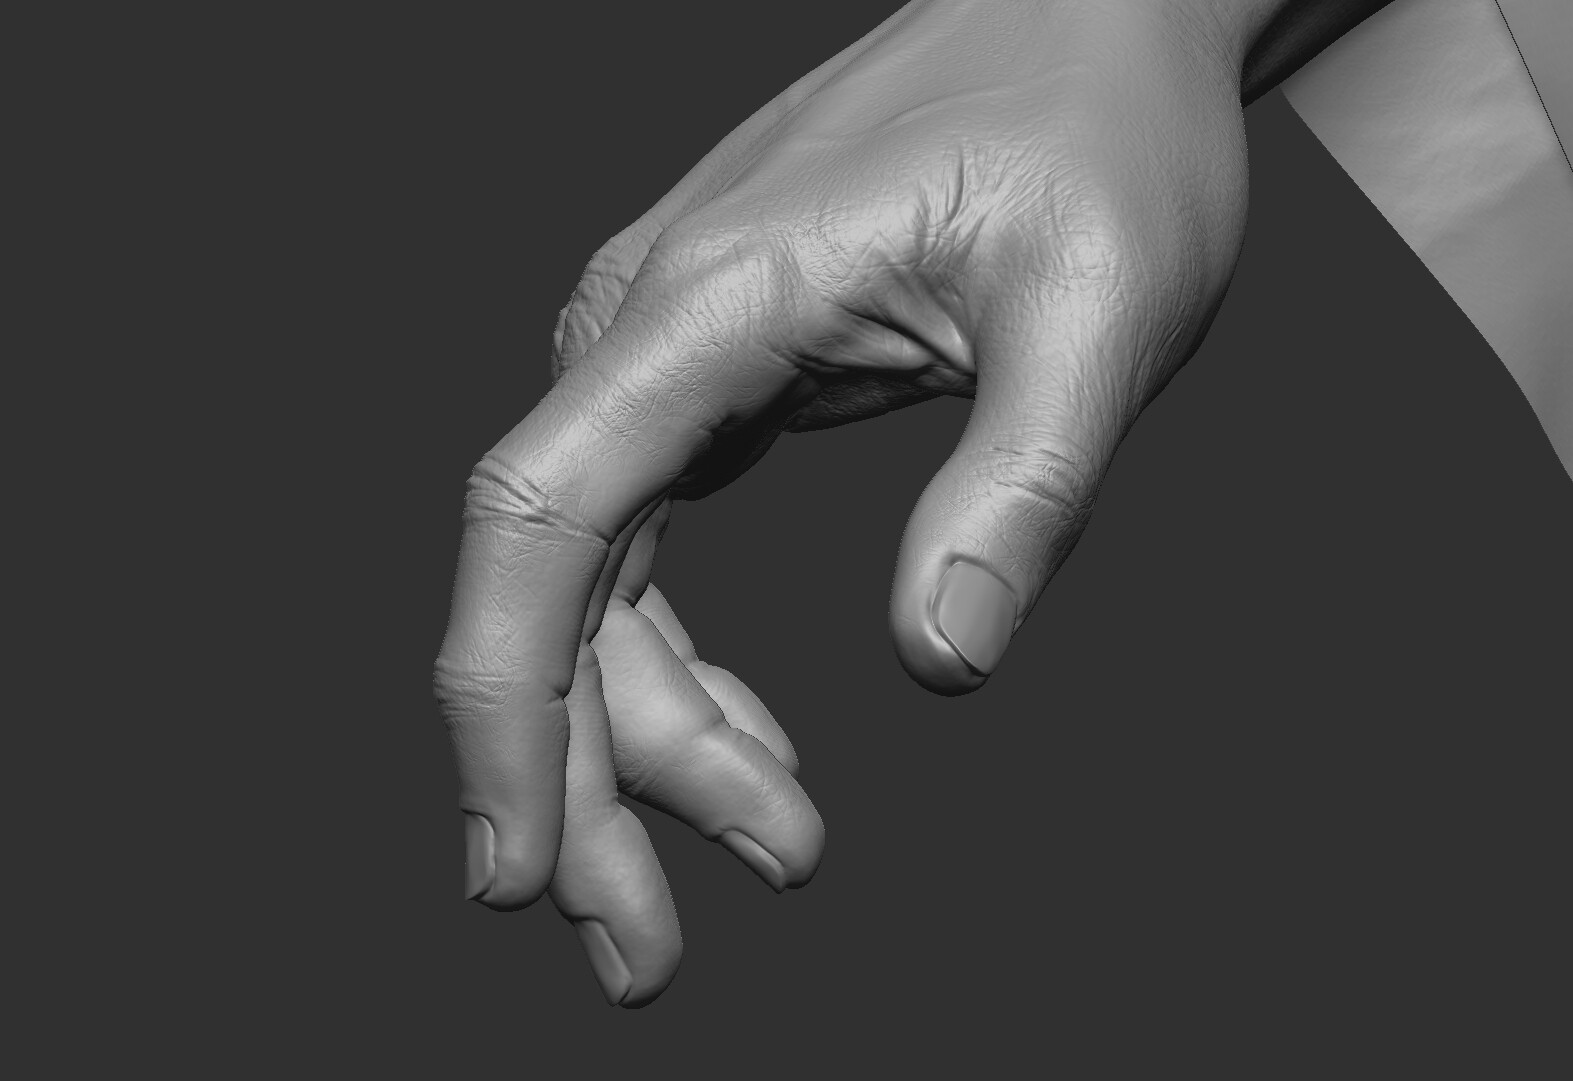
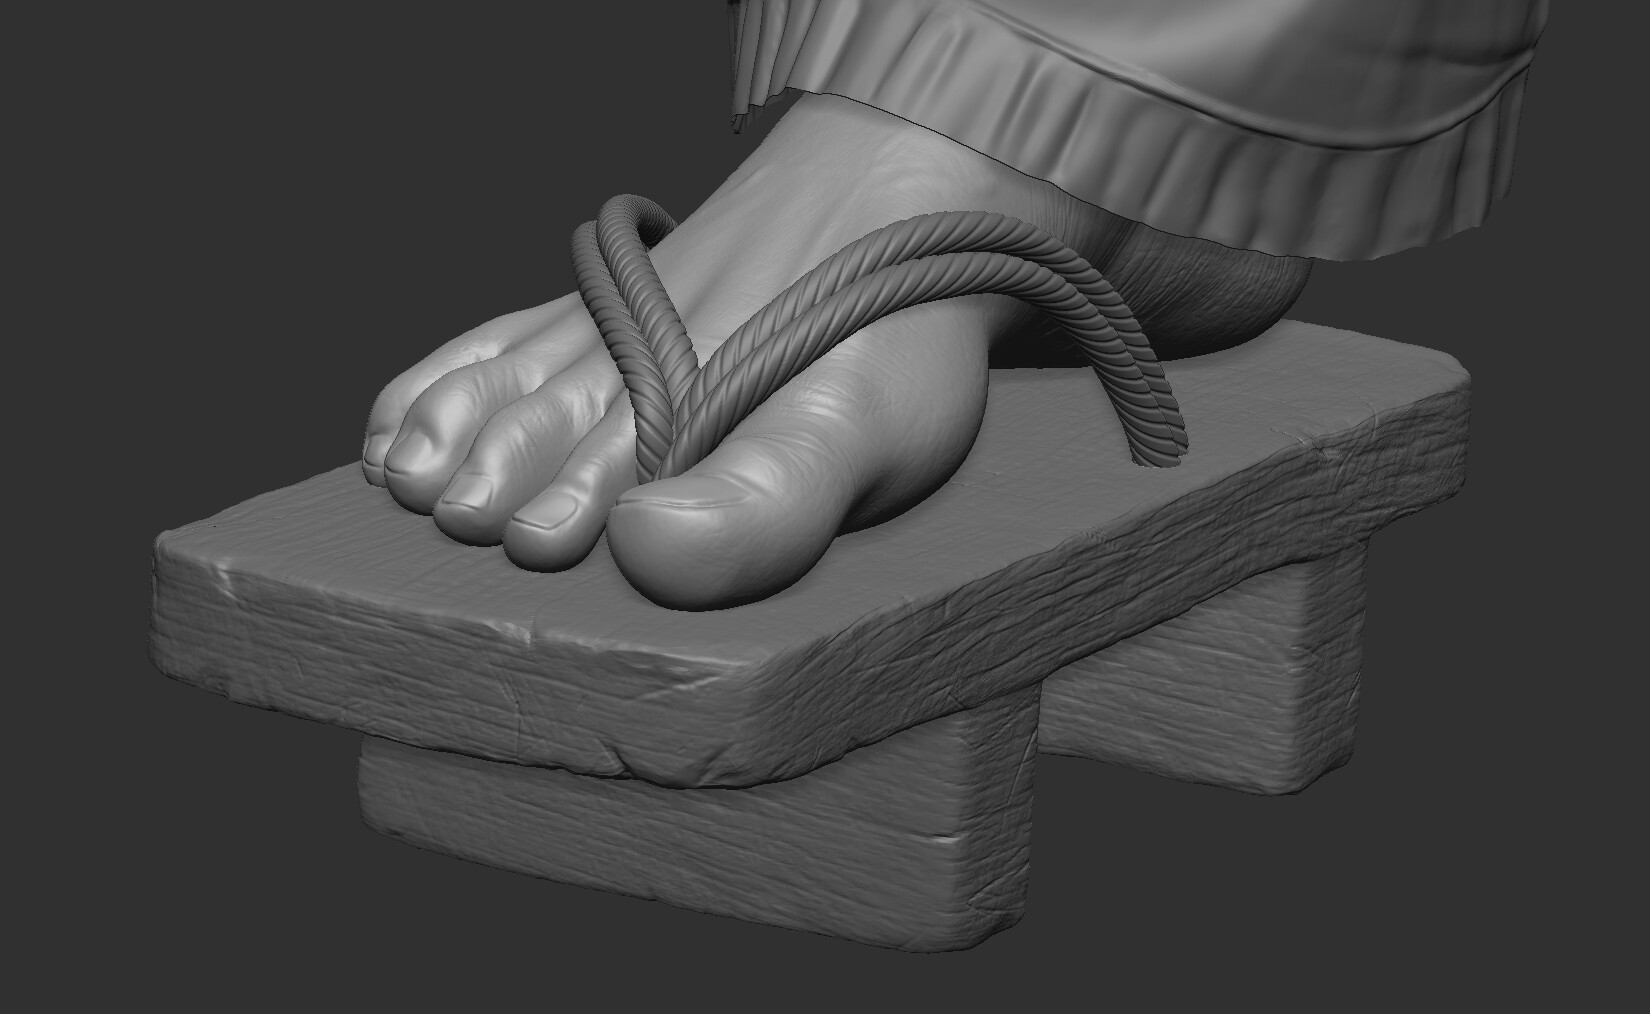
The hands and feet get special attention. I decided to give him wooden geta sandals instead of the two-toed socks he's wearing in the original concept. As a result, I needed to sculpt the feet - but that's OK, feet are so weird and wonderful to sculpt!
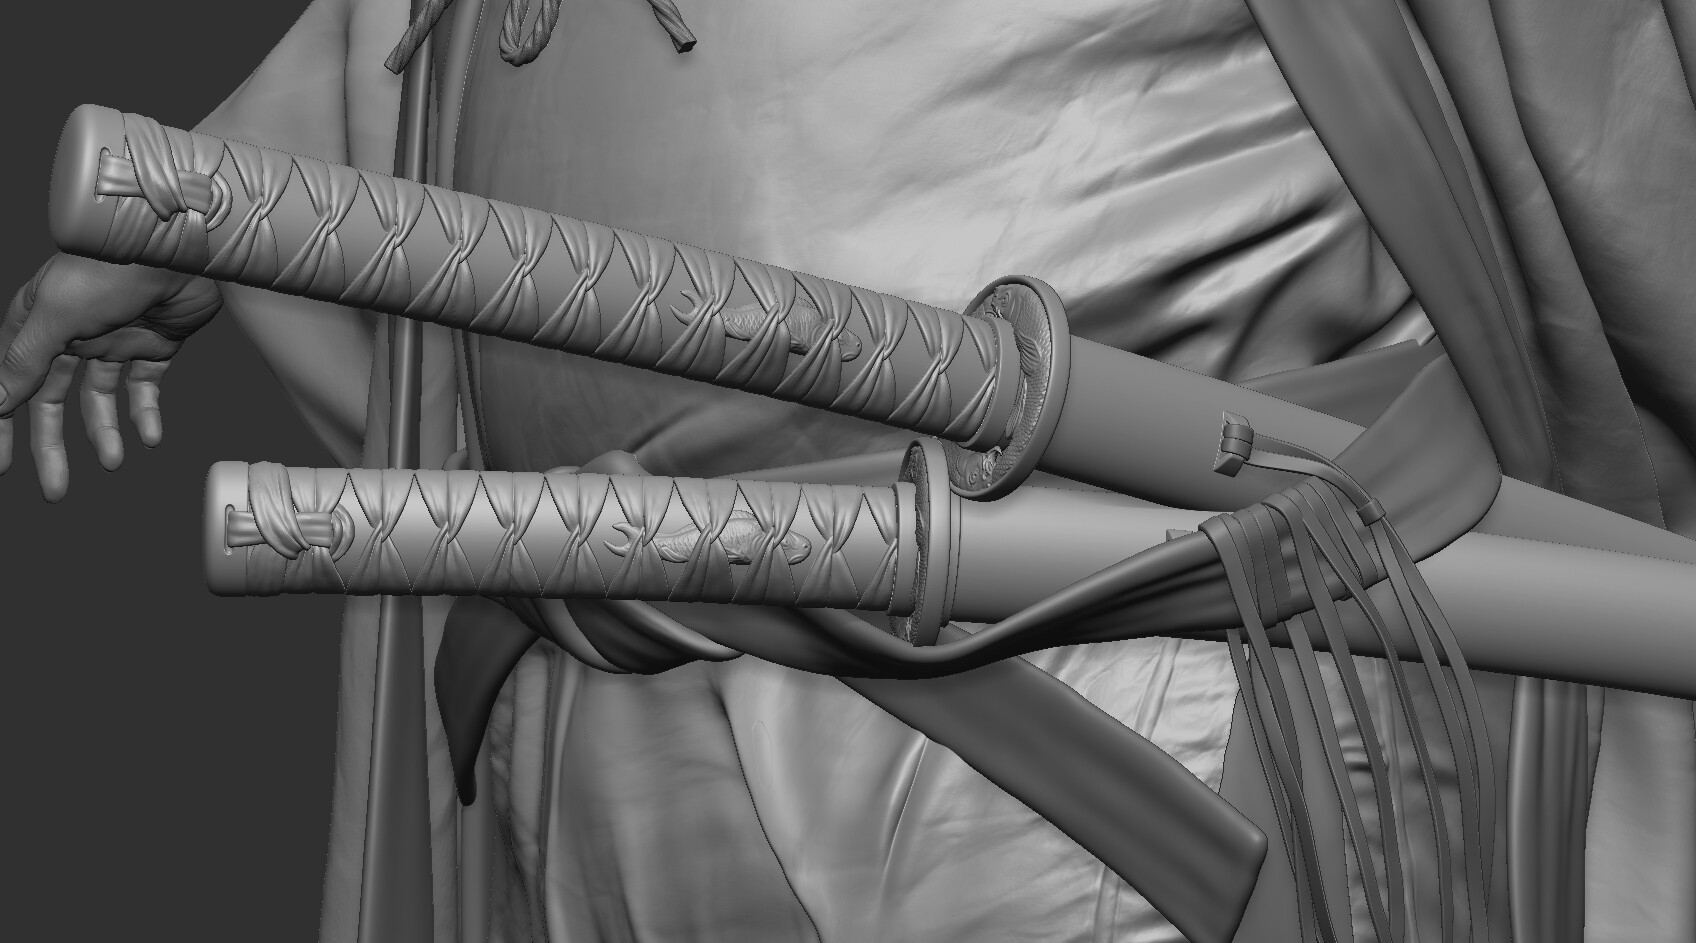
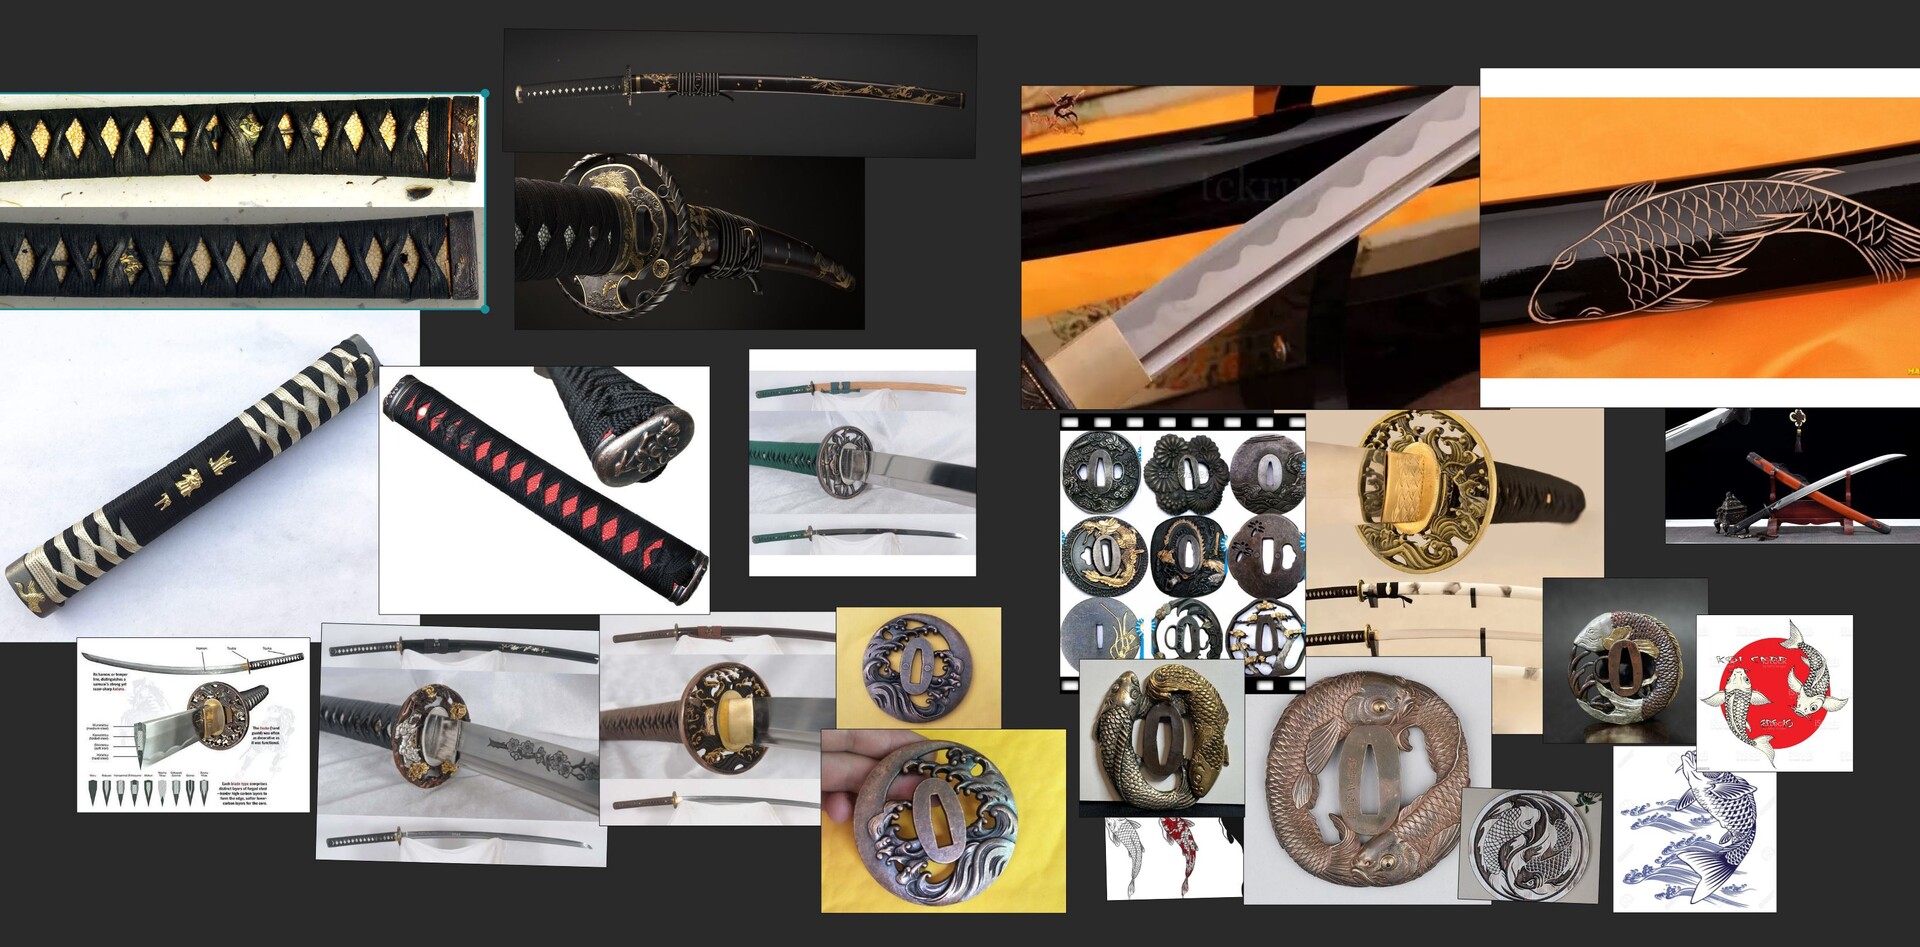
The swords were another major focal point. In my interpretation of this character, I imagined him to be the head teacher at an elite sword fighting school. As such, the katana (long sword) and wakizashi (short sword) on his belt would need to be approached very carefully. If guns are the focal point in an FPS game, then what is the focal point in a sword fighting game? The swords, of course.
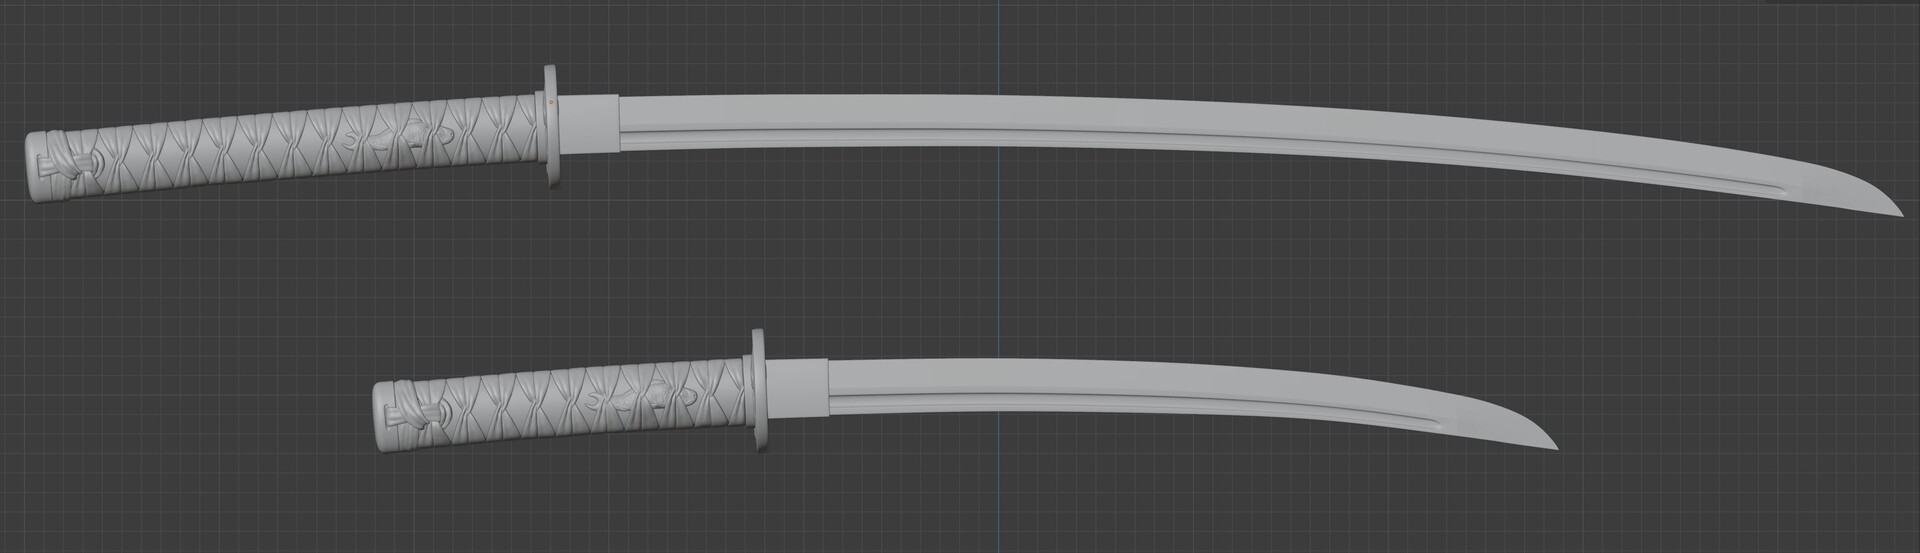
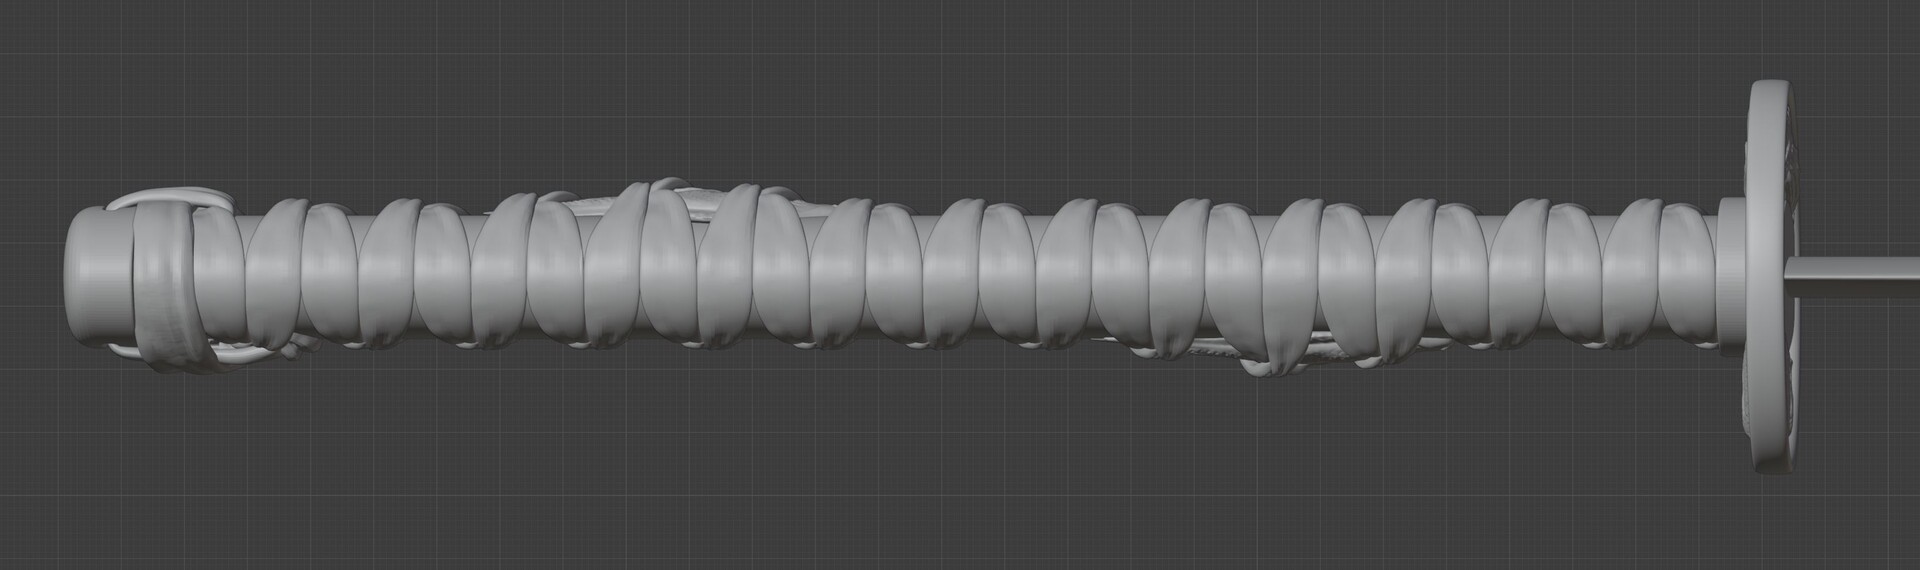
I built out the swords in Blender, using features like the Array Modifier hooked up to a Curve to get the handle wraps to flow just right. One detail that's often overlooked in katana models is the weave of the handle wraps. Most of the other art I've seen of katanas have the wraps simply duplicated, without a weave. This is wrong because in real life, that weave is what gives the wraps their strength, creating a tight grip around the handle that will not fall apart if one of the wraps is damaged during battle.
This is a tiny detail no one will ever notice but me, I know. However, I thought about my mission in the same way a weapon artist might. If you are modeling an AK-47, then every darn screw and bolt better be in the right place or the AK-47 community will devour you. So I attempted the same approach with the samurai swords.

The koi fish motifs were one of my favorite parts about detailing the sword. Sculpting these was trickier than I thought, especially the curving scales. I couldn't easily create them procedurally because they change in shape quite drastically along the form. I ended up building an array of scales in Blender, then using a deform modifier to curve them in the approximate shape I wanted. I took this into ZBrush for further refinement and tweaking and with some dynameshing, I glued it all together.
Again, tons of research are going on with every step. My pureref board continues to accrue images until it is rather monstrous.


By the time I've arrived at the end of the high poly stage, I have gone over all the assets with a final pass. The face gets skin detailing (using everyone's favorite, Texturing.xyz), and the clothing has memory folds added. Once I get to this point, the changes are so small and all the major decisions have been made so I am working somewhat on autopilot. Having done a lot of baking in the past, I have a pretty good feel for what will details will get passed down into the low poly and what the audience will actually see in the final.
In some ways the end of high poly work is also the end of big discoveries and it makes me sad. But the texturing/coloring I get to do later on is always worth it, that phase is just the best!!
Join me for more in The Making of Master Koi, Part 2.