
This is the breakdown of my project, Nissa Revane: Planeswalker. Check out the project on ArtStation here.
Every time I start a new character project I have this idea in my head that I will be using the same process as I have in the past with some slight refinements. But in truth it is always a different journey. I’ve heard graphic novelists say the same thing: by the time you’ve finished the graphic novel, you are a different artist. Modeling real time characters is roughly similar in that the process is incredibly laborious, with each phase of the project breaking down into individual challenges that have to be tackled one at at time. As a result, my methods are always shifting as I pick up new techniques, rework old ones and get better. I actually think this is a good thing, especially when it comes to personal work. After all, I’m doing this to improve, right? Out with the old and in with the new!
 Nissa, Sage Animist – art for Magic the Gathering by Wesley Burt
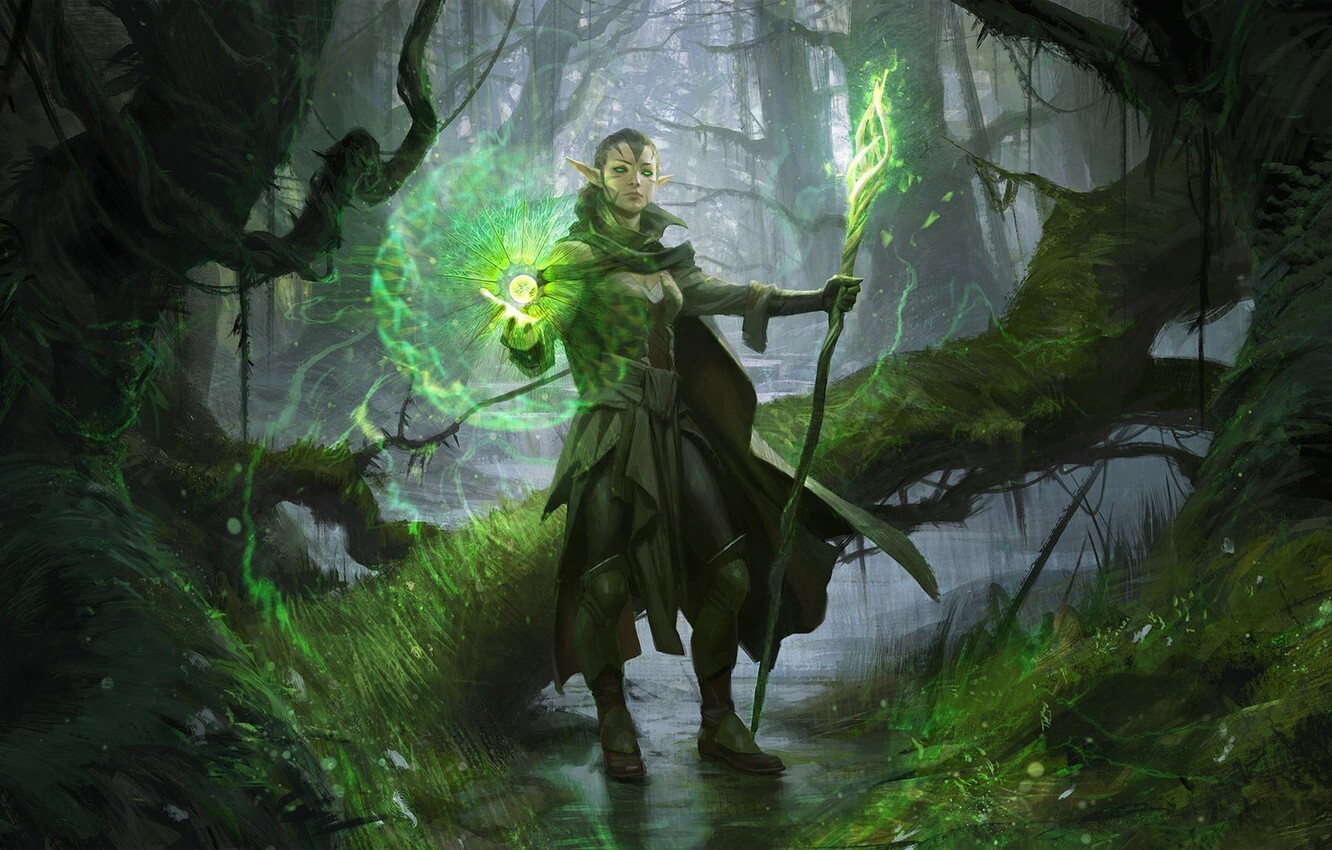
As always, I started this project by looking at lots of reference images and inspiration. An unexpected challenge regarding a character like Nissa Revane is that she has been depicted by multiple artists over time. A big part of the lore in Magic is that there is a multiverse where powerful wizards called Planeswalkers travel to different worlds, going on adventures and fighting evil, etc. Each set of Magic cards takes place in a new world, but these Planeswalkers remain consistent. Just imagine a fantasy version of Michael J. Fox’s character Marty McFly from Back to the Future and you get the idea.
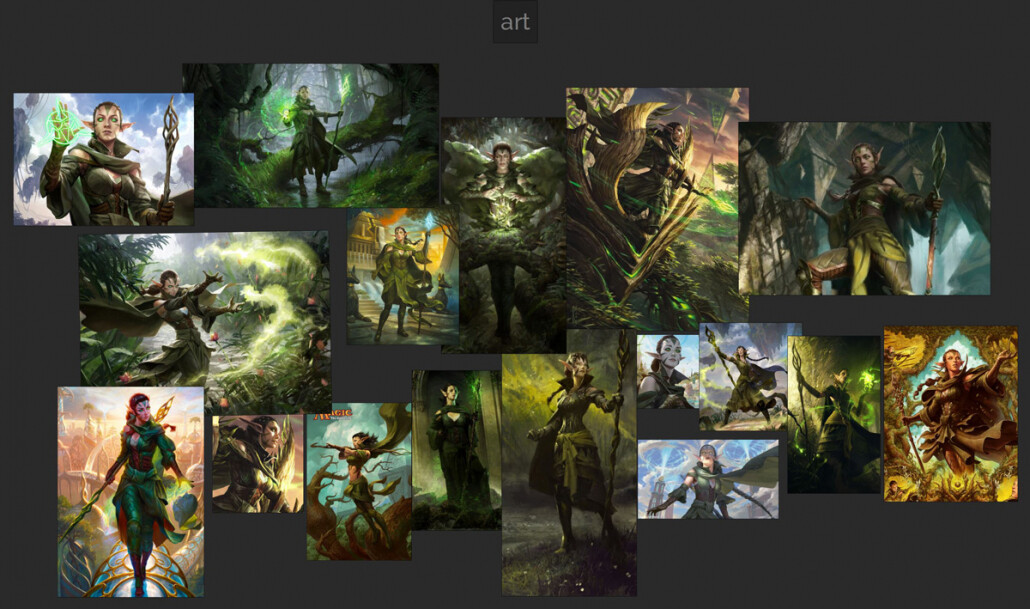
These are all the illustrations of Nissa I could find when I started (I actually missed a few). From what I’ve heard, the parent company of Magic, Wizards of the Coast has a somewhat lenient approach with their illustrators. They use a style guide but artists are allowed to make personal decisions. As a result Nissa is depicted in quite a range, especially when it comes to her costume. Her sleeves and skirts in particular have been treated wildly different by all these artists. Sometimes her garments are loose and flowing like silk, and in other treatments she has more leather and wool fabrics that hang heavy and close to the body. And, no one really seems to know what to do with her boots, which are often left in shadow or just kind of painted without definition.
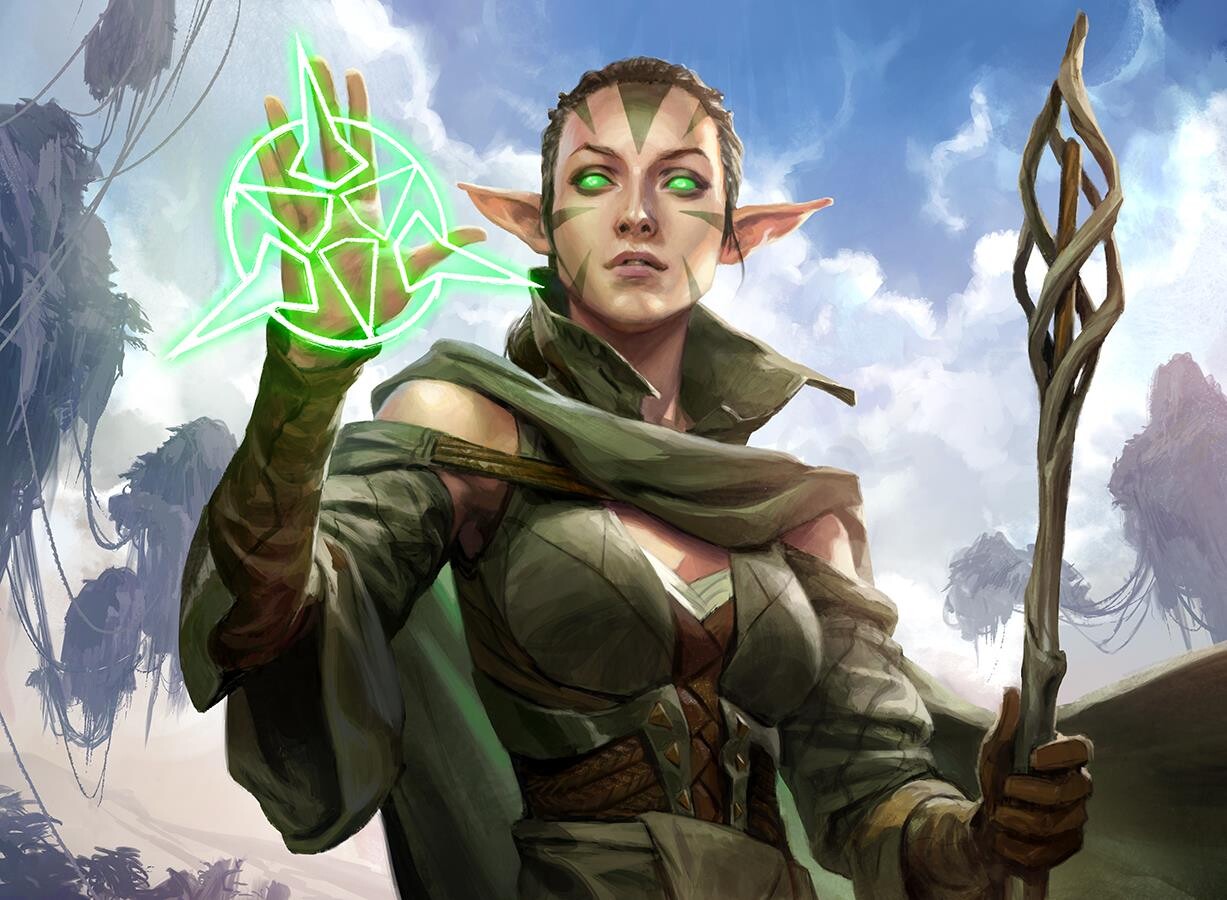
I had to choose one of these interpretations and in the end I decided to go with Wesley Burt’s depiction because, well I just liked it the best. I love his handling of the fabrics and the wild energy behind the character. He also dealt with the vagaries of the costume better than most of the others.
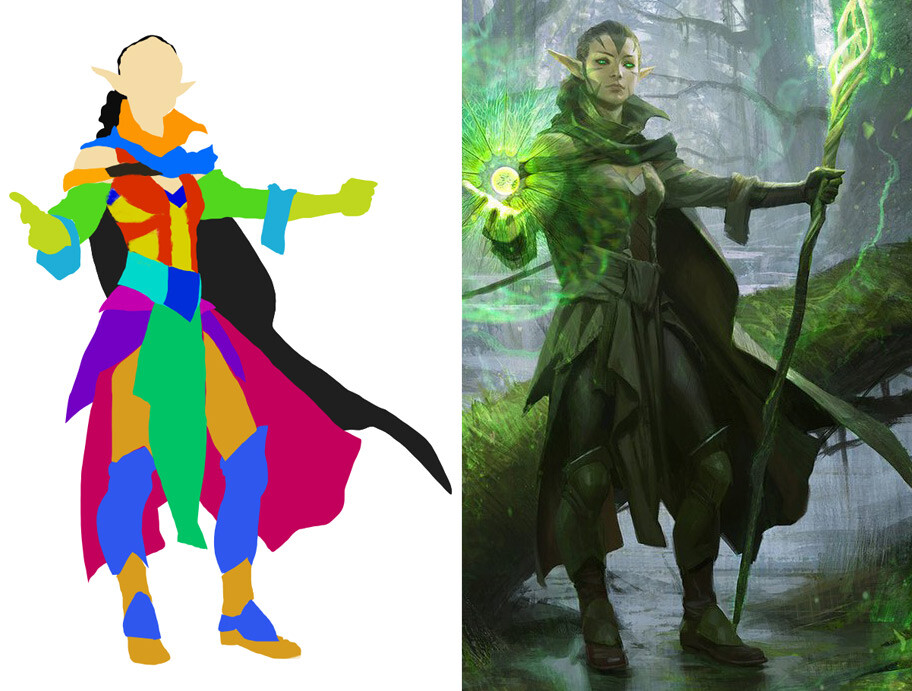
One of the first things I did was break down the costume with a color key. Planning is so important at this stage and I wanted to know how many different assets would be needed. I also wanted to figure out how pieces were overlapping and just how this thing was constructed. One of my pet peeves are costumes in 3D that just don’t look convincing, and I think some of this stems from vague concept art that hasn’t been properly understood.
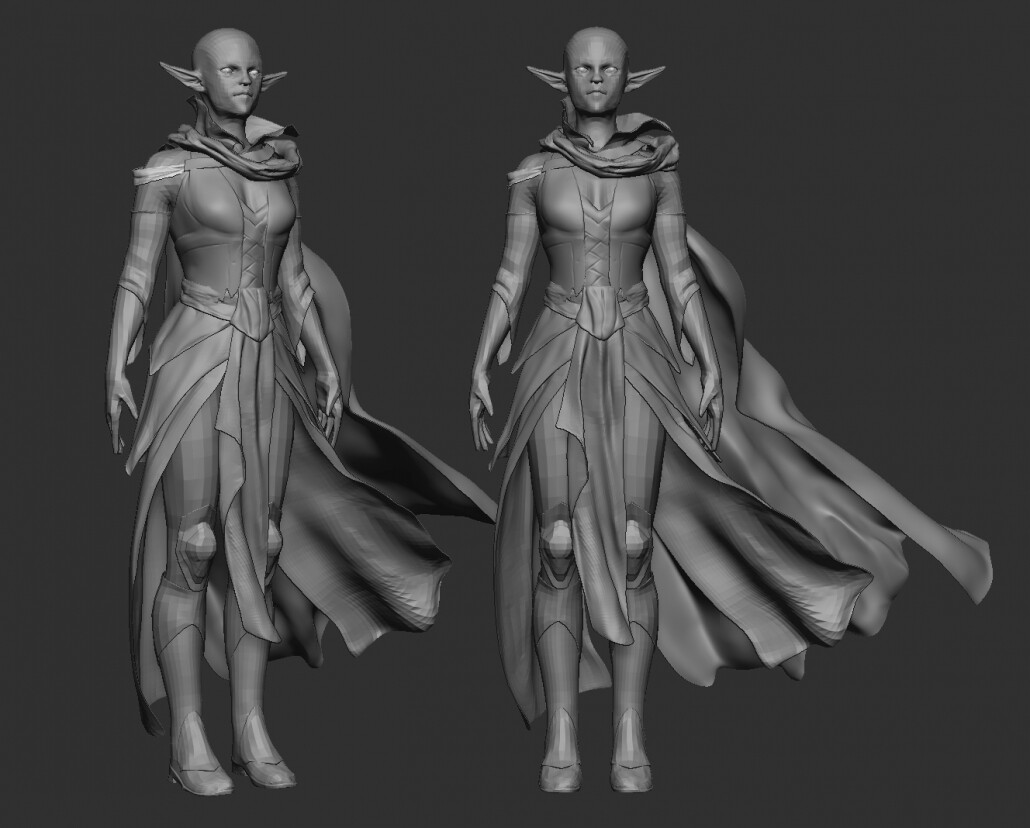
After making my game plan I dove into sculpting the rough block-in. This stage is very much about loose problem solving for me. I work at the lowest resolution possible, just moving big shapes around and focusing on proportions and gesture without worrying about details. A problem that immediately arose was her skirts, loincloth and cloak. They were quickly becoming way too busy and distracting. The trick was to make them fluid. I knew the best way to handle them was likely Marvelous Designer where I could experiment quickly with different kinds of fabric weights and cuts, but the block-in would at least provide a rough sketch for that process.
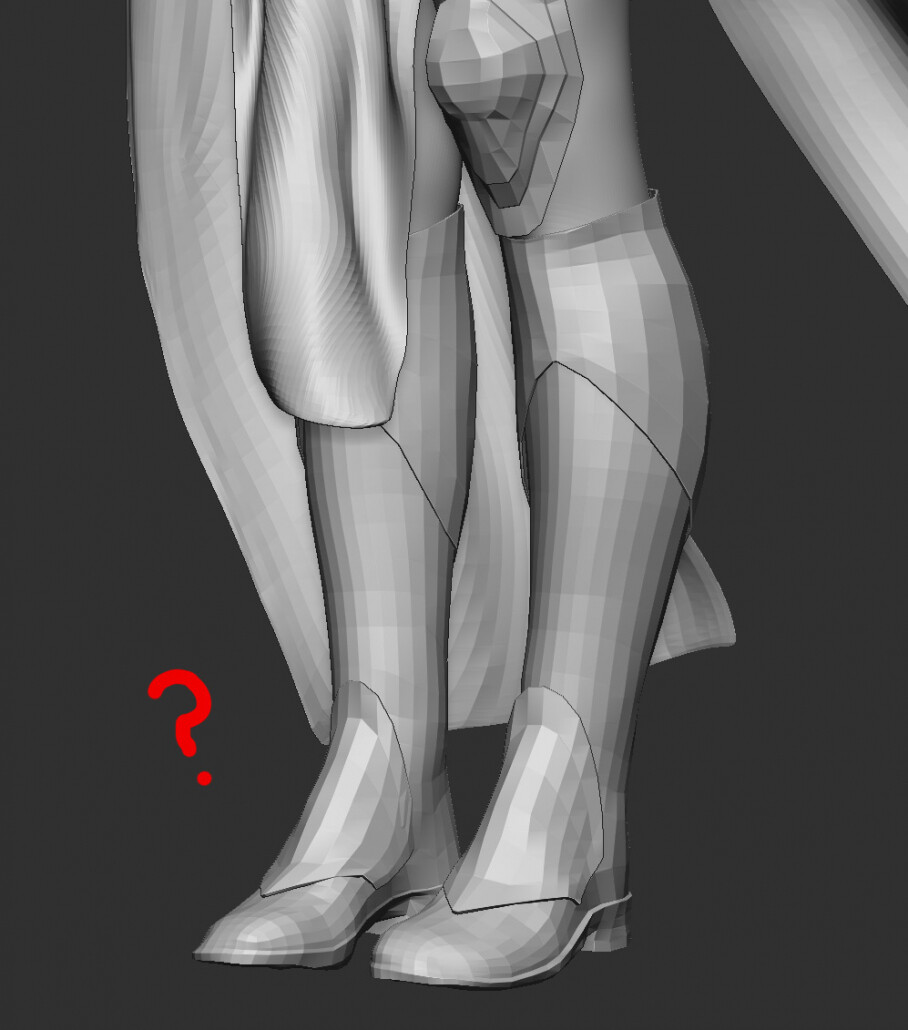
As I kept refining my block in, a tricky obstacle became the boots. I stared at all the concept art for these and couldn’t find a good solution. Her boots were covered with some kind of metal armor, similar to a spat. What I couldn’t figure out was she could walk with that on top of her foot right where the ankle needs to bend.
I kept refining the boots and experimenting with different ideas. I tried making the armor pads more ovoid, but then that made for a really weird read, almost hoof-like, and they still didn’t look like they could be walked in. Bleh. Throw it out and try something else.
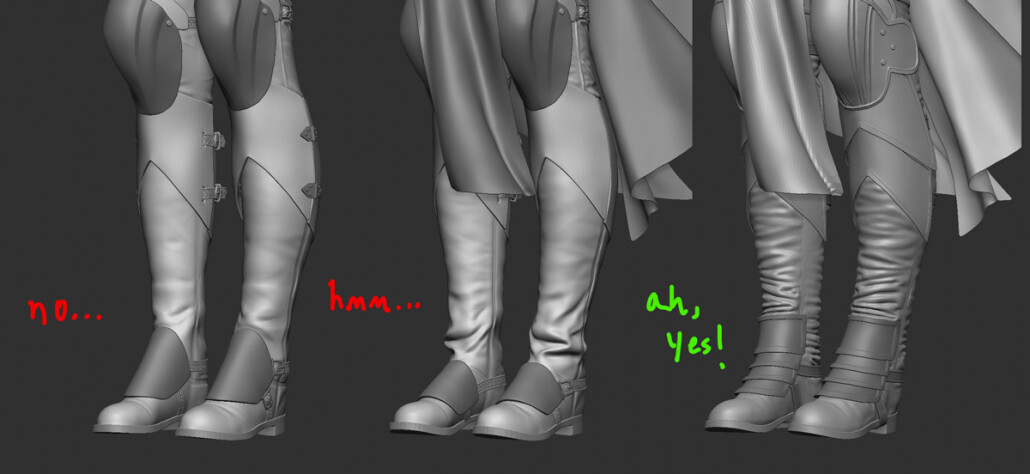
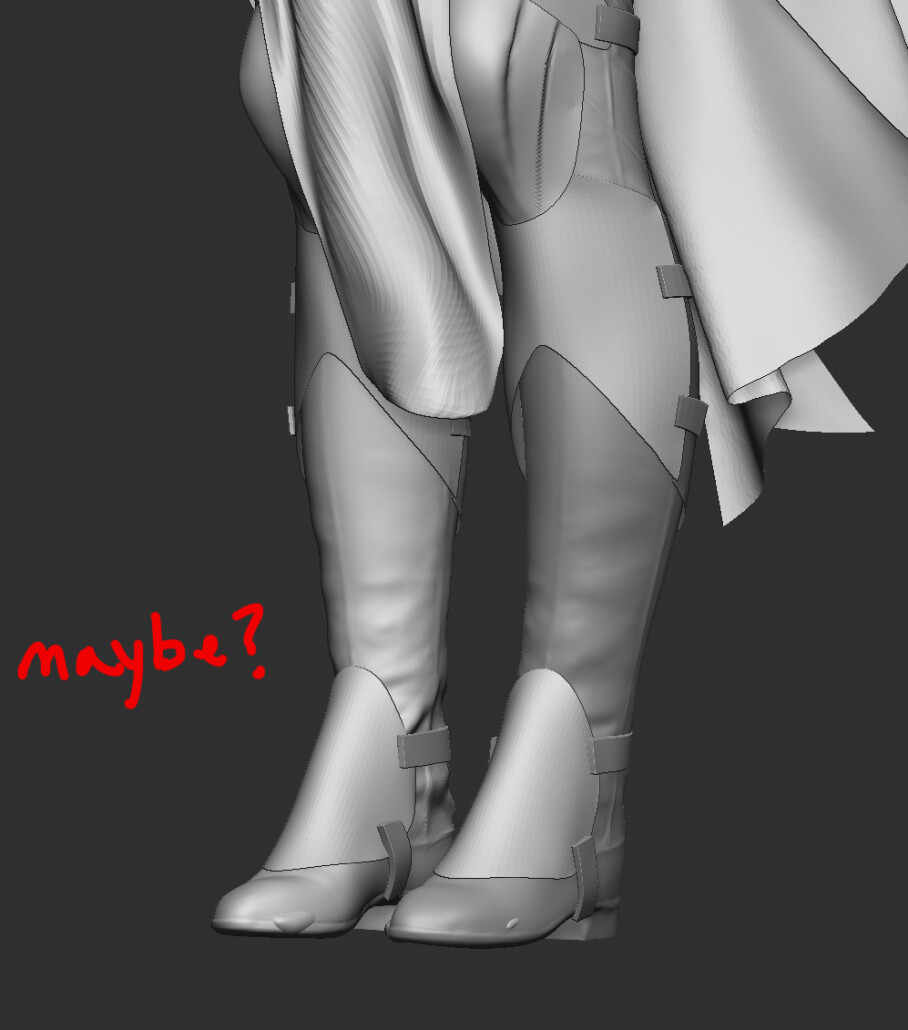
Sometimes the bad ideas come in spades. I tinkered with several variations until I finally thought about lobster style armor for the boots. I liked this solution because the armor is actually articulated and allows for mobility. I then imagined the leather boots as being made from a pliable animal skin, something that’s been worn into permanent deep wrinkles by years of hard wear, and the concept came together. Yes, it is a departure from the original art, but the boots were never well defined anyway. Magic primarily uses horizontal art… feet get left out a lot of the time, I get it. It turned out that the boots were a wonderful place for me to insert my own design aesthetic, and in the end they were one of the assets I had the most fun with
While I was making refinements to the boots I kept working on other assets, taking care not to spent too long in any one area. By this point I had gone into Marvelous Designer to build out the skirts and get the cloak in. The skirts were surprisingly easy to do while the cloak took a lot of experimentation to get right. It kept getting way too many folds and I did the thing in Marvelous Designer where you continually pull at the clothing trying to make the flow better and it just keeps looking worse the more you do it.
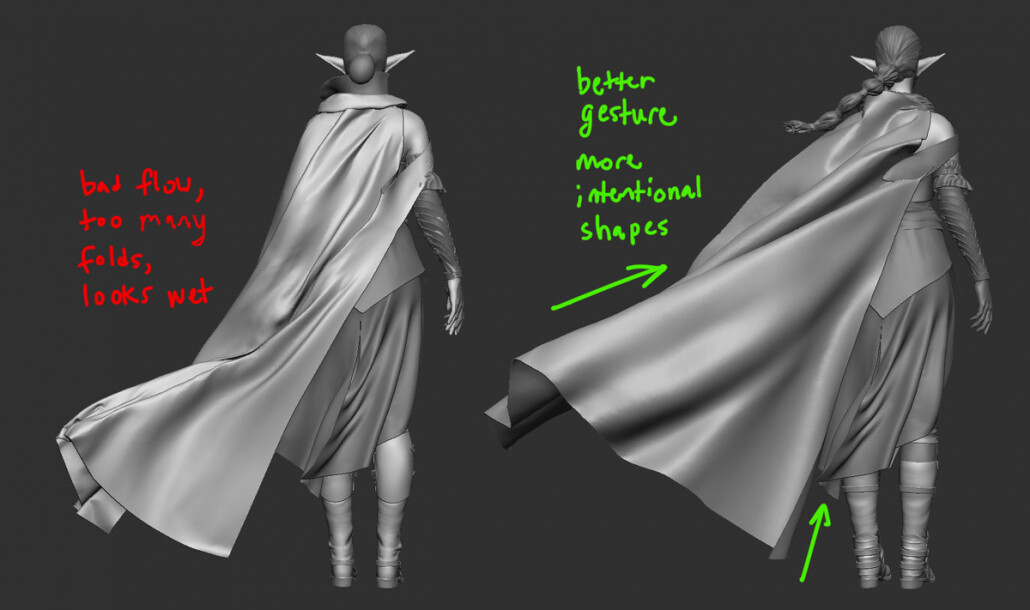
Something that helped a lot in this process was using Marvelous’ wind tool which I didn’t know about before. Instead of the grab tool which just yanks at one point in the cloth, the Wind tool does, well, exactly what you’d think. While I never use Marvelous meshes straight from the program and always I sculpt in more detail afterwards, having a good base to work from makes a huge difference. Besides, I knew the cloak was going to be a big basic shape in the background. I didn’t want to spend time getting perfect folds there that would never be seen.
Similar to the cloak, the wrap around cowl was tricky to nail down in a way that felt convincing. I spent a lot of time messing around. The great strength of Marvelous Designer is that you can play with options quite easily, but it can feel like spinning your wheels while trying out dozens of variations that don’t jive. Wrapped garments in particular are hard because you have to get the simulation to hold the folds against each other with pins or seams. My strategy is not to get it perfect, but get it good enough that I can take it out of Marvelous Designer and into ZBrush where I have much more sculpting control.
Back in ZBrush, I used the Move brush to smoosh the mesh into place but one issue was that the topology was hell: all the different layers from the simulation in Marvelous Designer were intersecting. Intersection = grumpy times ahead! So, I took a little time to retopologize it manually in Blender, brought it back into ZBrush again and finally finessed some higher level details in. Hard won, but it was worth it.
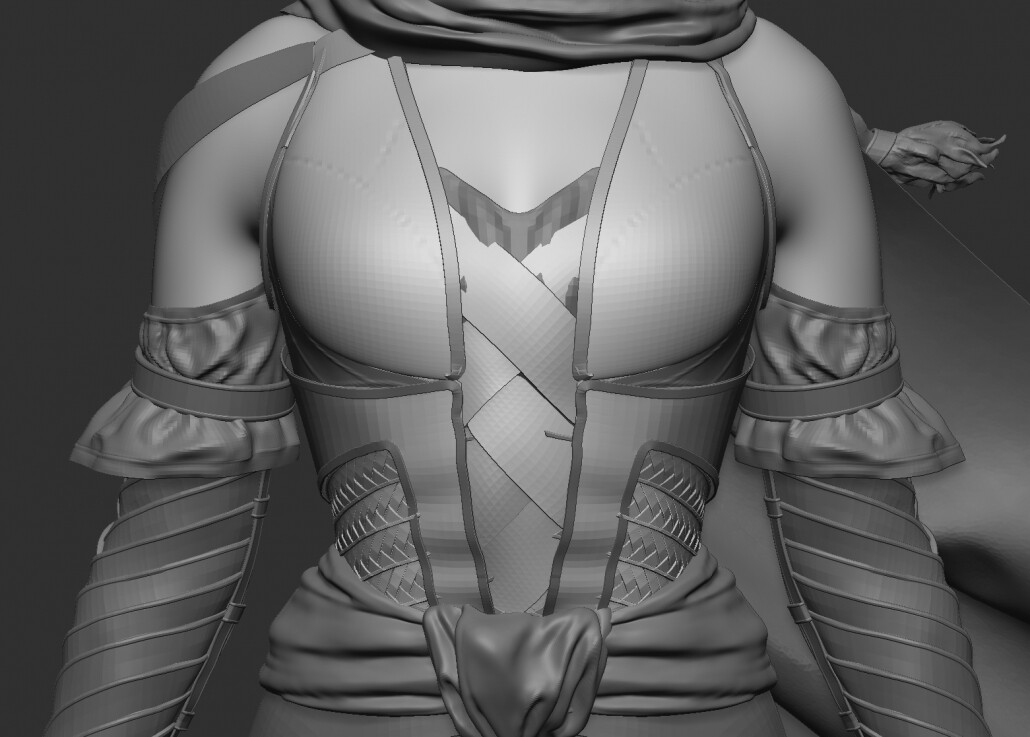
I kept returning to the corset, shirt and gloves during this process. While they were some of the most detailed portions of the costume they were also the most clearly spelled out in the concept art so it was more a matter of time and attention to detail. After I knew what I wanted to do here, I retopologized assets with ZRemesher and also sometimes in Blender to get nice clean geometry, then returned to ZBrush, subdivided and sculpted in more layers of detail. Wash, rinse repeat.
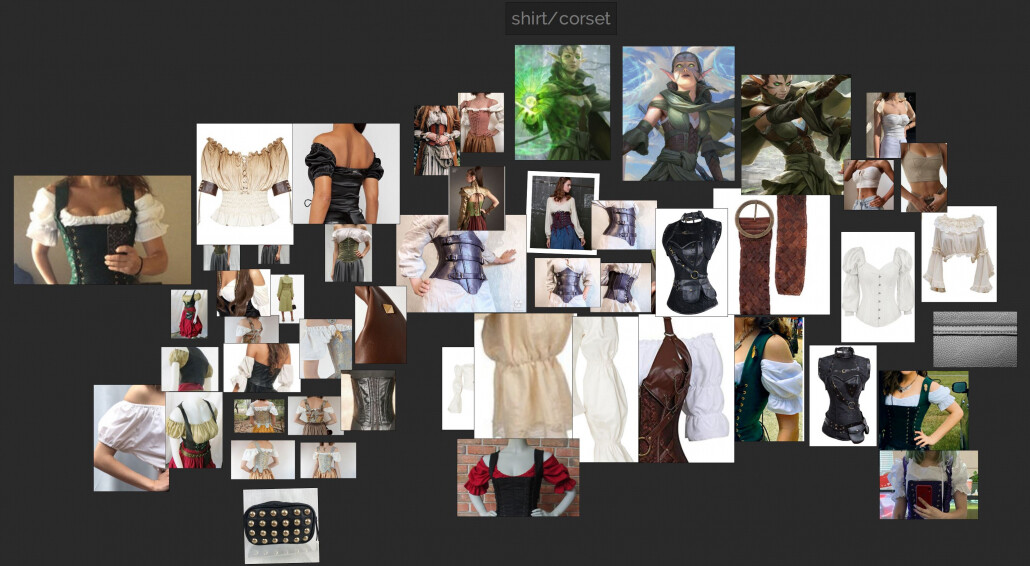
Throughout this process the Pureref board on my second monitor continually grows. I find sites like Pinterest and Etsy to be fantastic for things like period clothing. I have these memories of wandering into the fashion studio back in art school and the one thing I remember is how much felt like construction. Even the most diaphanous garment has to be built and designed to handle the stress and friction of real life. I like to inject this handmade feeling into my 3D work. It just becomes more interesting for me that way.
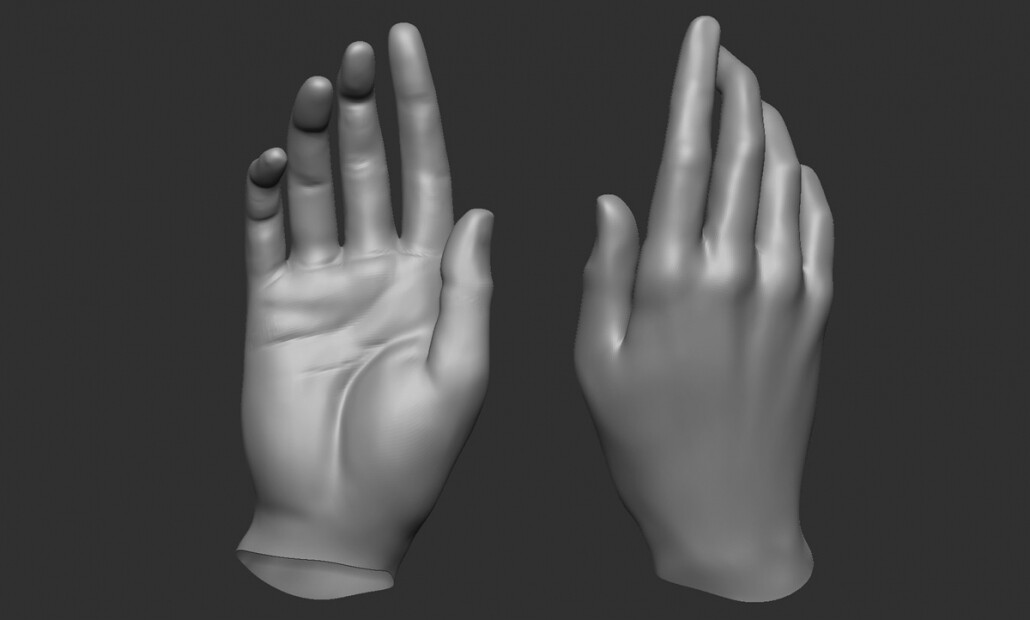
Sometimes Nissa was depicted with full length gloves, and sometimes not. I decided to eschew them and go barehanded as gloves felt too disconnected from the natural feeling I wanted. Now I had the classic challenge of making straight-up hands, but they are really just a matter of effort and I actually find them quite relaxing to sculpt. I give myself the simple goal to make every hand a little better than the last. I looked at classical sculpture for help in getting a nice gesture here and it was a pleasure to return to the works of the old masters for inspiration.
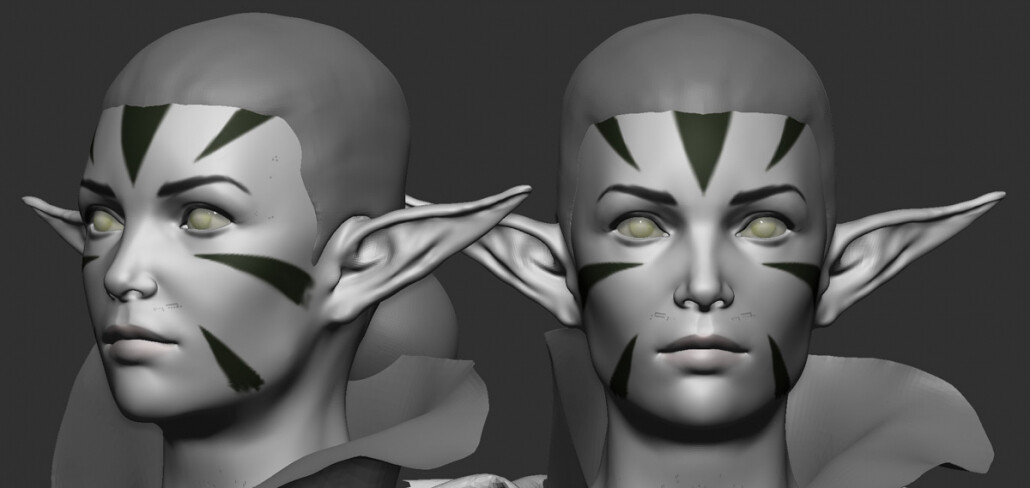
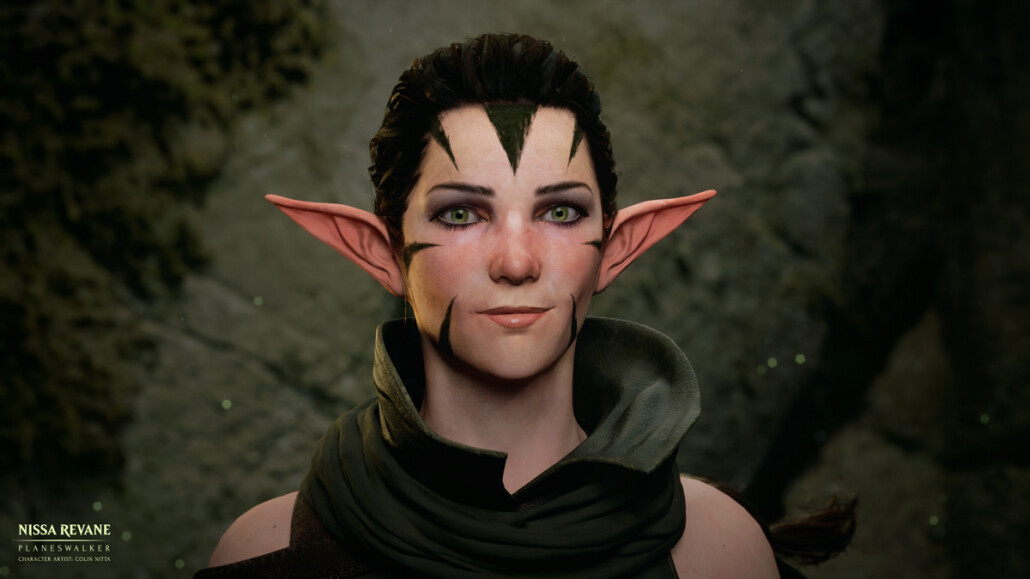
And the face… the hardest part of every model, every time. Doesn’t matter how much I practice faces, they are ALWAYS tough and require my A-game. I like to model the forms very slowly, toggling polypaint data on and off that helps to visualize eyebrows and makeup (very important for female characters). This was my first attempt and after getting it to a reasonable place I let it sit and marinate for a time while I worked on other parts. I like to do this because a face is so critical that it can’t really be knocked out in one sitting. It has to sit there until you’ve gained enough perspective to judge it correctly.
After staring at it for some time I decided it was time to start fresh. The first face just looked off. It looked too young and had a strange, barbie-doll like sharpness to the features. The first reference model I used had these qualities as well so it wasn’t surprising that they came through. With this in mind I re-sculpted a new likeness that I was much happier with.
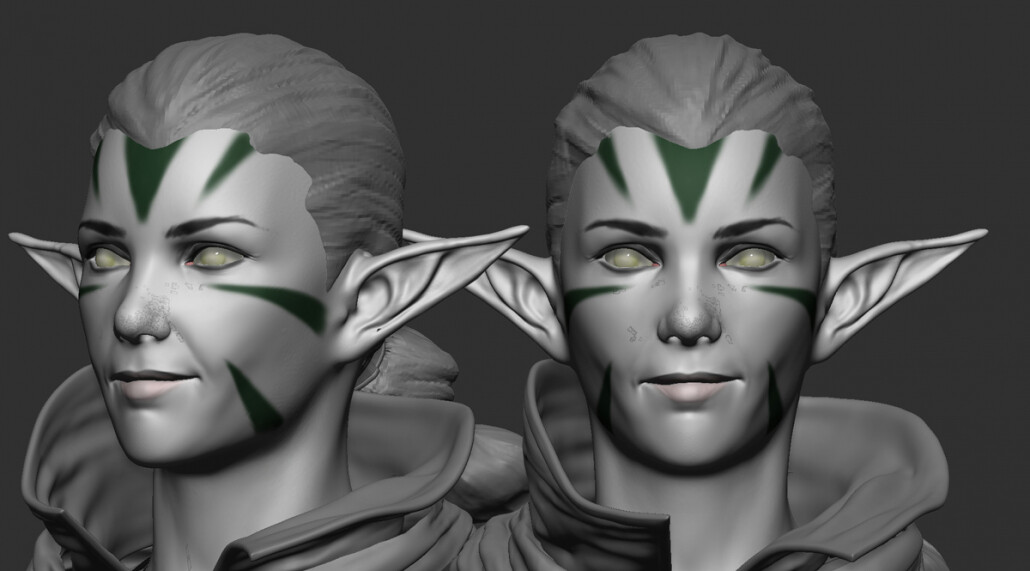
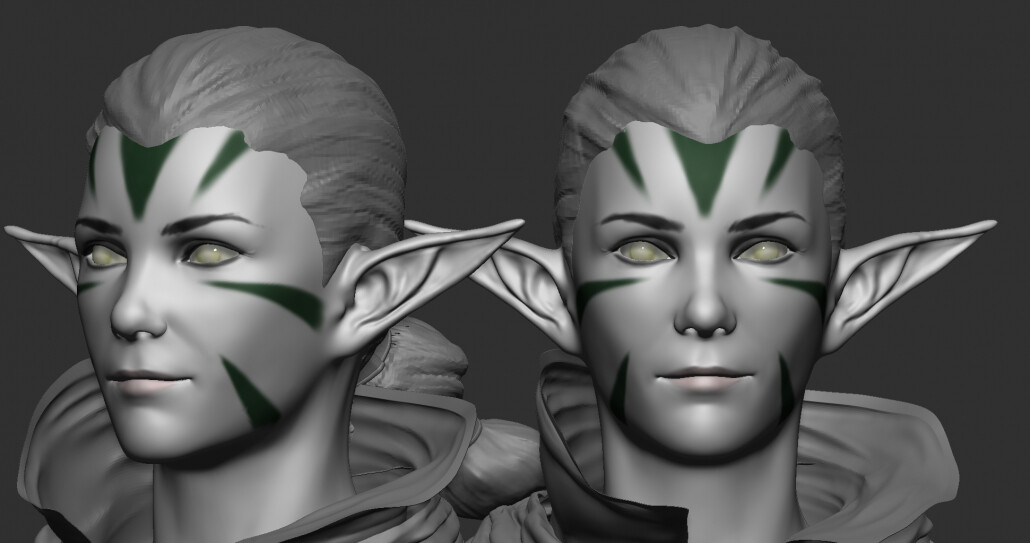
This was actually followed by a third phase in which I attempted to nail a slight smile as an expression on the character (something odd was happening with my polypaint data on the mesh at this point which is causing those strange marks on her nose). This was tough! So many muscles are involved in a smile, even one that is comparatively small. In some ways, it is more difficult that a full, open smile with teeth because all the movements are much more subtle. One thing that cause me some grief are the thinness of the lips when they are pursed together in a closed mouth smile. It is so easy for them to appear withered or aged. My solution was to sculpt them thicker and plumper than I wanted, then when I posed the low poly model I curled them in slightly to show the way the flesh would compress and tighten in that area. It was an unusual method but it worked well enough.
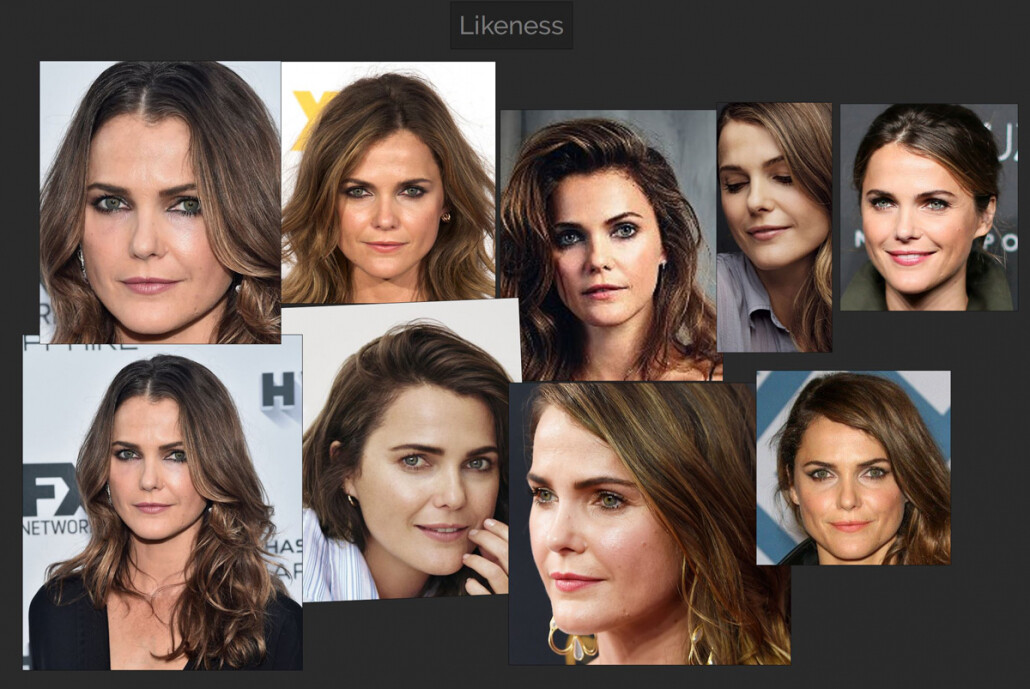
I decided to go with the actress Keri Russel as my new model. You can see that pursed lip smile she has right here. My wife and I watched all six seasons of The Americans recently and it is hands-down my favorite TV series ever. Keri Russel delivers a fantastic performance as a Russian sleeper agent in 1980’s Washington D.C. Throughout the show you spend all this time staring at her features, watching these complex emotions flash across her face and you have to wonder what she’s thinking. Also, it just felt right for Nissa to be slightly older. After all, in Magic lore, Planeswalkers are these incredibly powerful wizards that make epic journeys across time and space. It makes no sense for a fresh faced 18-year-old to be doing that!
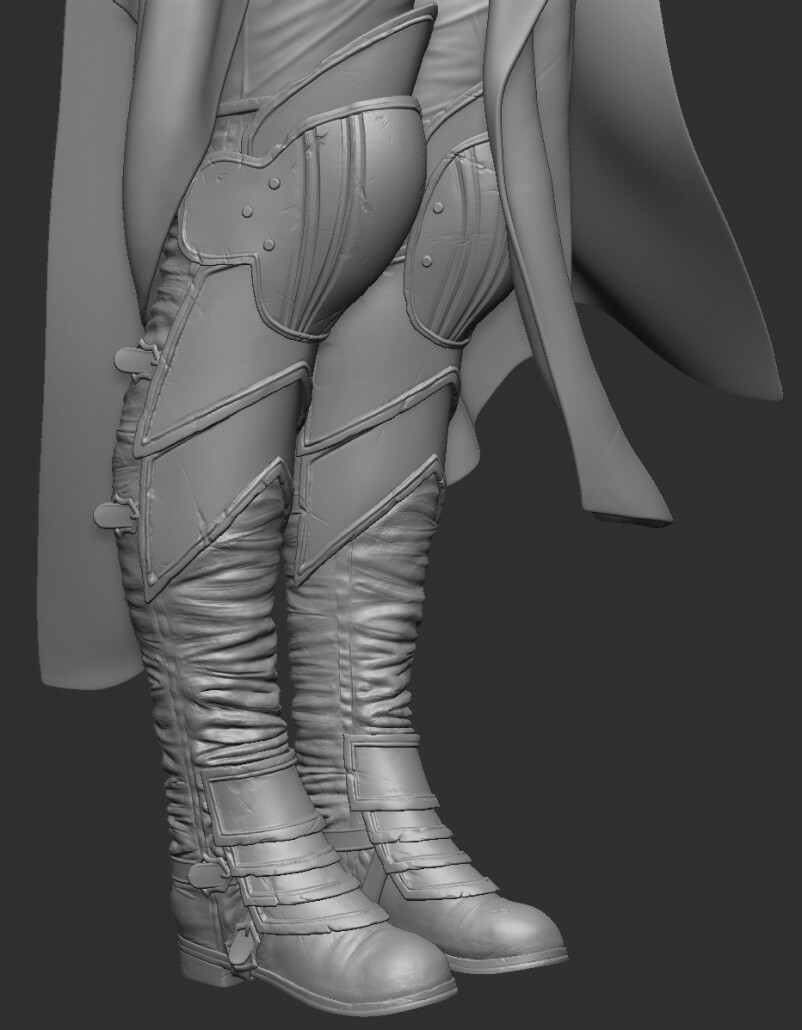
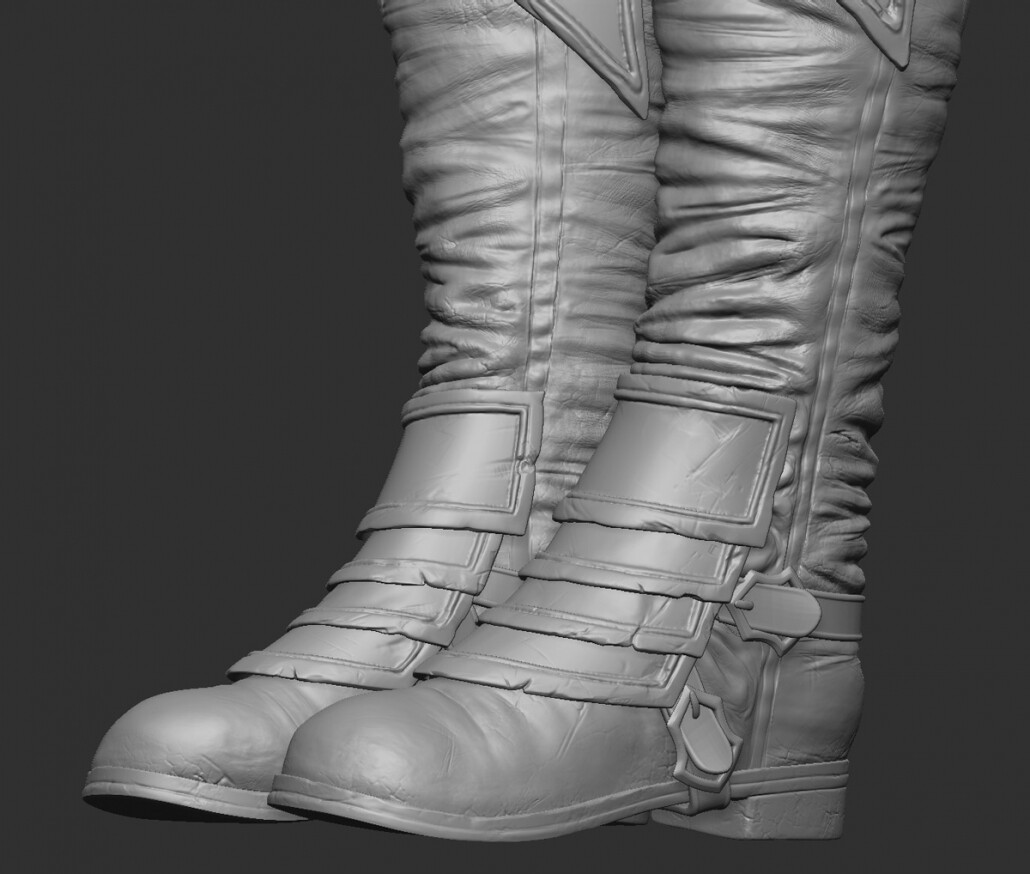
After much of the problem solving stage in the high poly, it is all refinements and detailing. I decided to really go for it with the boots and they kind of ended up being stars of the show in their own right. There is this boot project by artist Safwen Laabidi that is sort of famous in ZBrush circles – I’ve seen multiple references to it as a pinnacle of mid poly detailing. I really liked how aged and distressed those boots looked and how much detail the artist got in with his high poly in ZBrush. It takes so much patience to do this and you have to resist the urge to just skip this step and instead slap on some procedural textures in Substance Painter. Problem is, they never look as intentional that way, at least when it comes to lifelike distresses, cracks and weathering on organic surfaces. Safwen also has a brilliant technique for stitches that I used (more on that later) as well. So much good stuff from one pair of boots!
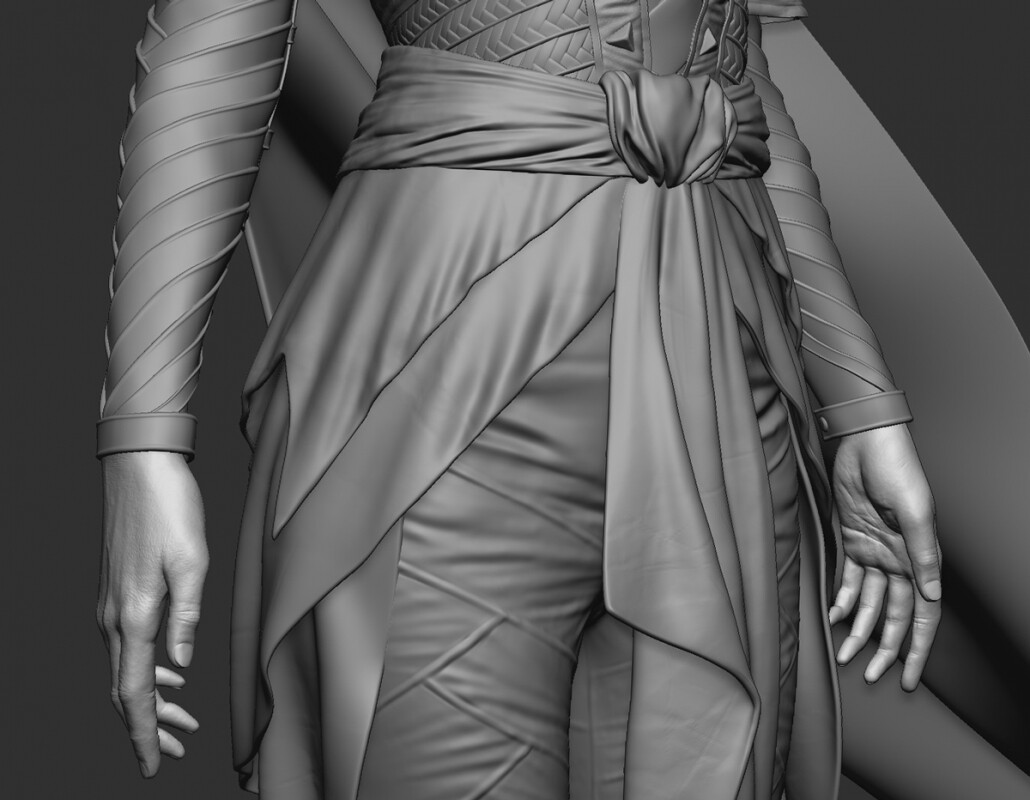
All the other assets get a final pass as well. The fabrics get subtle memory folds and I sculpted in compression folds into the sewn leather panels of the pants. I used hand textures from a scan model that I purchased from 3dscanstore.com and reworked them into alphas that I then projected onto the hands. I had a hard time finding reasonable hand textures elsewhere and it only took a slight bit of tinkering to get it to work.
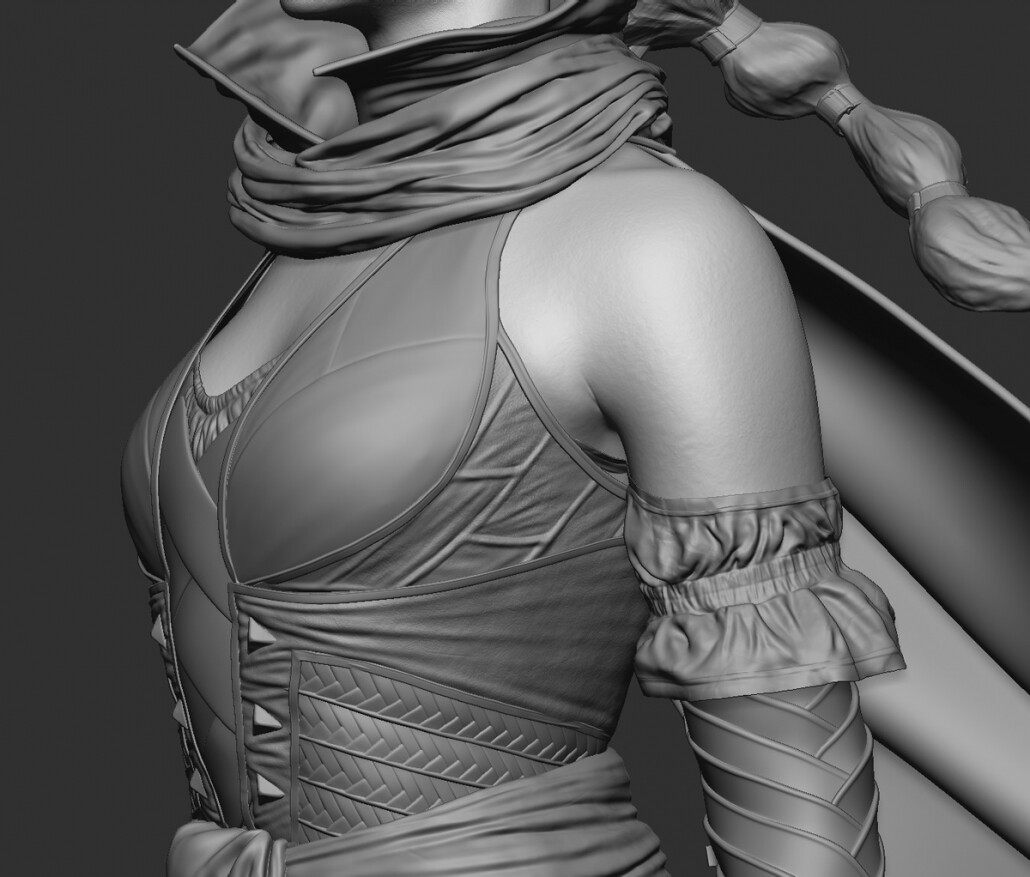
I really enjoyed hand sculpting the blouse sleeves from the block-in all the way to their finished state. I probably could have done them in Marvelous Designer but I wanted the challenge. You’ll notice that some parts of the leather, like the glove sleeves and the bottom portion of the corset are quite smooth and without texturing here. I could have hand sculpted textures on to those leather bits… but I was worried it would take like a year to finish. Every single overlapping piece would have needed to be finessed… my eyes start to hurt just thinking about it. I decided to leave that level of detail up to Substance Painter later. Pick your battles, right?
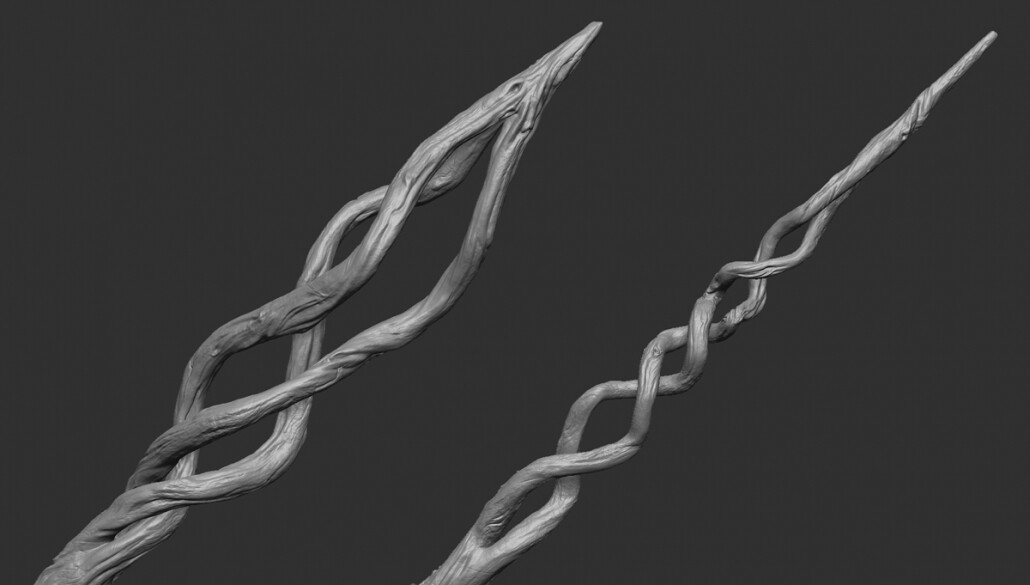
One happy day was spent just texturing the staff. Pure meditation here, just getting lovely wood grooves, aged knots and cracks and organic textures to flow along the surface.
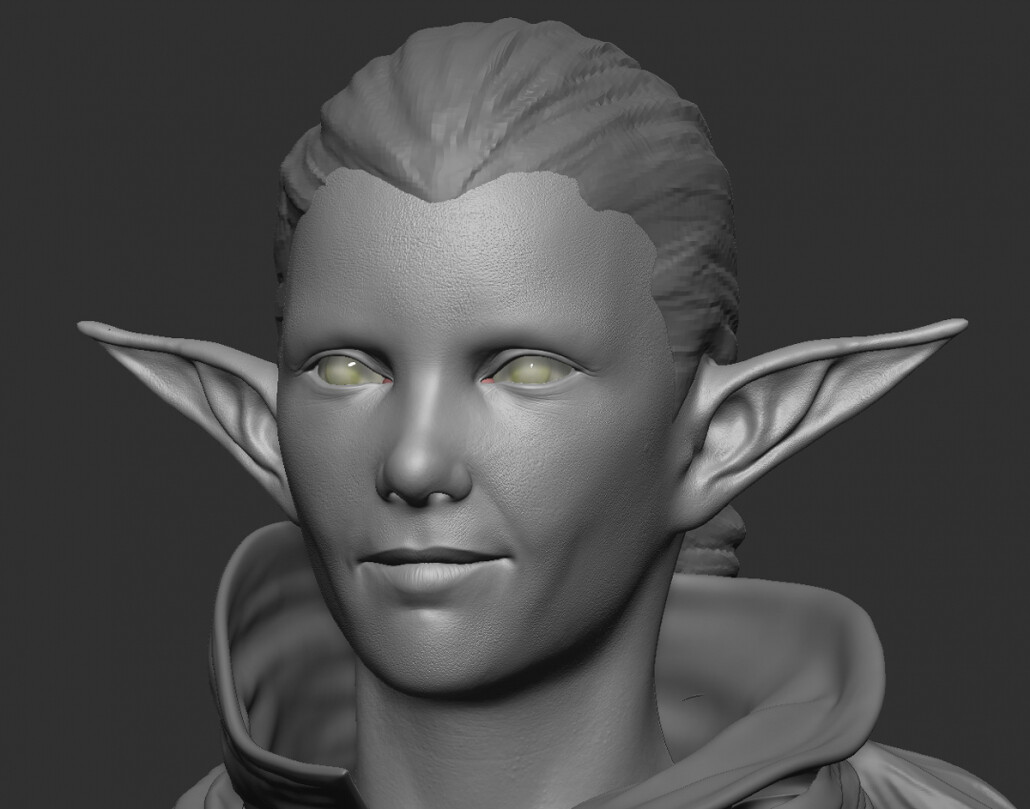
And the face gets final texturing treatment as well, using skin alphas from texturing.xyz. I prefer to simply drag them one at a time with the Standard Brush and DragRect, using the Morph brush to clean up any mistakes. I’ve gotten fairly quick at doing this – there’s not too much fuss and I don’t have to jump into another piece of software this way. The simpler I can make my process, the better.

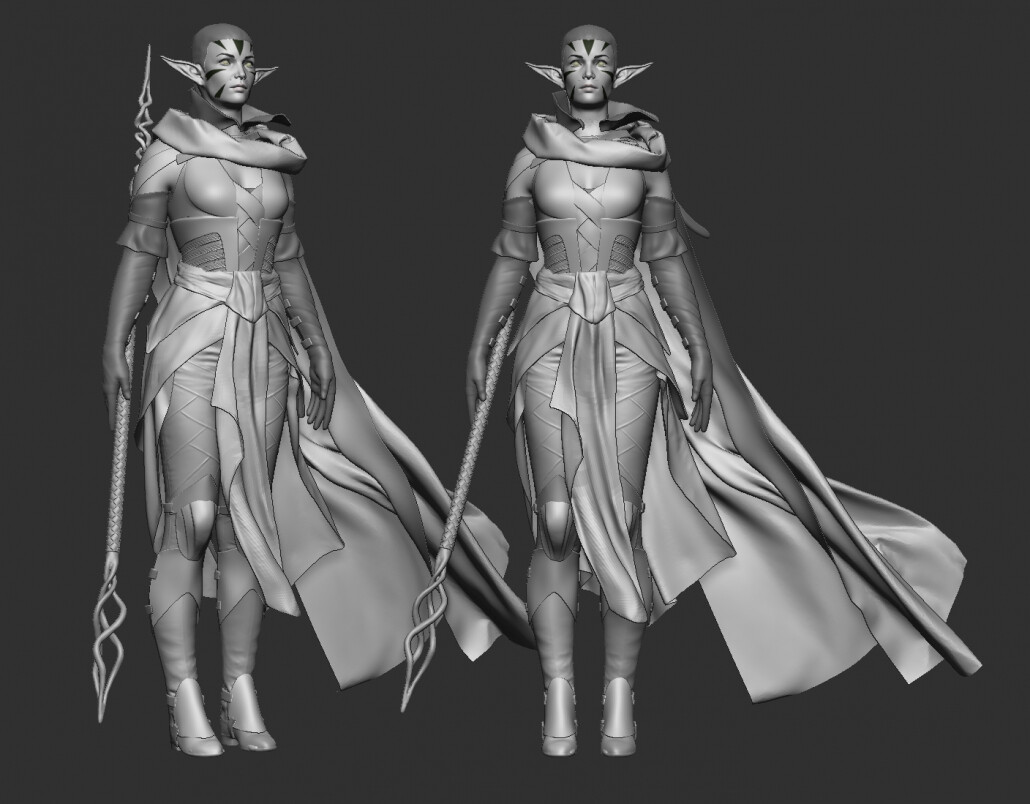
And here’s the final high poly model at this stage of the project. I return to it as needed, but for all intents and purposes it’s checked off as a giant task that has reached completion. I’m still relatively new to 3D so this is actually the most detailed high poly I’ve ever made! Wow, bit of a milestone. As expected, I enjoyed the high level detailing, especially in the boots. But the hard work is always in the problem solving and the design challenges and in that sense, this high poly is very similar to all the to others I have made.
Next up: Part 2 – Retopology, UV’s, Texturing… and Unreal Engine 5!