

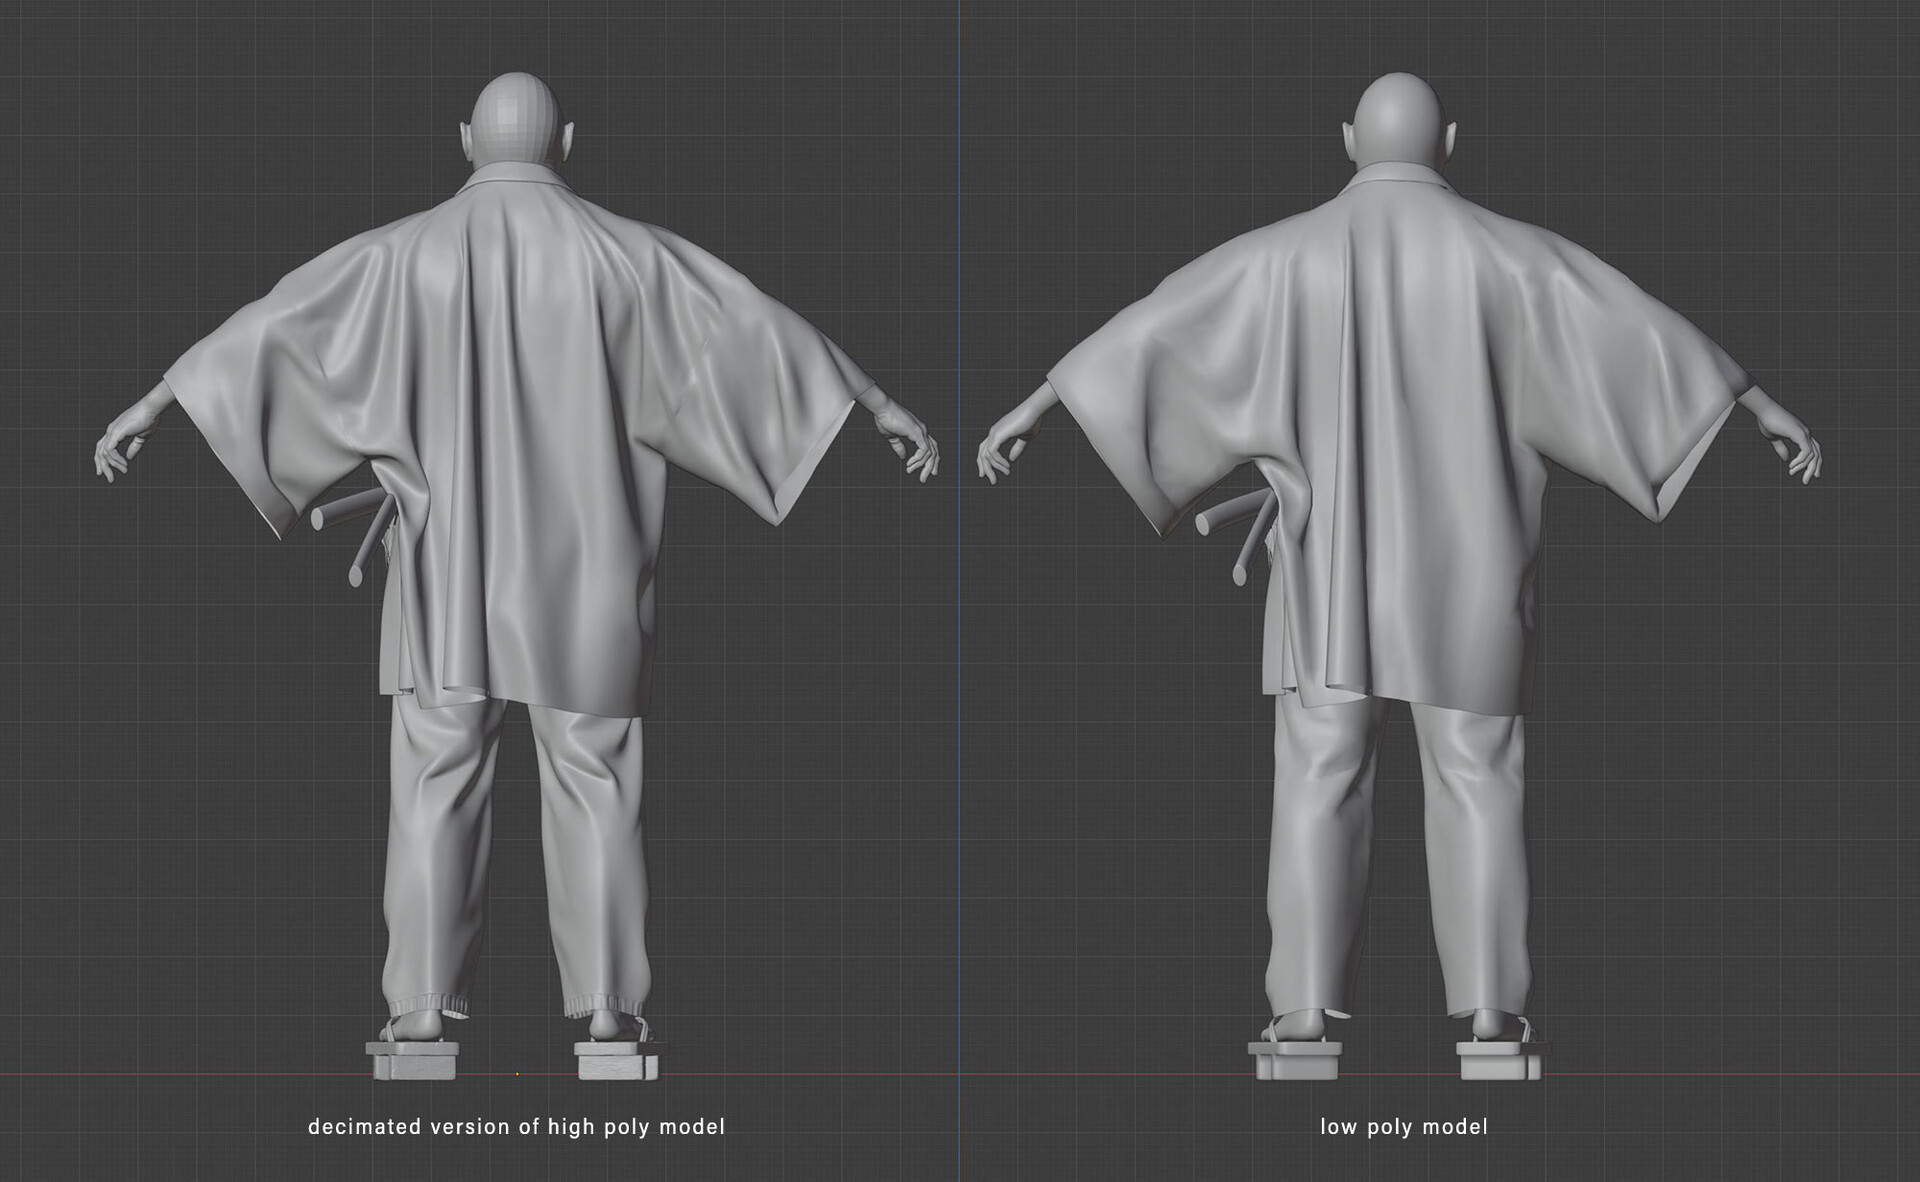
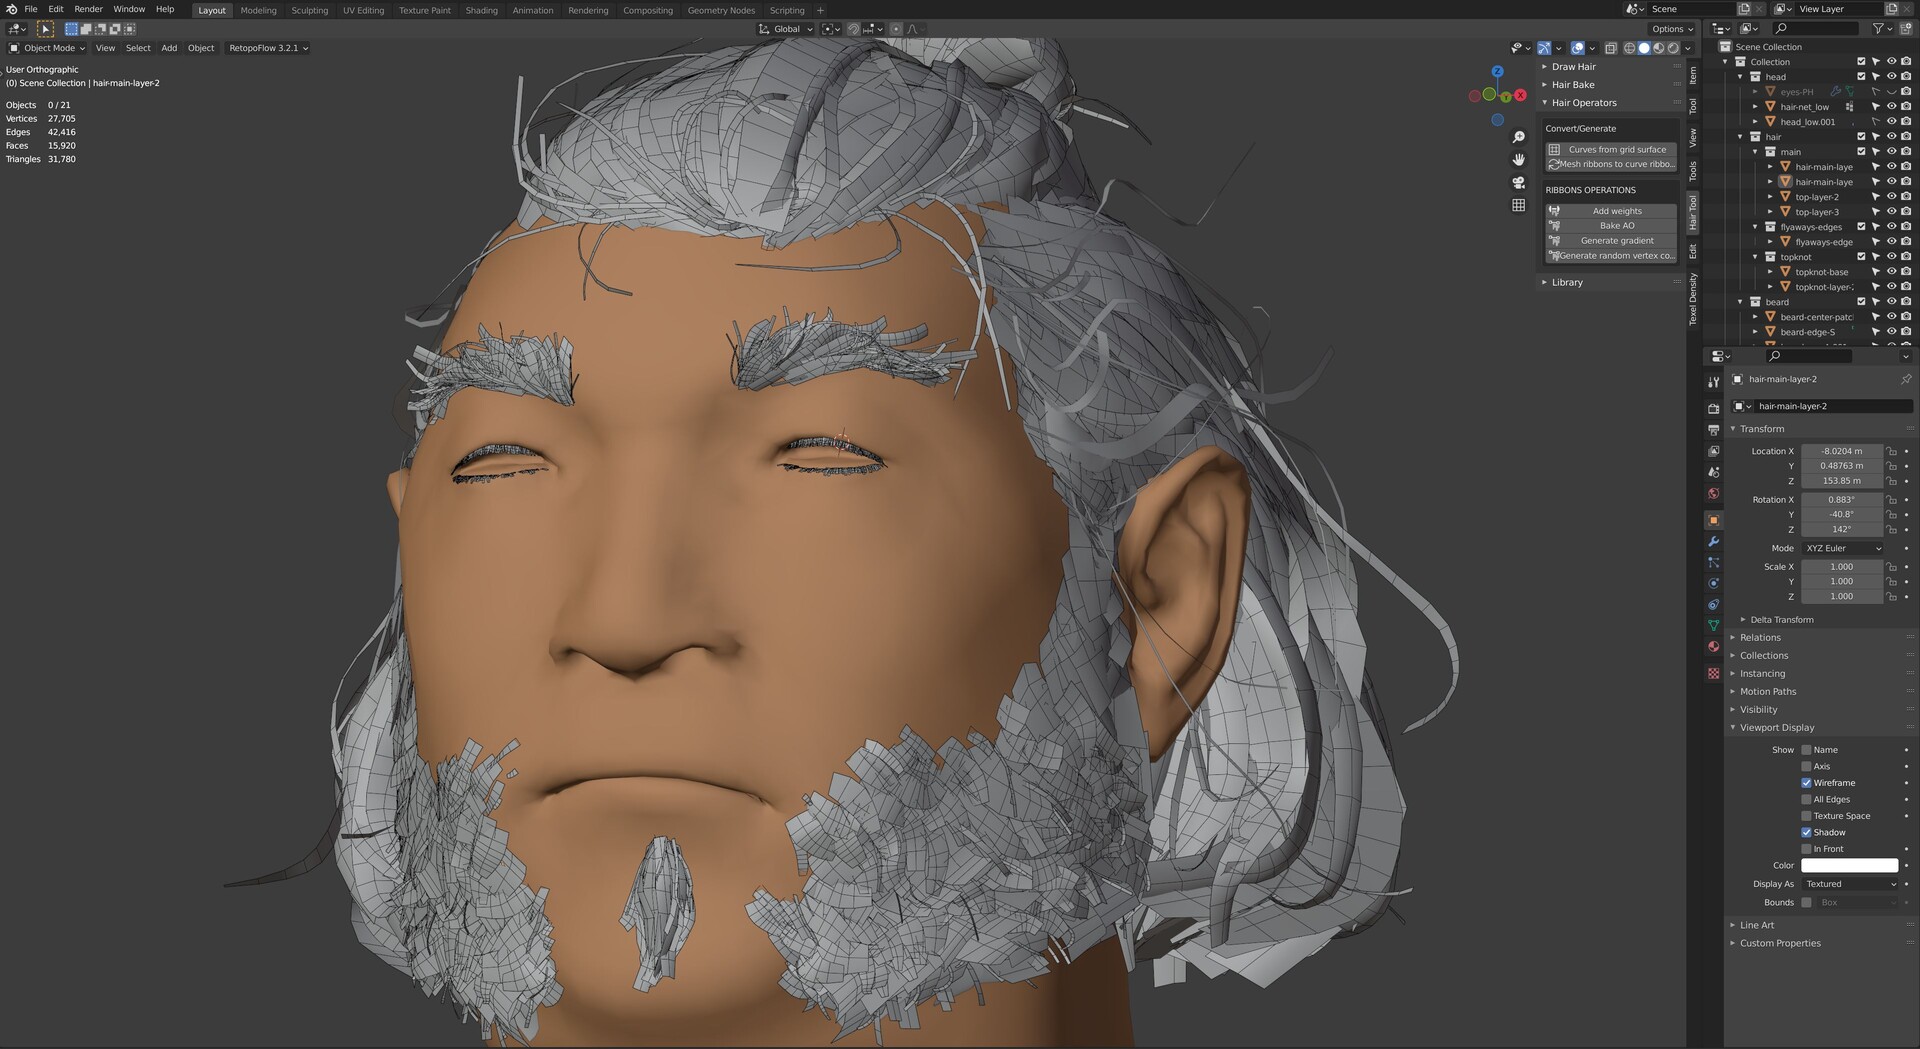
I'd be lying if I said that I looked forward to the process of retopology with anything resembling joy. However, I do like the fact that I've gotten a bit better at it than I was in the beginning. With Master Koi, I was aiming for a 100,000 triangle count and I wanted to see if I could land somewhere in that ballpark while maintaining silhouette and crucial details.
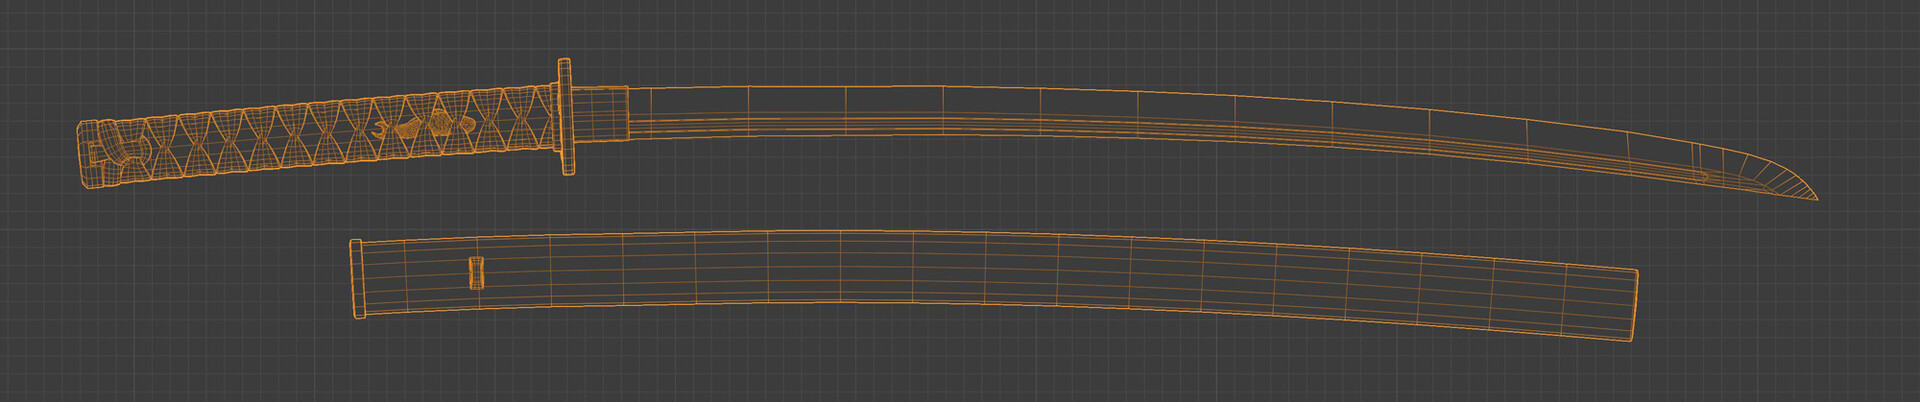
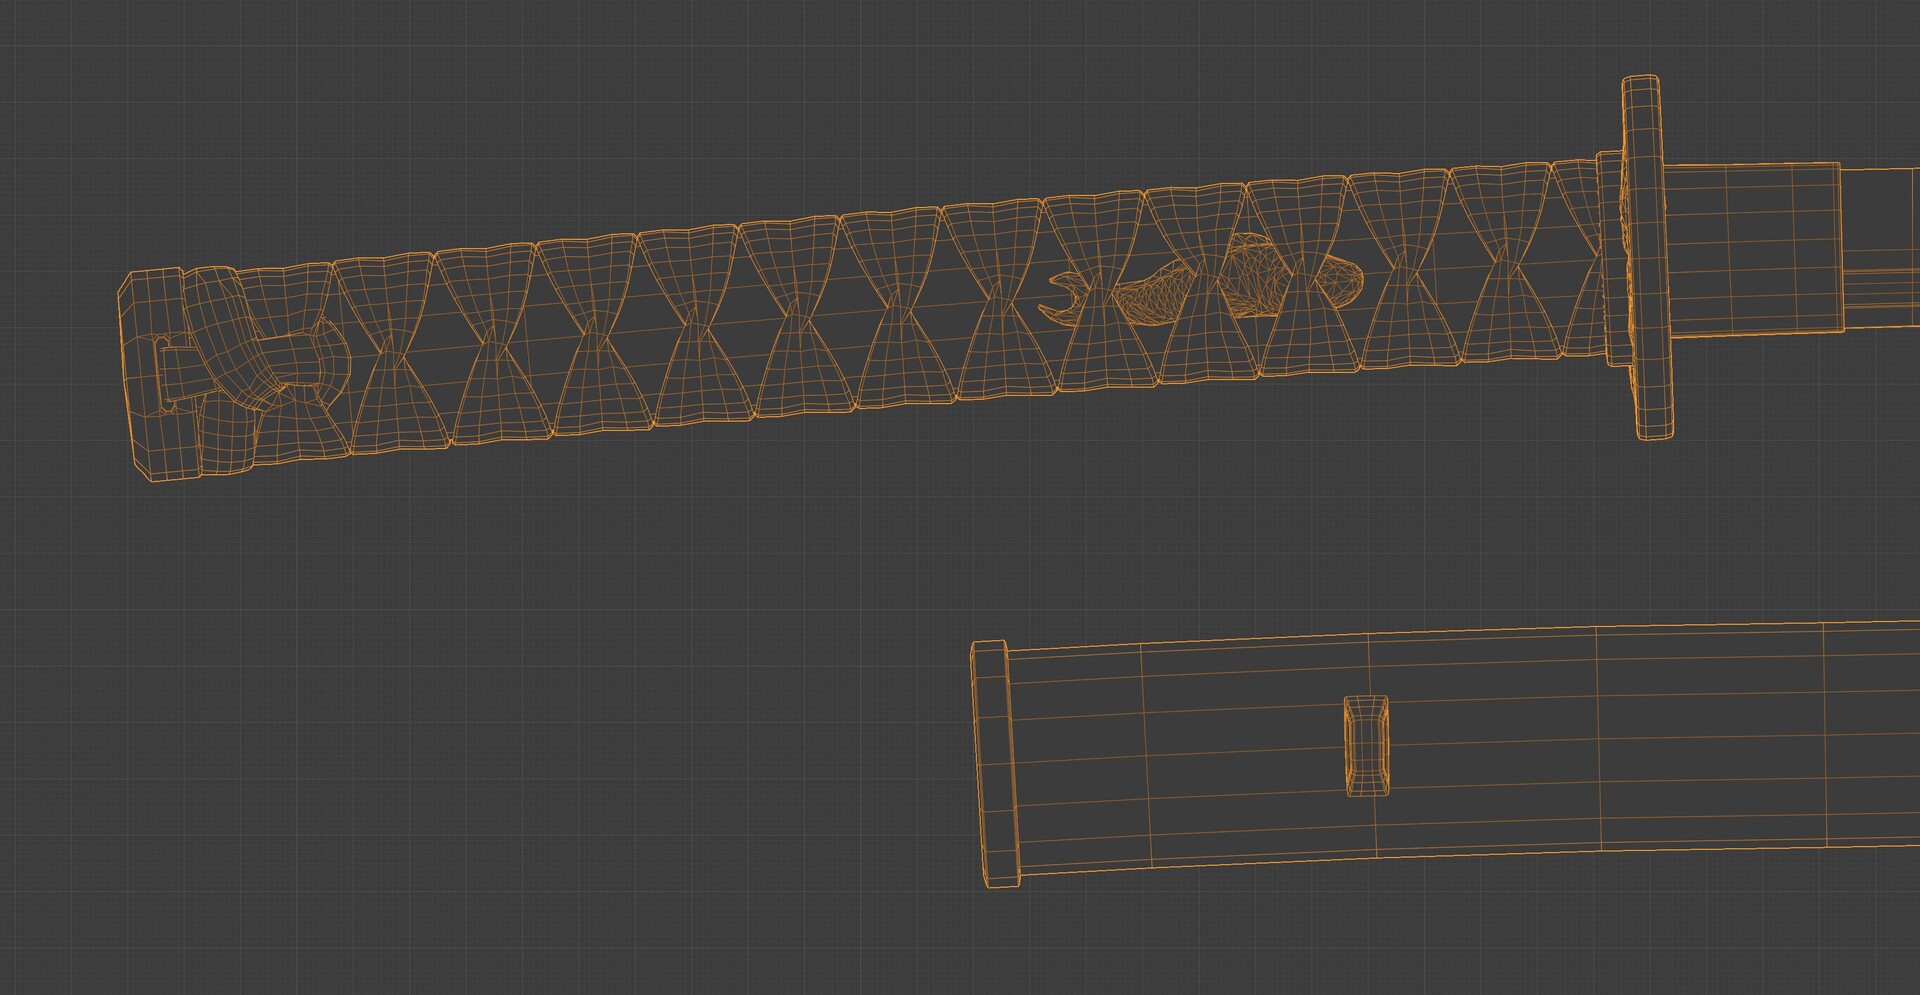
An early lesson in retopology was to always beware of straps/ropes/anything cylindrical that curves. This kind of geometry will eat up your poly budget SO fast. A sticking point ended up being the handles of the swords. As they wrap quite tightly around the handles, the wraps could have easily been baked down as normal map textures onto a single cylindrical mesh. But... I knew it just wouldn't look nearly as good in close up shots. I wanted the detail of the fabric knots forming that mass at the bottom as well. In the end, I paid heavily for both swords (together they ended up being about 38k tris). However, they looked so much better in the final renders! I think something like this really just depends on priorities. He's a sword master, so the swords are a top priority.
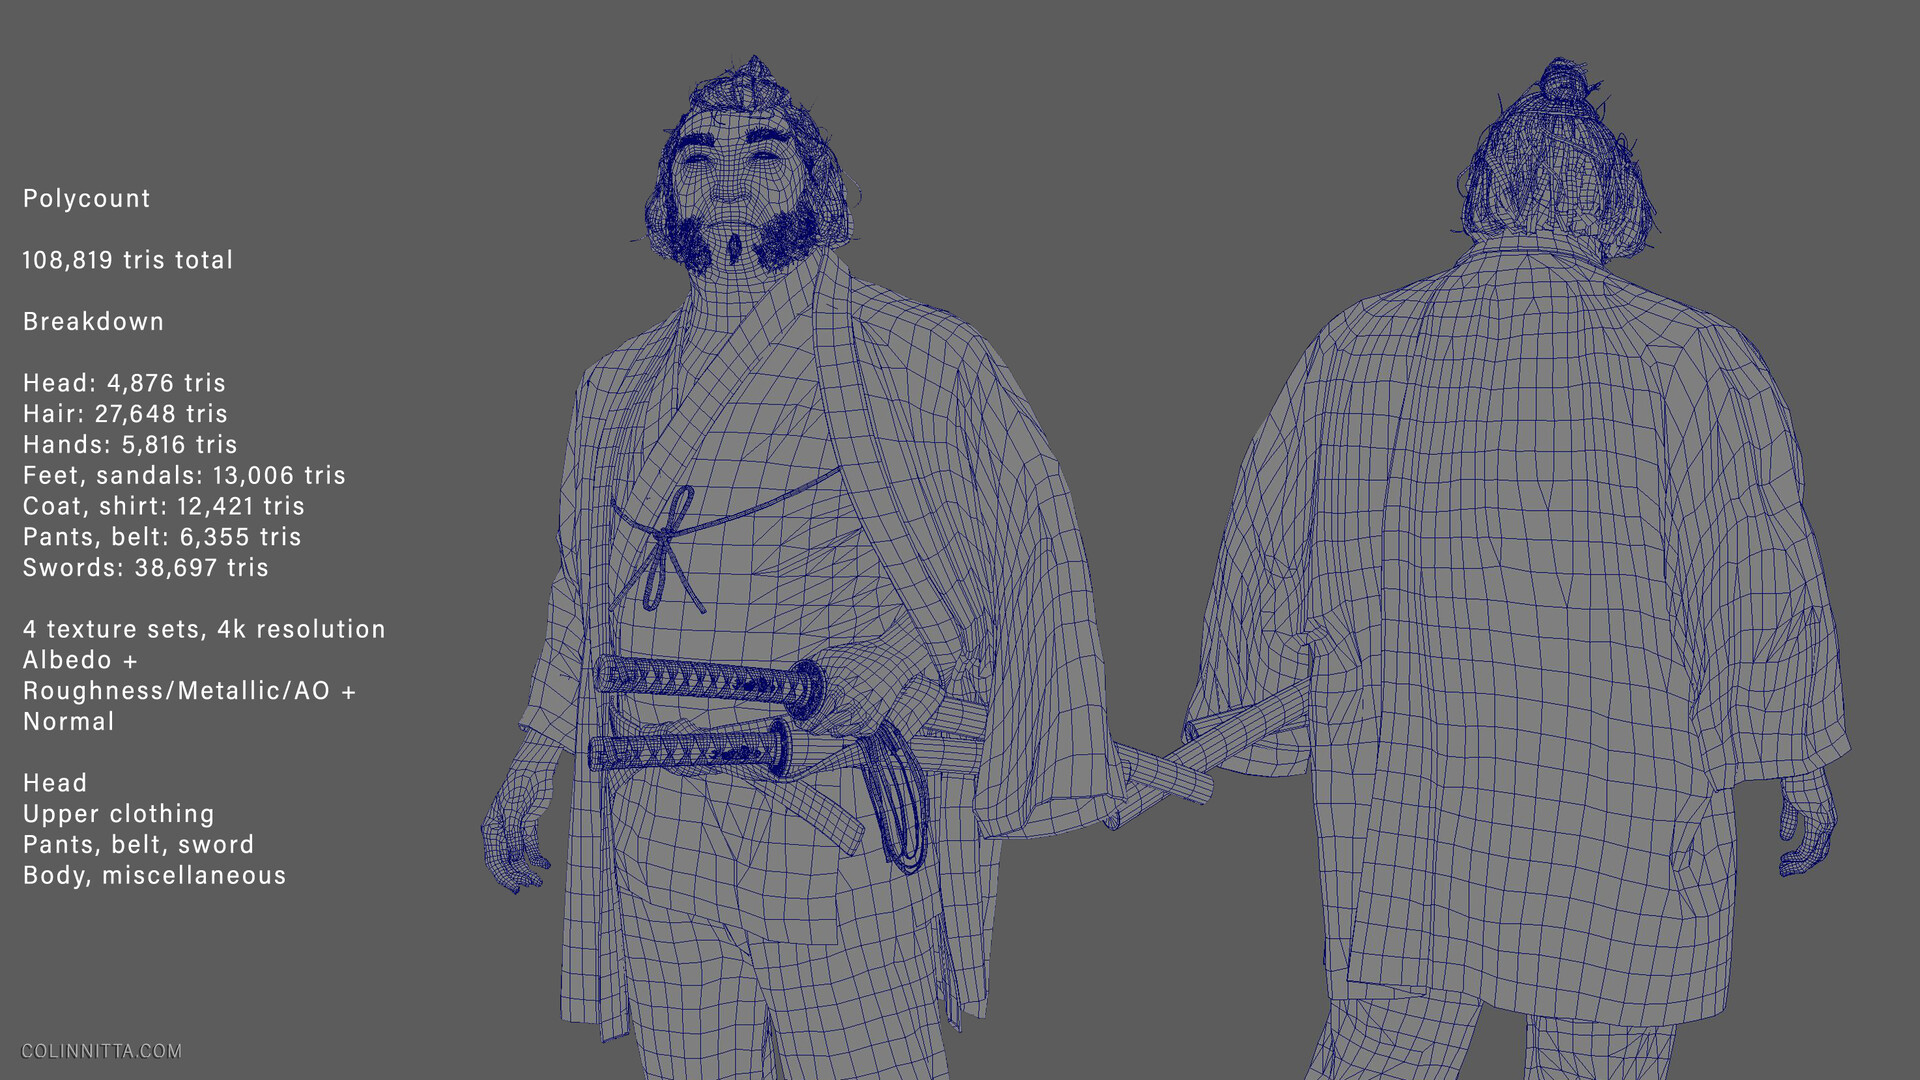
Following retopology, I did my UV maps. This process was fairly straightforward and I gave myself a goal of being as efficient with my texture sets as possible. I managed to get it down to four: Head, Upper Clothing, Pants/Belt/Sword, and Body/Miscellaneous. This is less than half of what I've done with previous projects, so it was cool to see just how much I could trim down and optimize while still maintaining AAA level quality.
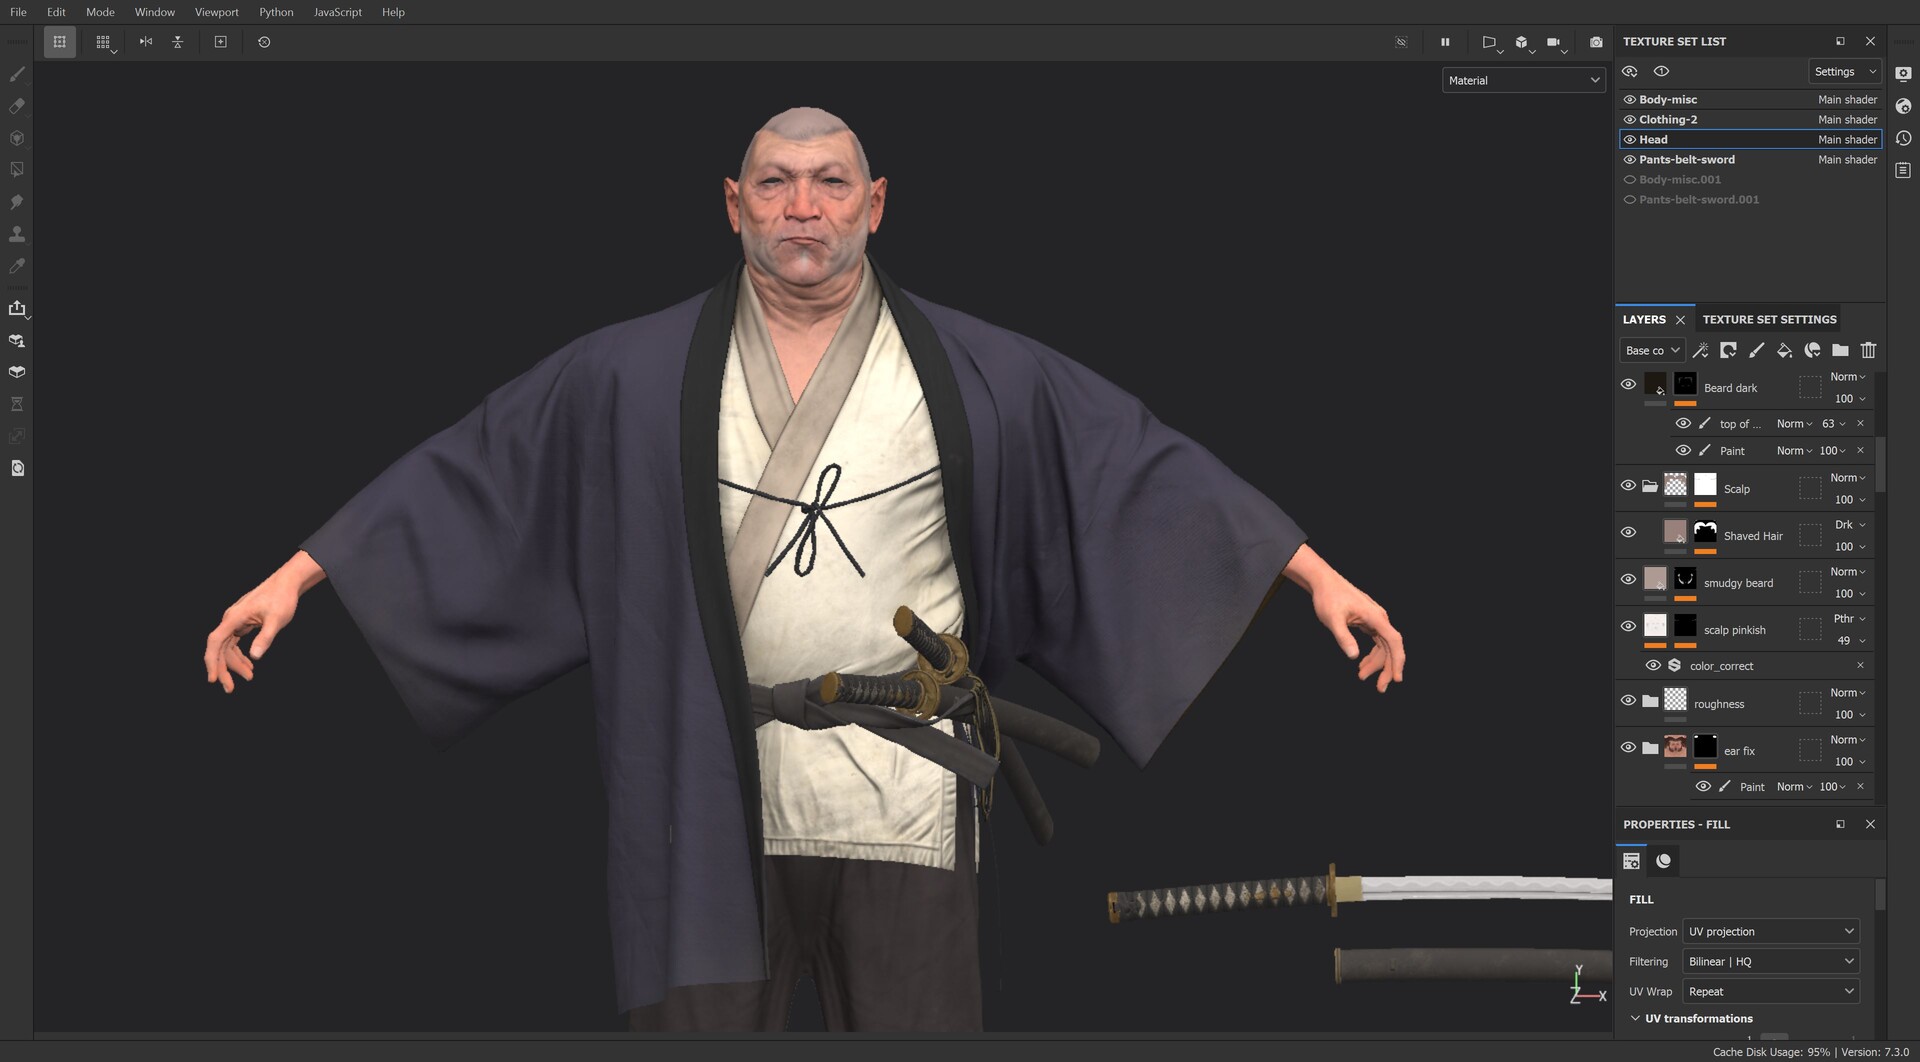
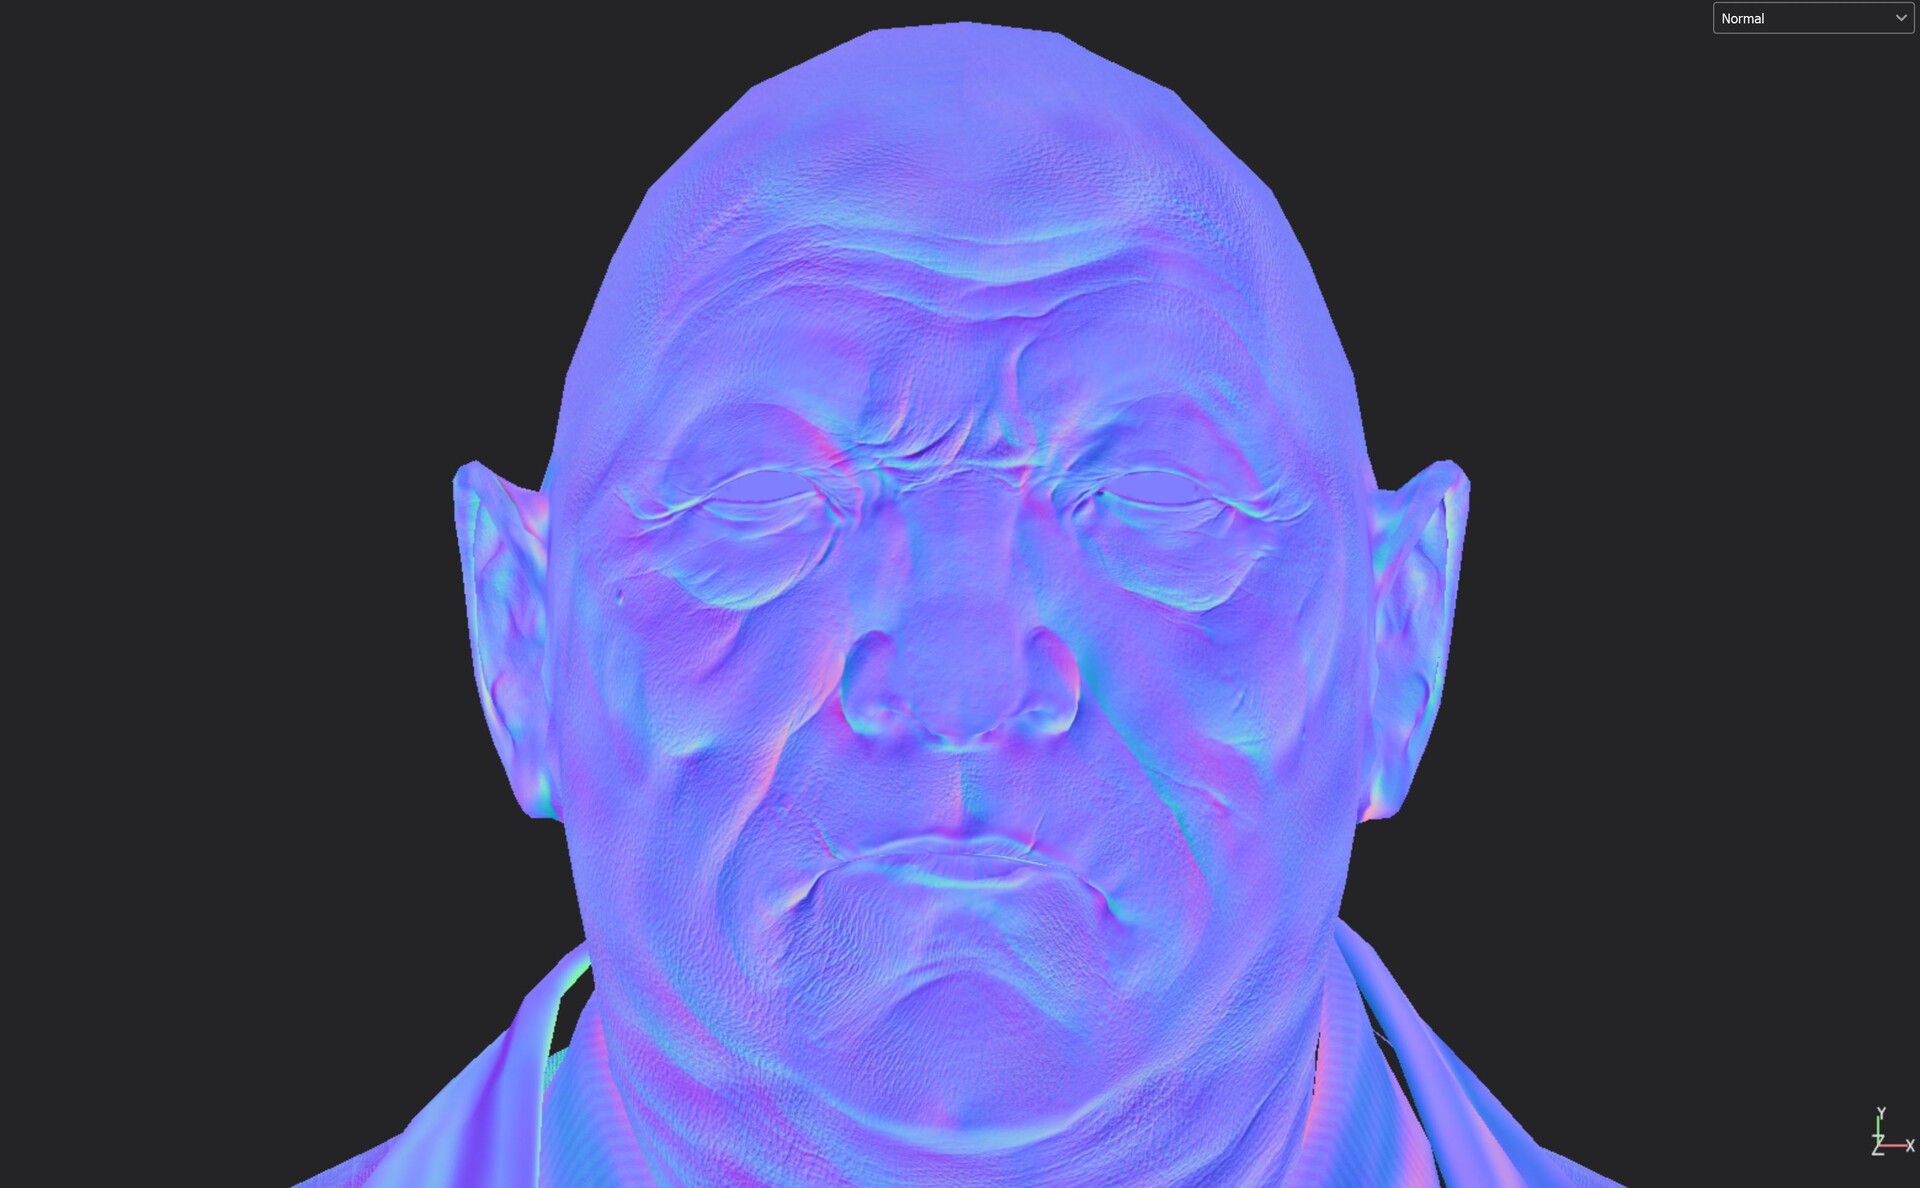
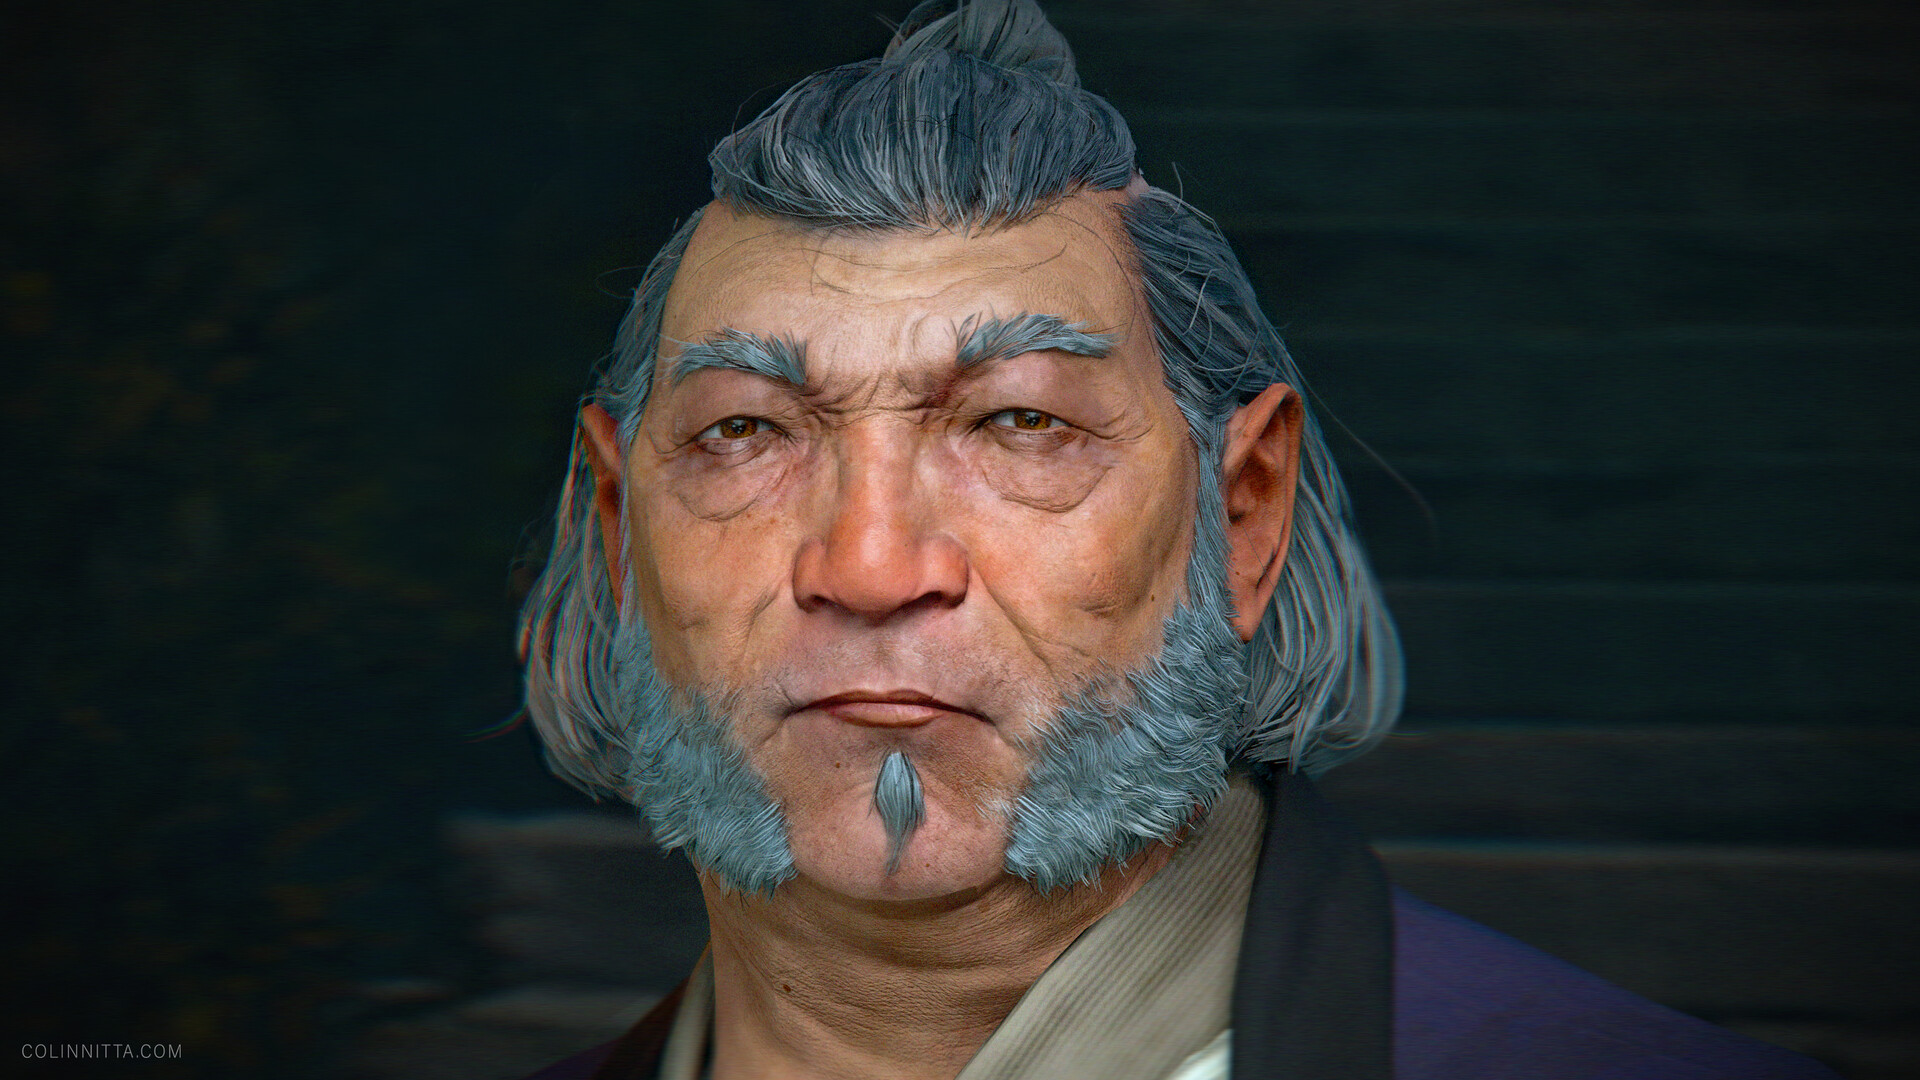
And, my favorite part: texturing! I think texturing is what keeps me coming back to real-time models again and again. Seeing those normals bake down, it's just magic, every time. And of course, painting in base colors really starts to make the character feel real and pushes it beyond the work that's already been made. As a character artist I've learned to savor this moment because it takes so much work just to get here!
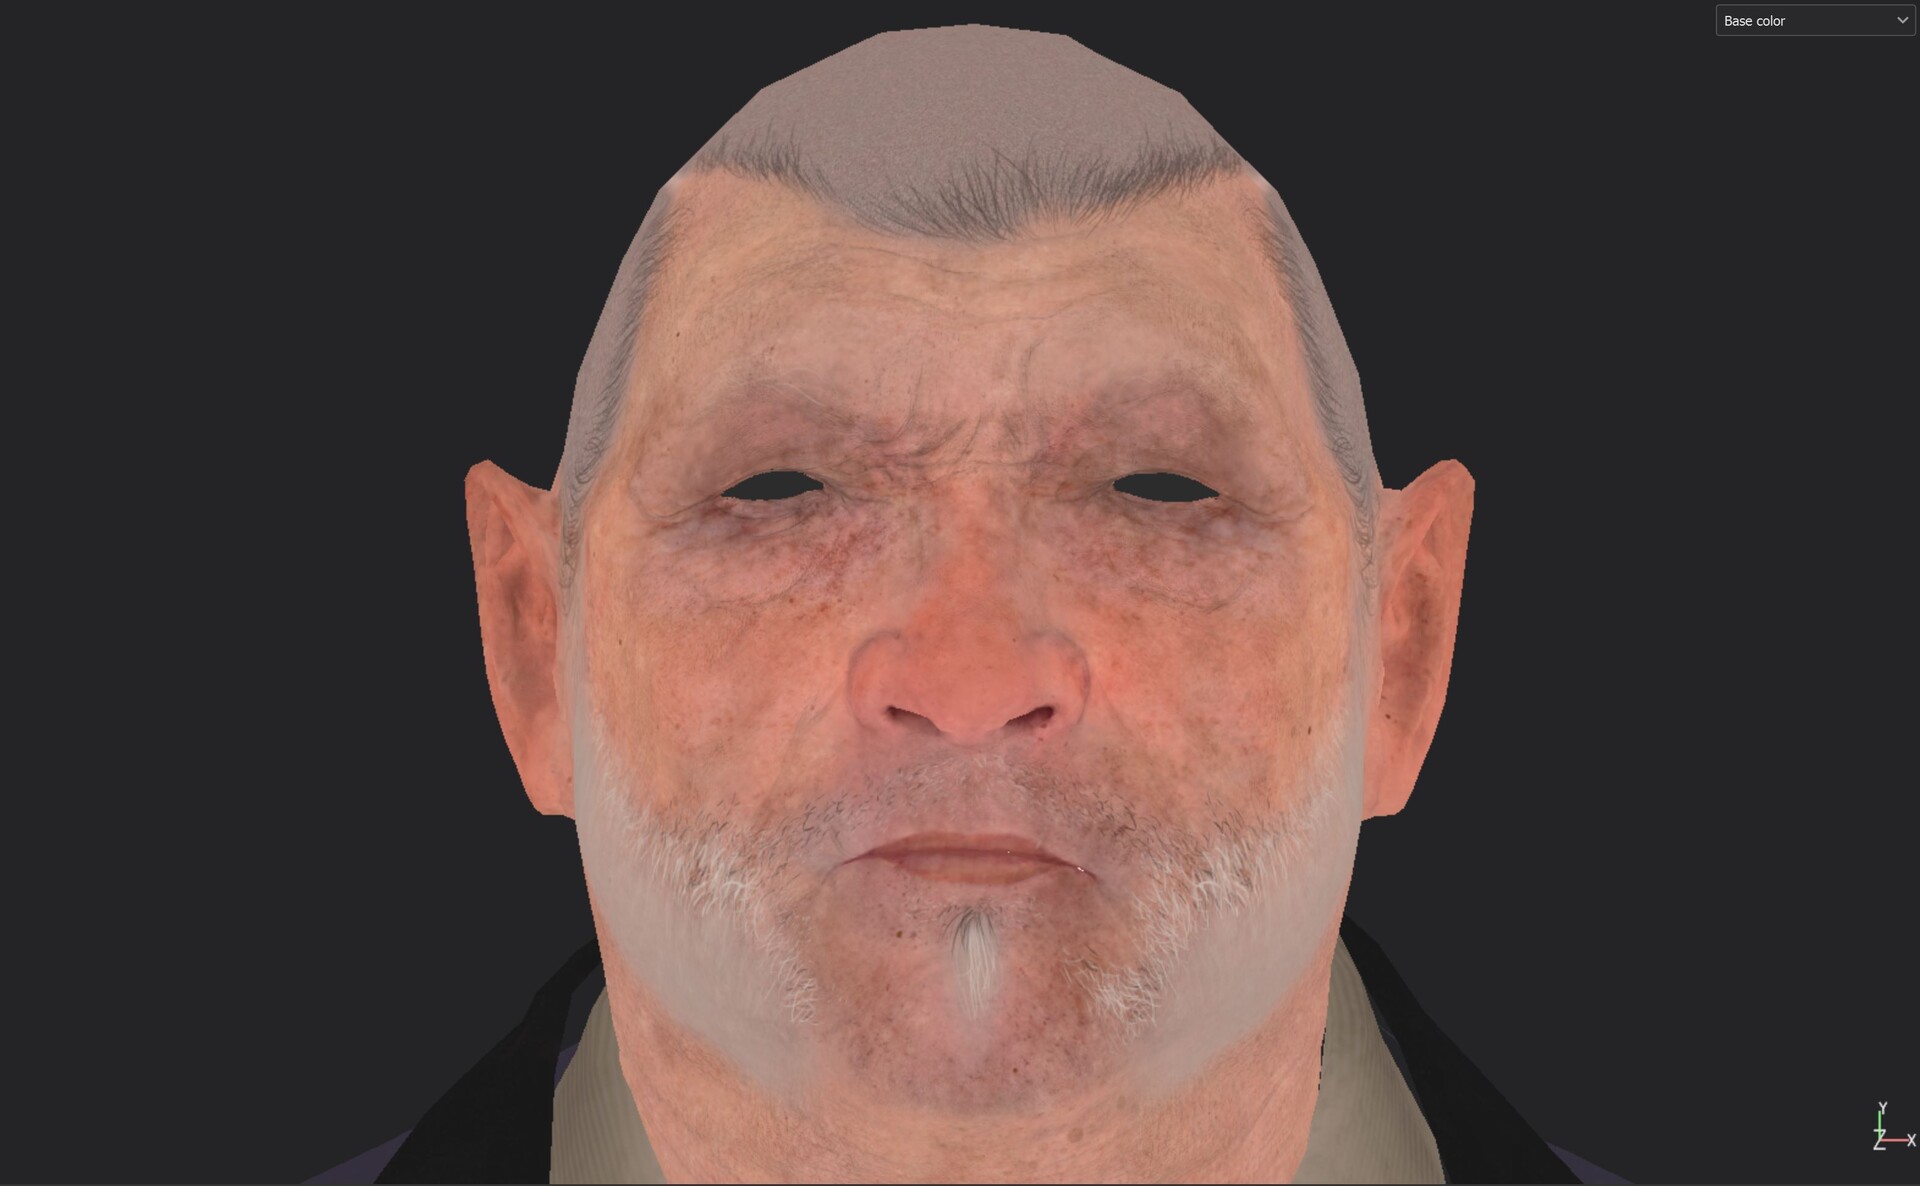
As with the other phases of the project, the face once again takes center stage for all my attention. After baking, I start the texturing process with base colors taken from a source photograph. In this case, a family member actually ended up being the perfect model. I used a polarized lighting setup to capture his skin tone, then projected the image onto the head mesh in Mari.
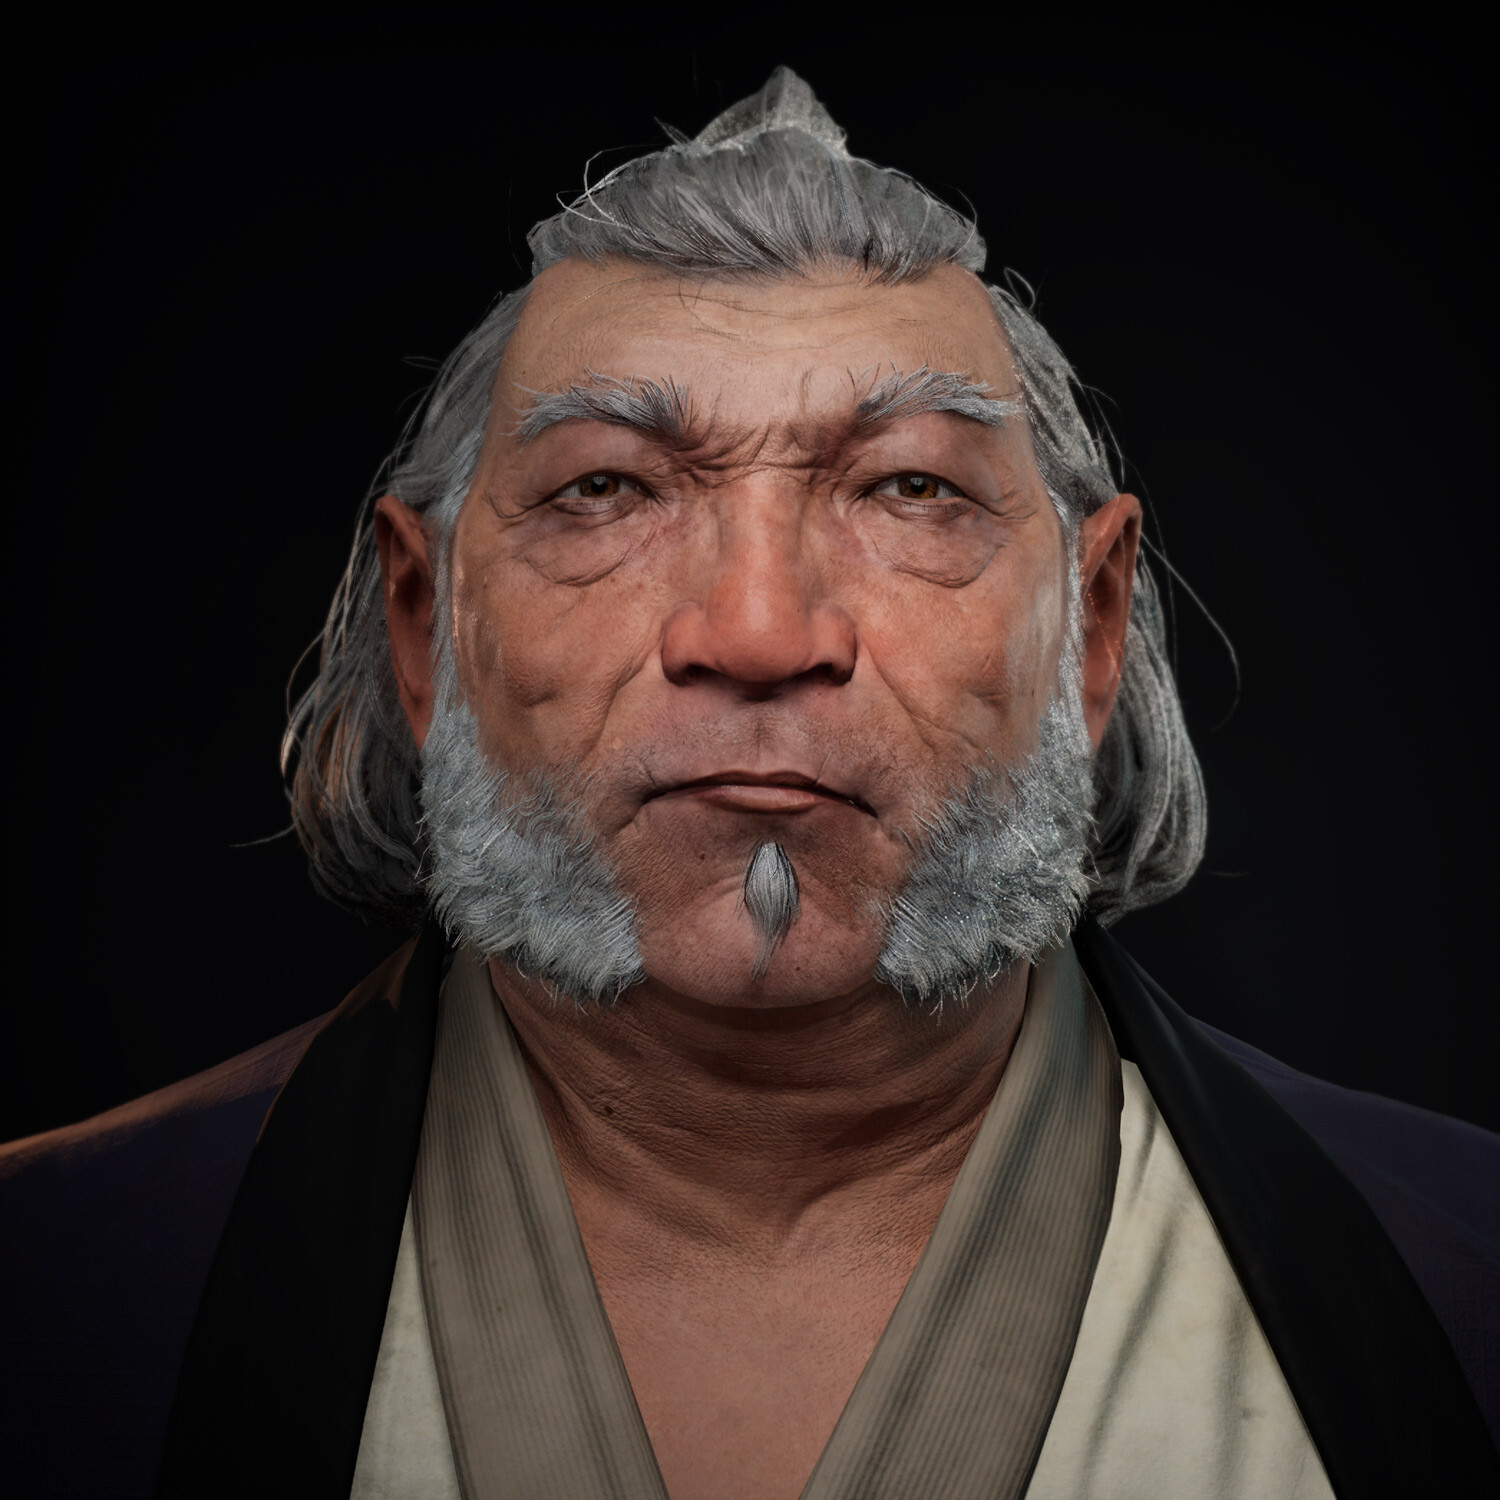
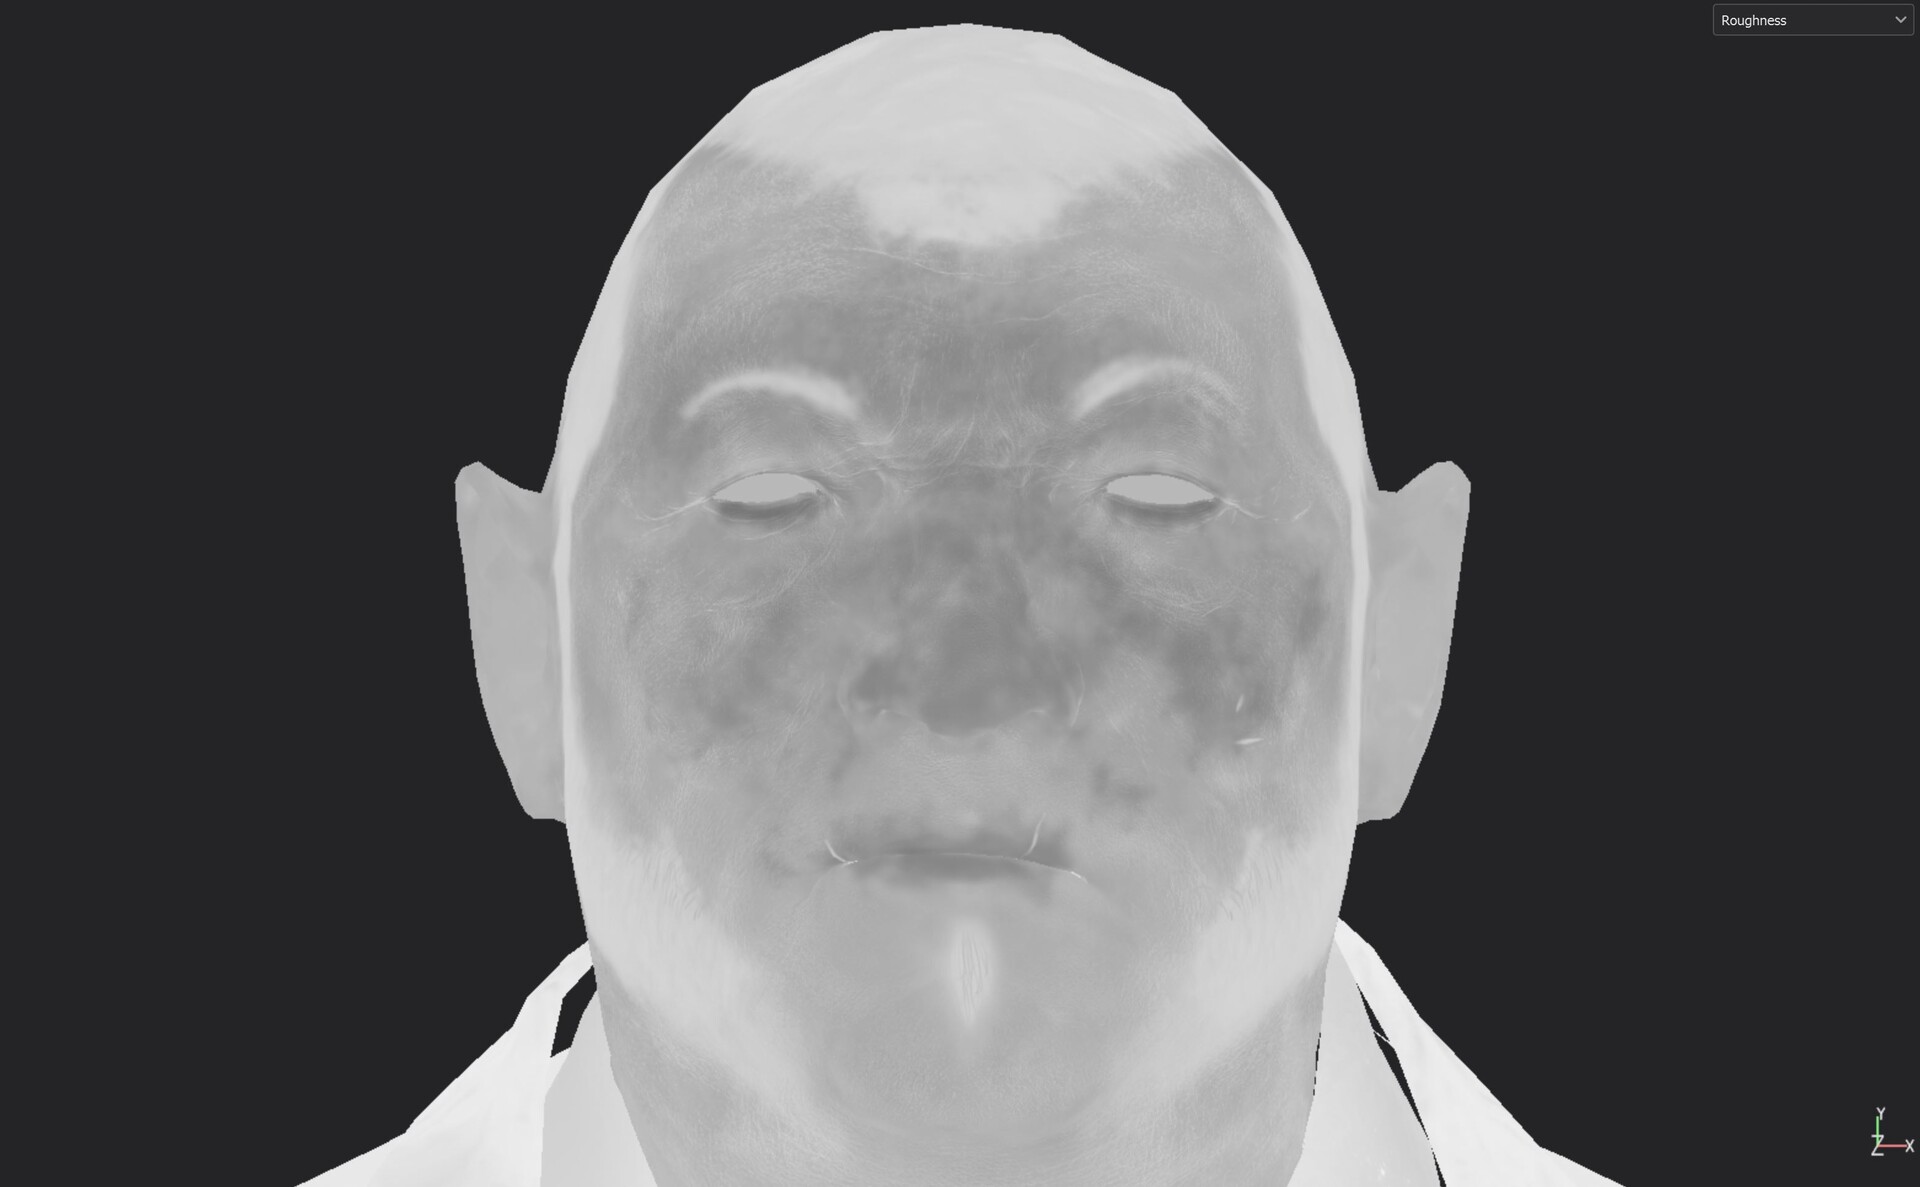
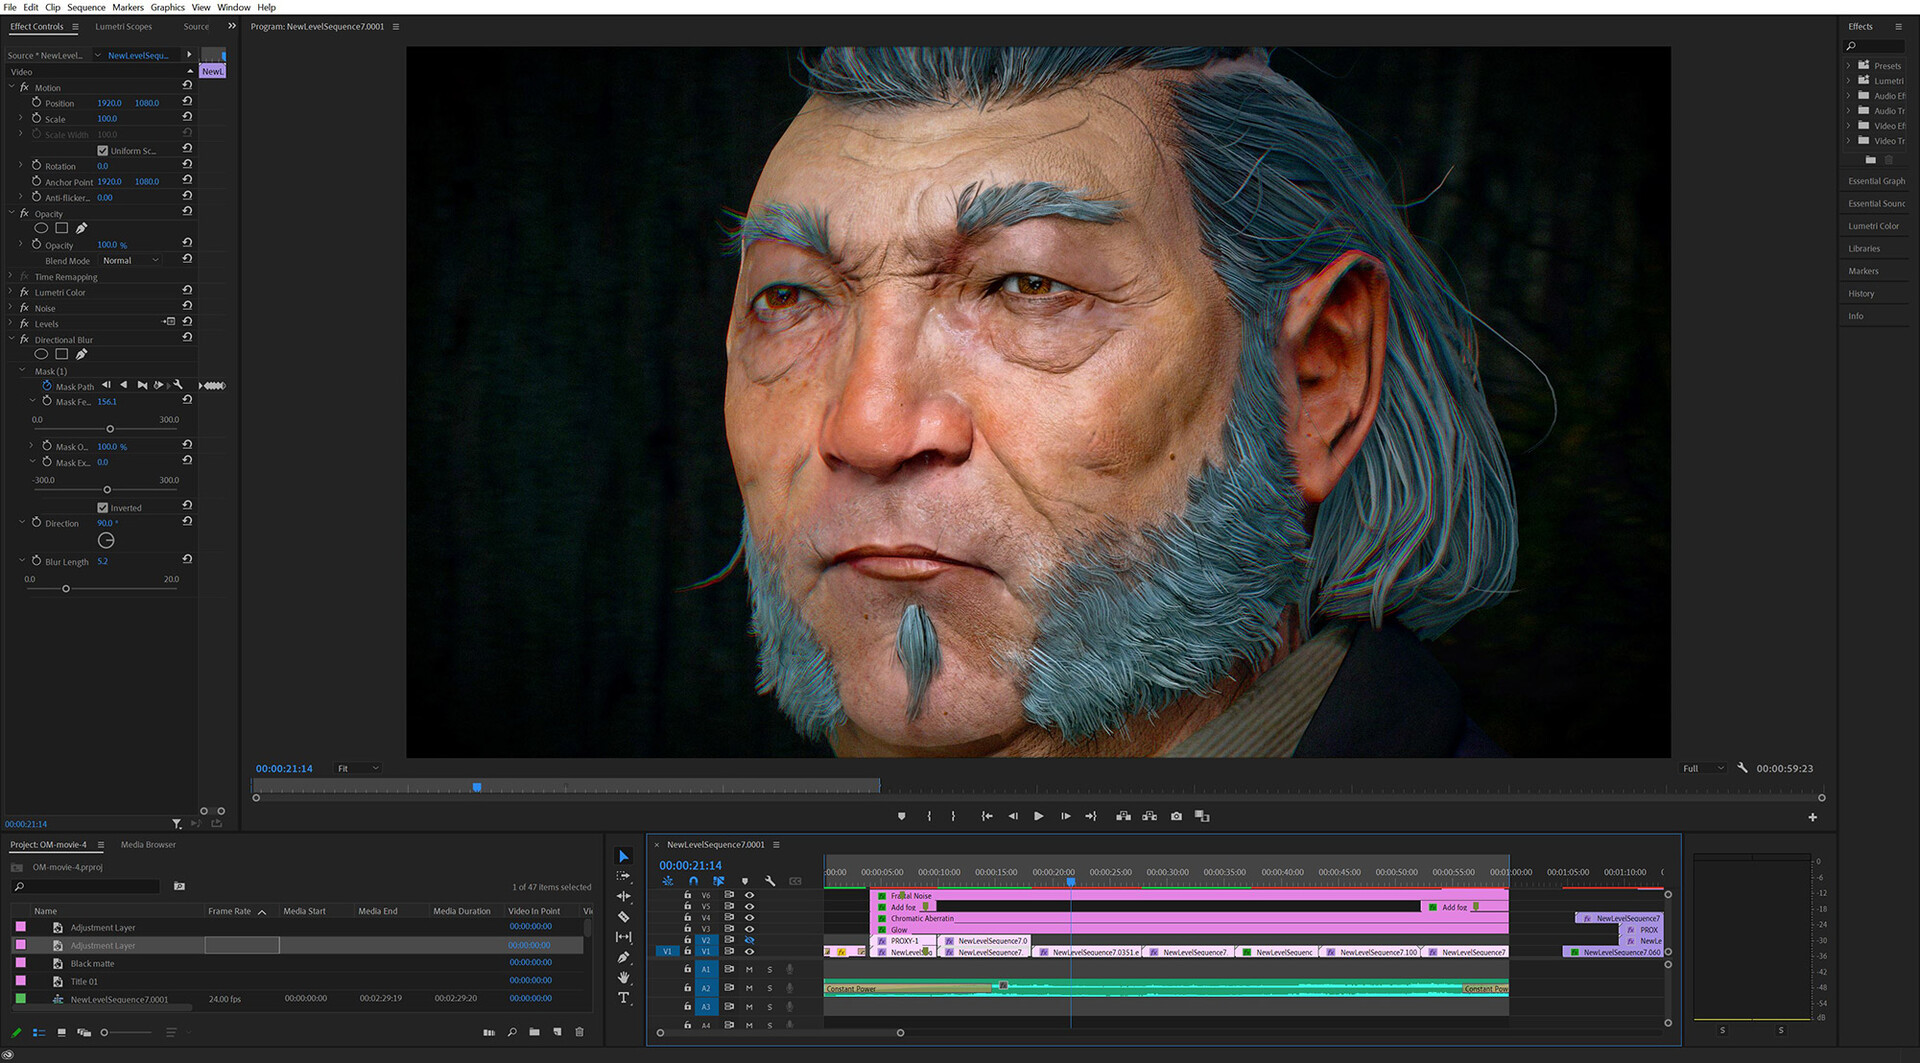
Here is an work in progress image from Unreal when I was near the end stage of developing the face. I ended up using a skin shader developed by Saurabh Jethani which greatly affected my final results. He had a .uasset file available but it didn't work for me out of the box. I ended up writing the shader by hand following his instructions and this worked perfectly well, and I also understood better how it worked. The technique involves combining the base normals with a micro tiling texture that really gives the skin lively, organic detail, especially in closeup shots. Interestingly, he does not even really use a roughness map, but instead uses roughness zones - three regions where he has roughness levels that are created procedurally. I stuck with my good old fashioned roughness map and I was happy with how it came out.
Something I've learned about rendering in Unreal is that the shader in the engine has almost as much influence as your texture maps. A few twists of the knobs in Unreal and the skin looks totally different, which goes to show how important it is to look-develop your work in engine during the texturing process.
For those who want to see under the hood, I uploaded a full resolution screencap of my modified version of Saurabh's skin shader here.
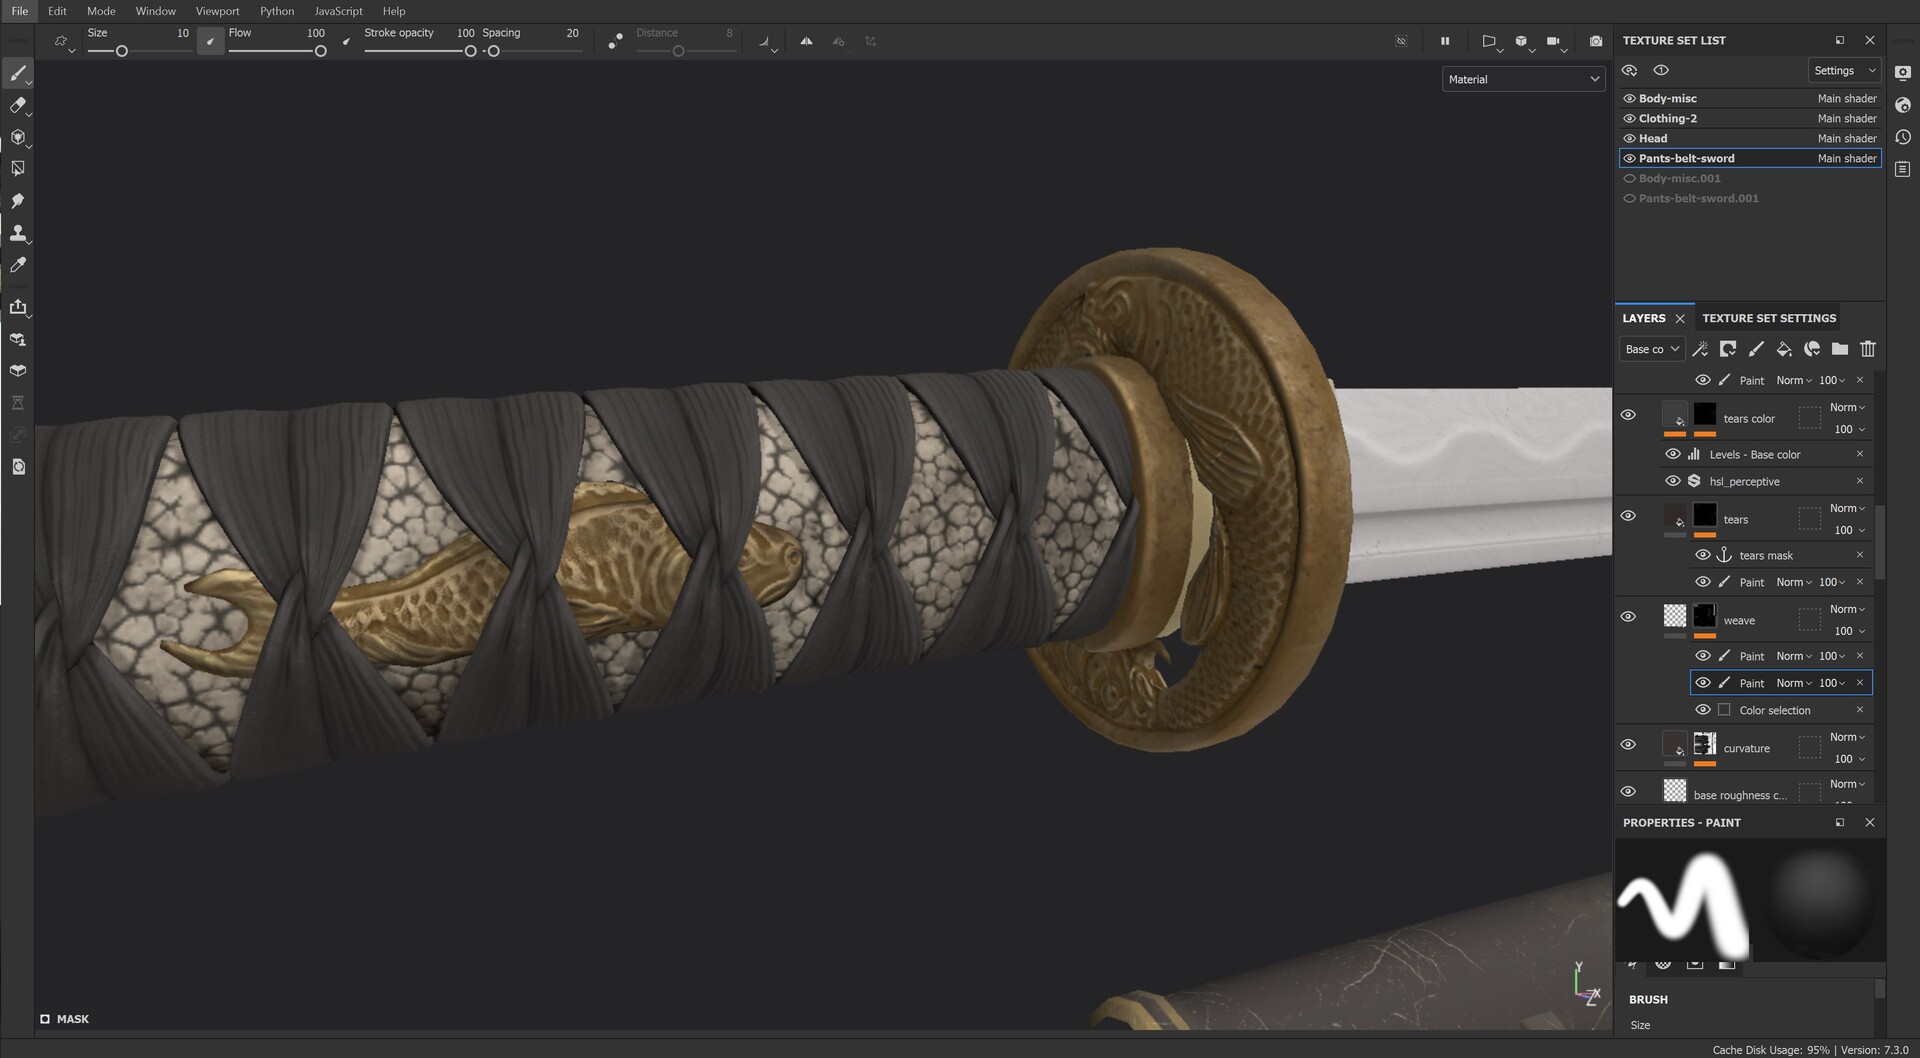
Texturing the sword was an interesting challenge. Because I decided to do the handle wraps as a separate mesh, I had to decide how to treat the fabric weave that narrows towards the point where the straps cinch together. I ended up drawing the weave pattern by hand, which was painstaking, but I only did it once. All the wraps are copies, which means they share the same UV space: very efficient! And a whole lot less work.
Another fun fact: the wakizashi (short sword) is simply built out of pieces of the katana (long sword). So again, they share the same UV space :)
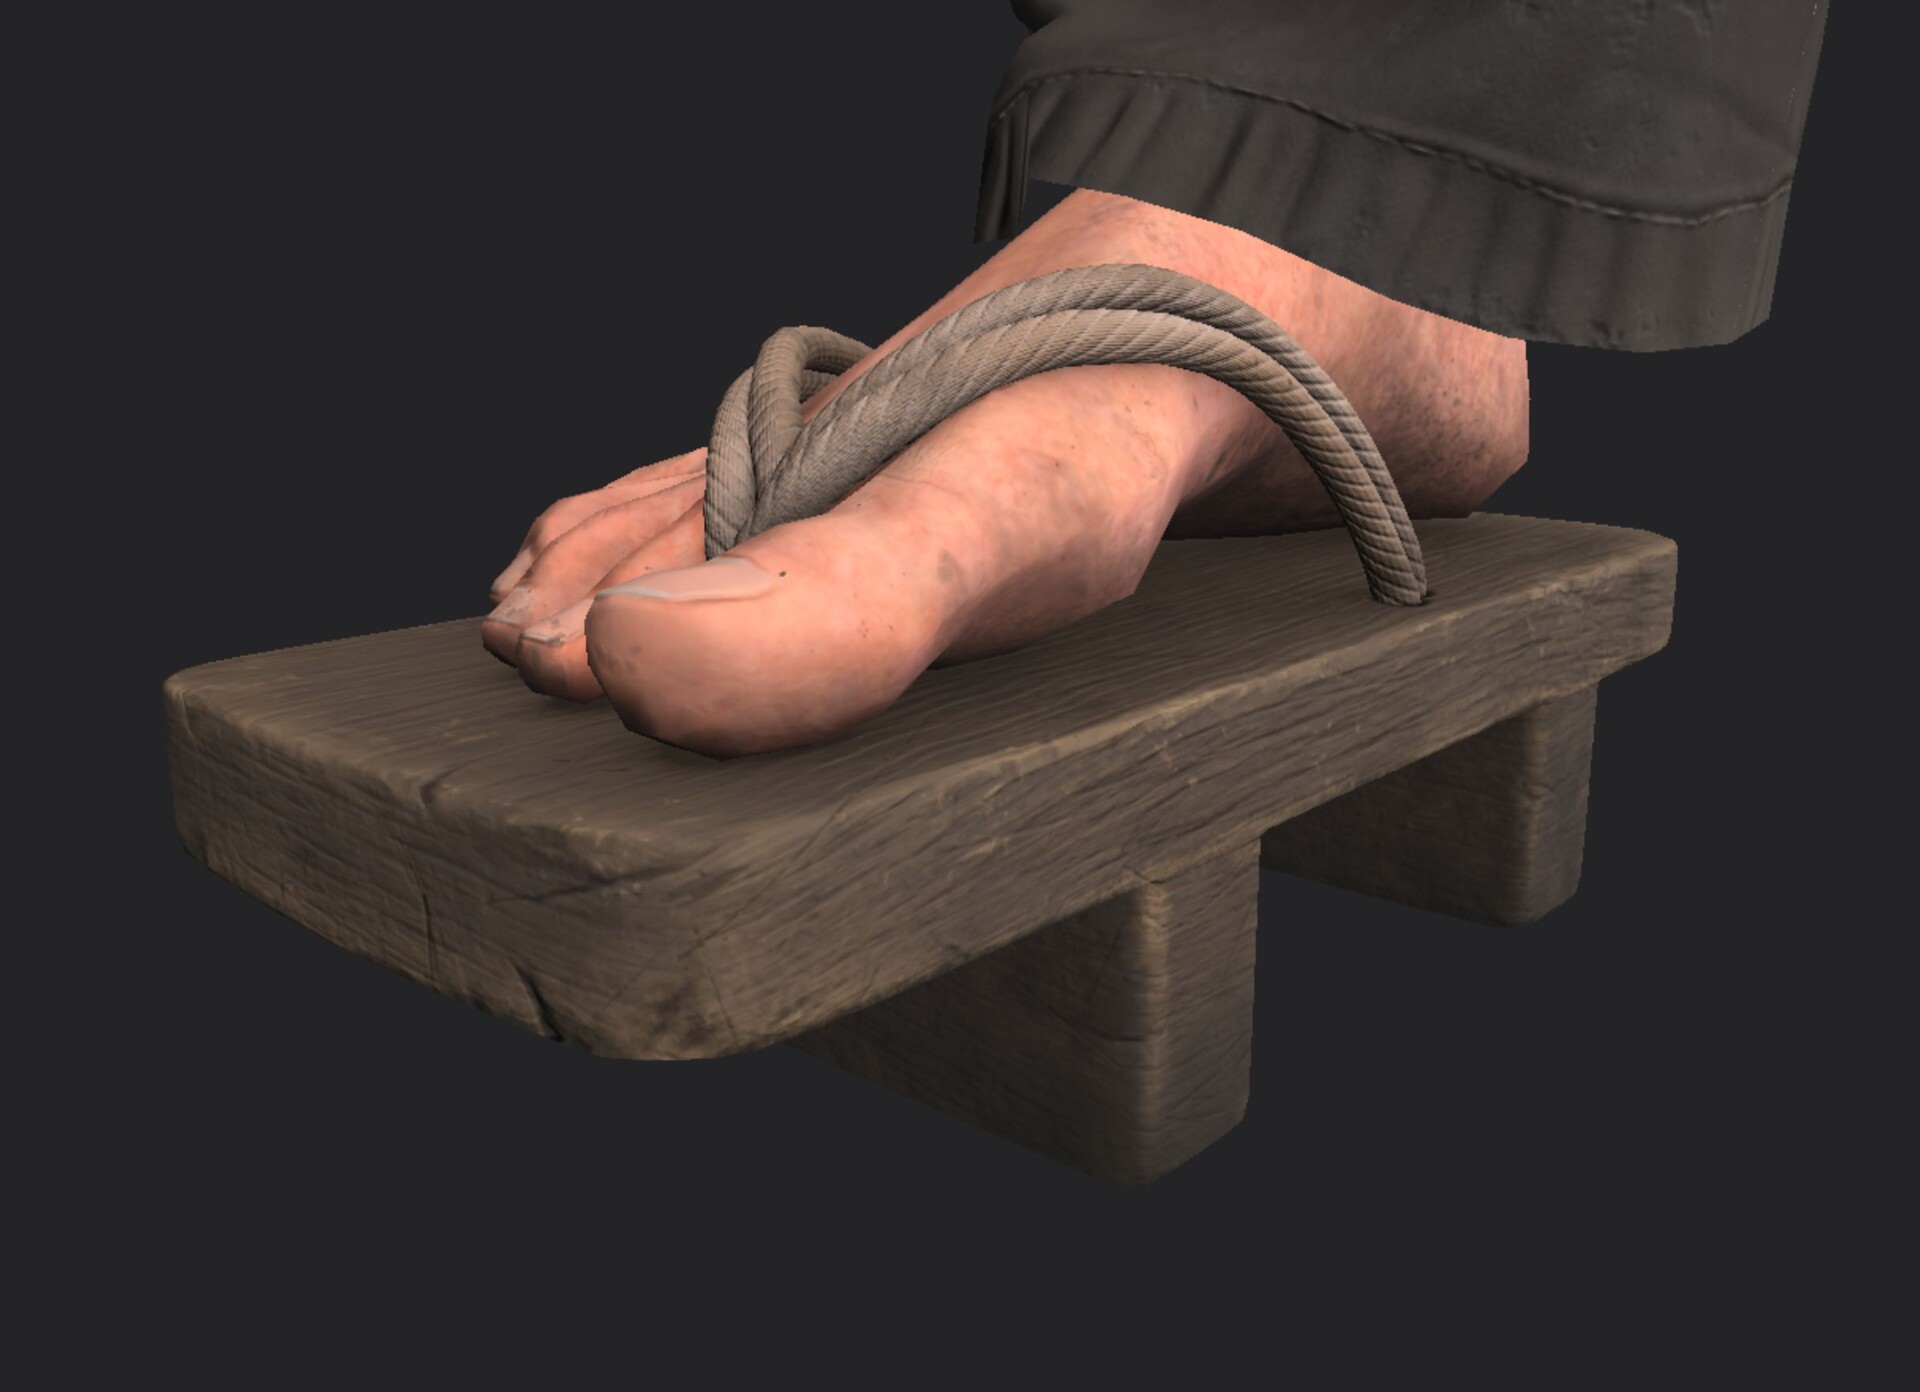
I also had fun texturing the feet and sandals. The bottom of his feet even got some TLC with dirt spatters and grime that would naturally splash on them when he spends a whole day clogging around in wooden shoes.
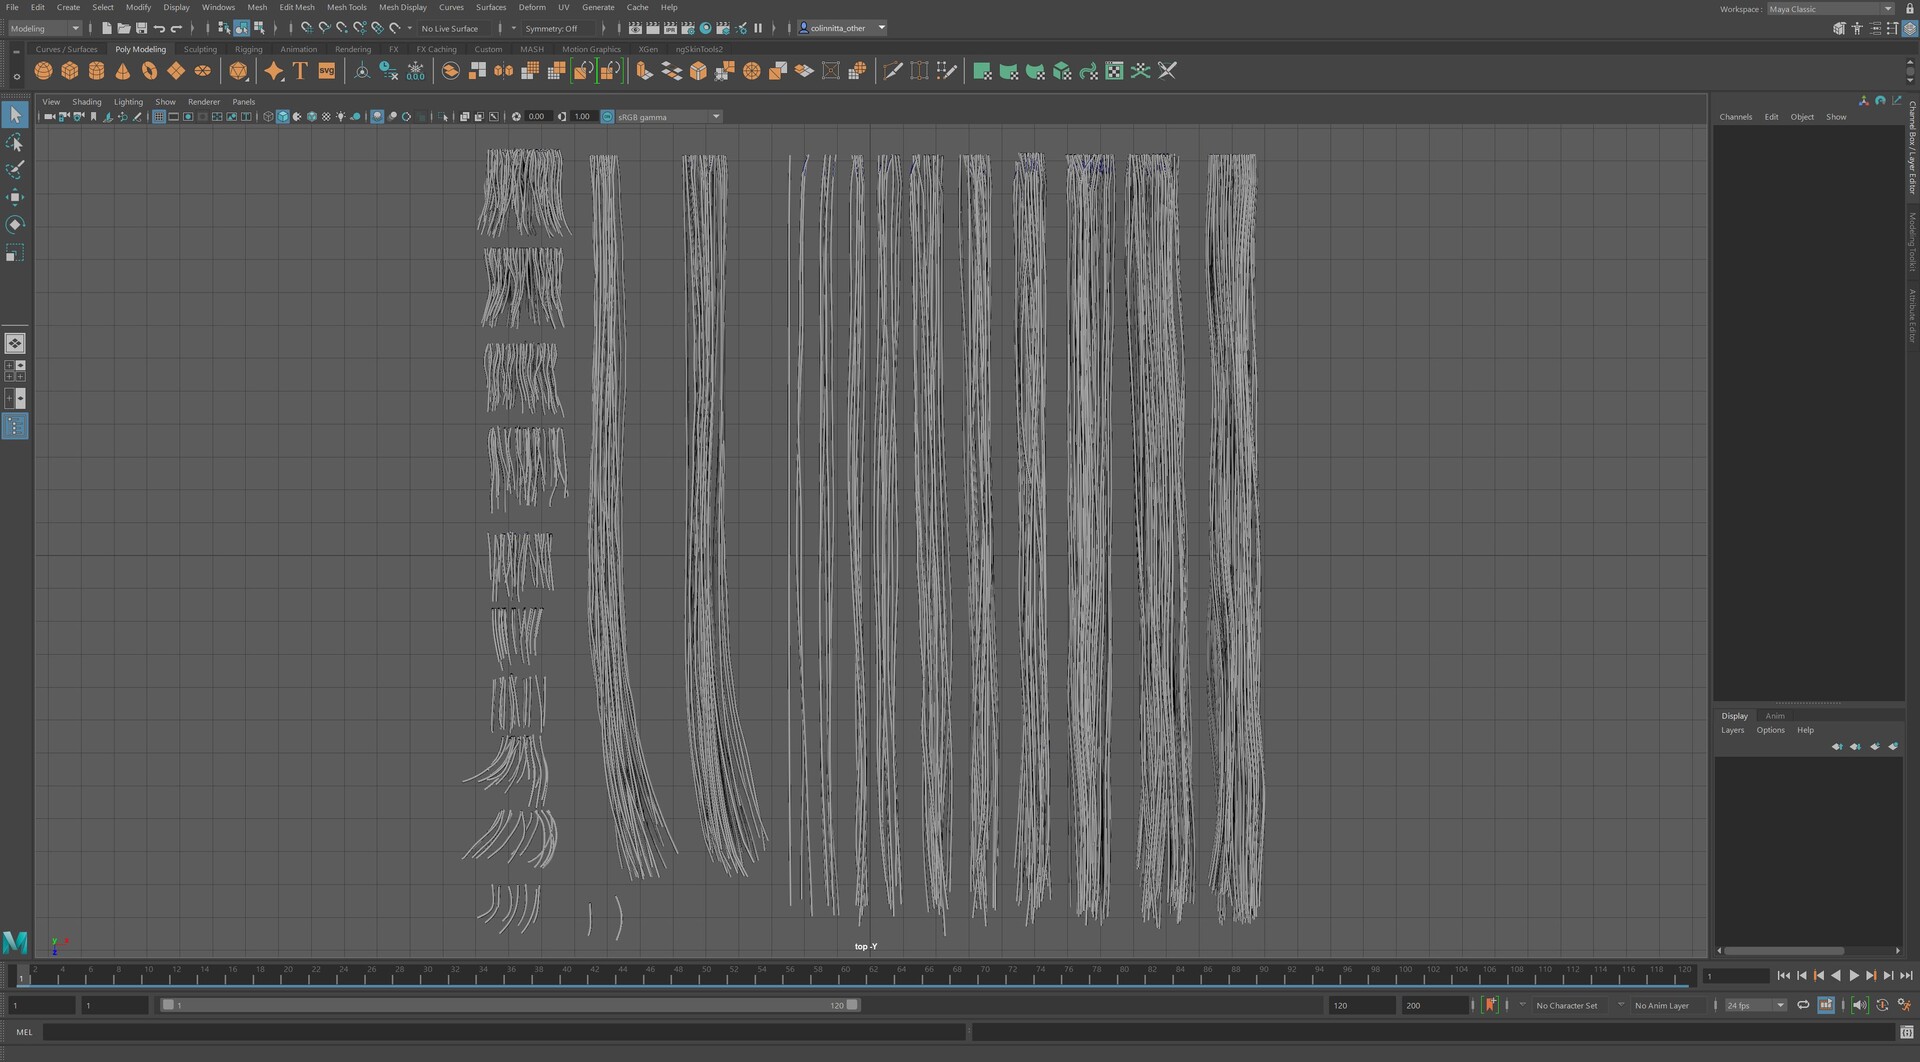
Ah, we finally come to hair. I've fought a battle with hair cards for so long that I've finally come to terms with just how fussy this part of the project always is for me. Luckily, after struggling for many days, I've come up with a pretty good workflow that makes the process manageable. Since everyone does hair differently, here's a basic breakdown:
- Create hair textures in Maya using strands generated by XGen. Go from thick to thin, creating variety with each section. For Master Koi, I set aside an area just for beard hair (the left side) since I knew this would be important for him.
- Bake hair textures in XNormal.
- Build hair cards in Blender using Hair Tool for Blender by bartoszstyperek .
- Finish hair with final look development in Unreal.
I know this is a pitifully short summary of what is an incredibly elaborate process. I'm considering doing a tutorial just on my specific hair workflow because I've gotten a number of questions about it.
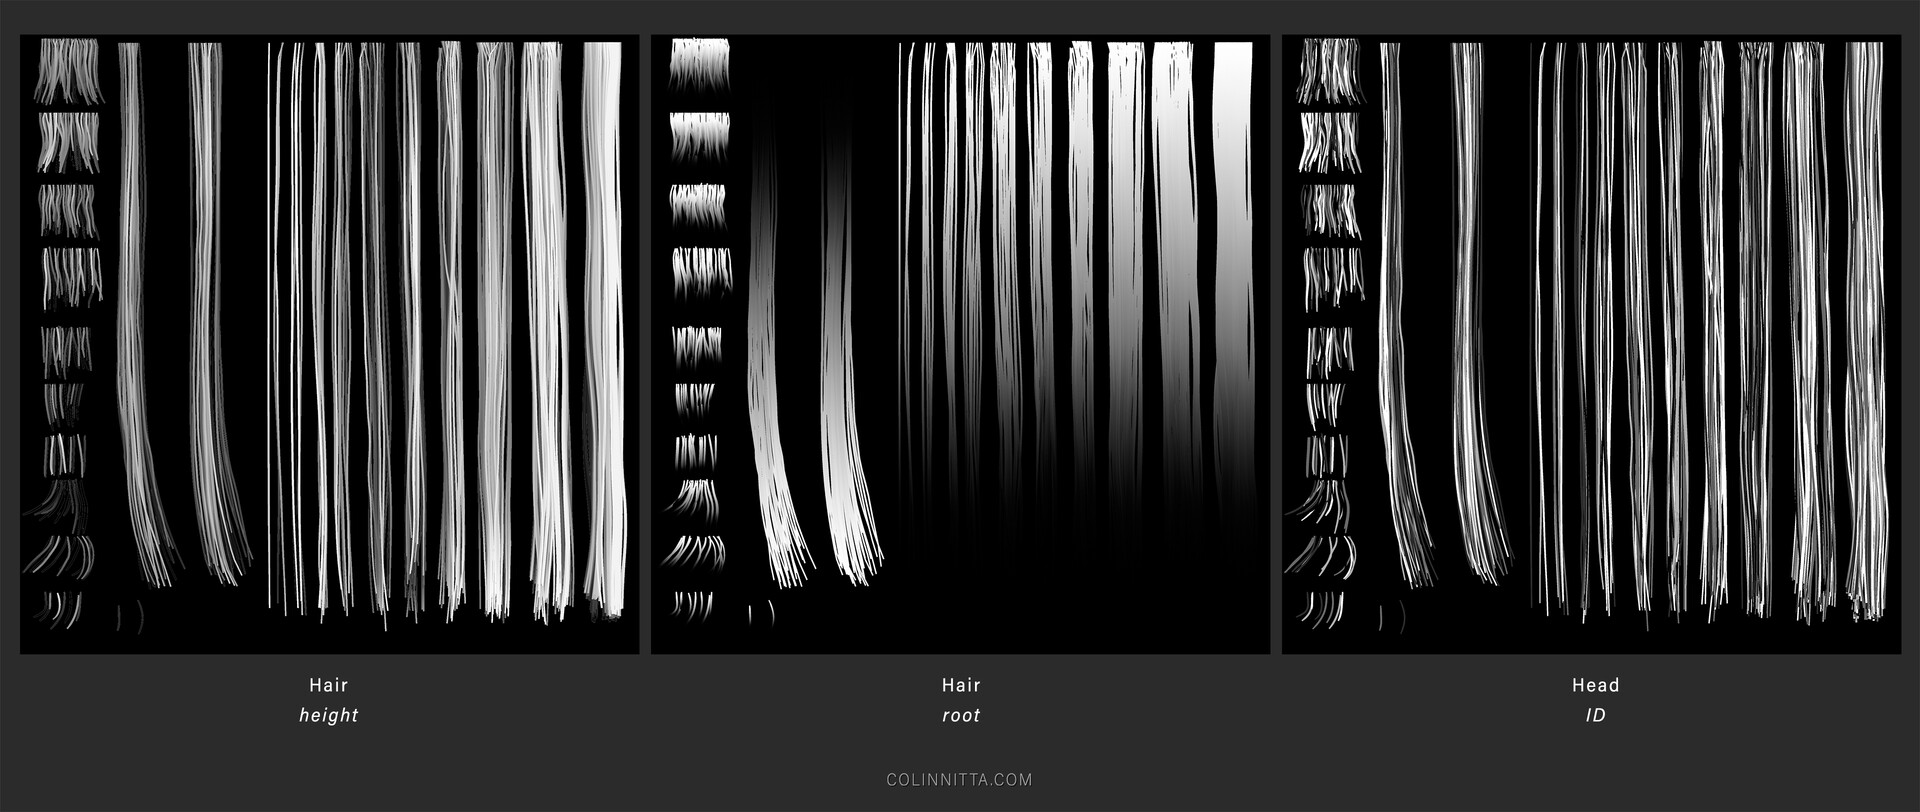
The baking process with the maps for height, root and ID is specifically for the Unreal hair shader. I picked up this technique from Johan Lithvall through a class available at the Vertex School.
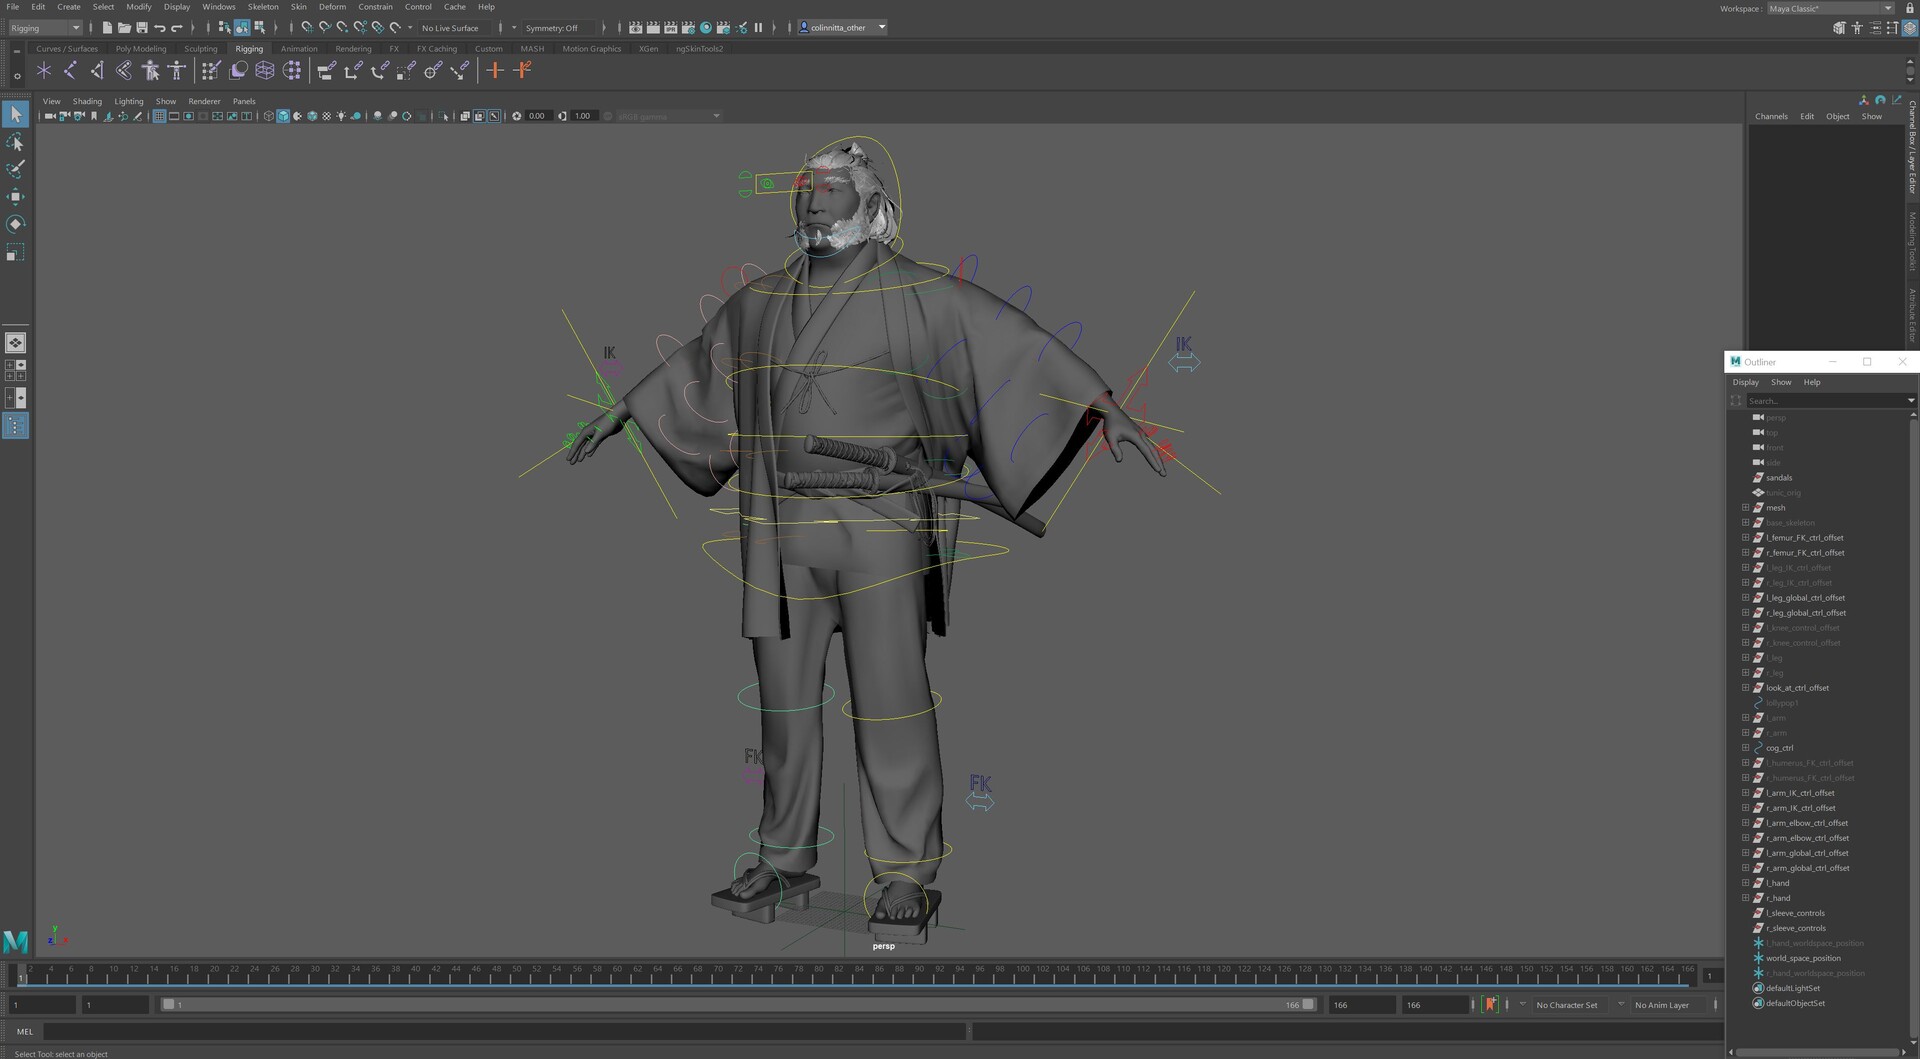
Normally, after finishing hair I give myself a big pat on the back and move to the fun part of final rendering. However, in the case of Master Koi I decided to jump into something even harder (for me, at least): rigging!
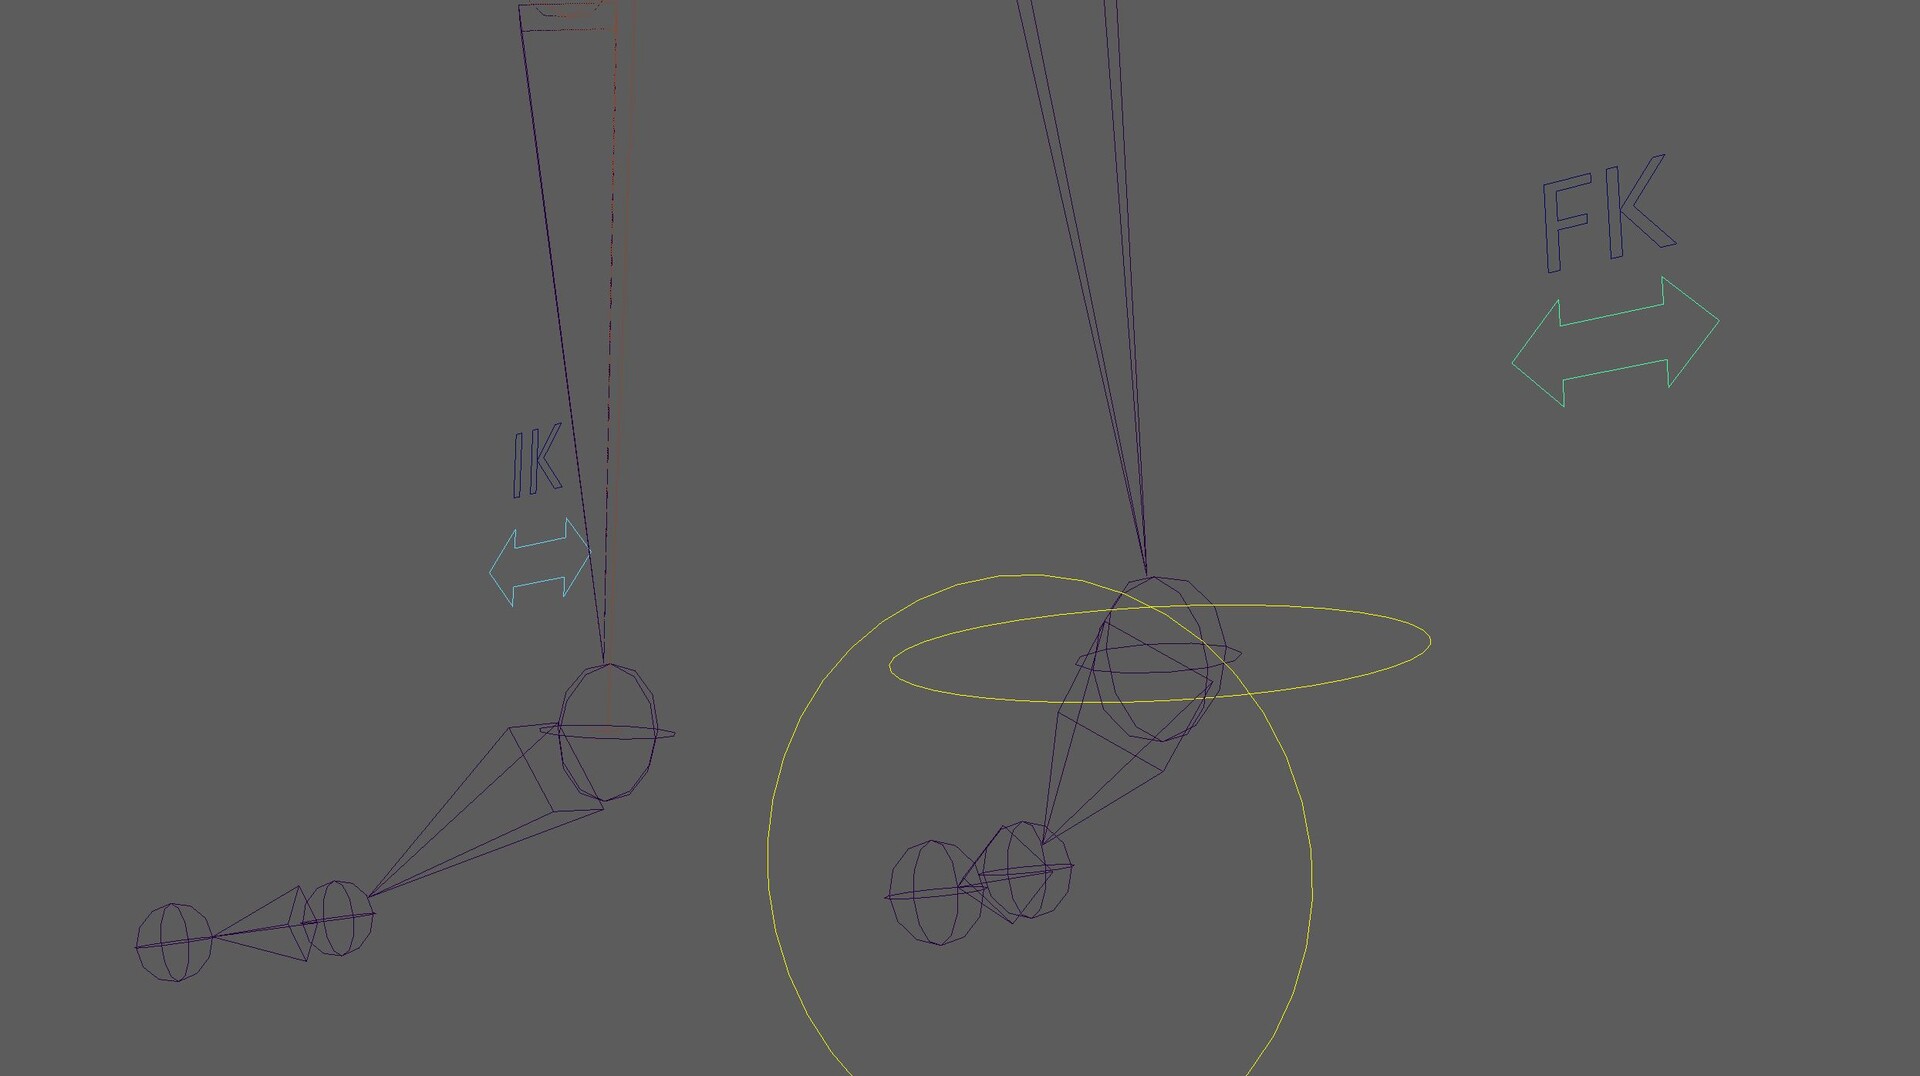
I did a lot of research to get a handle on where I should start. I knew that Maya would be necessary for this one as it's the undisputed master of animation workflows. I settled on AntCGI's tutorial series on Youtube , which is an incredibly in depth piece of education for zero cost. AntCGI was great because he starts with the basics and moves slowly into more and more complex systems.
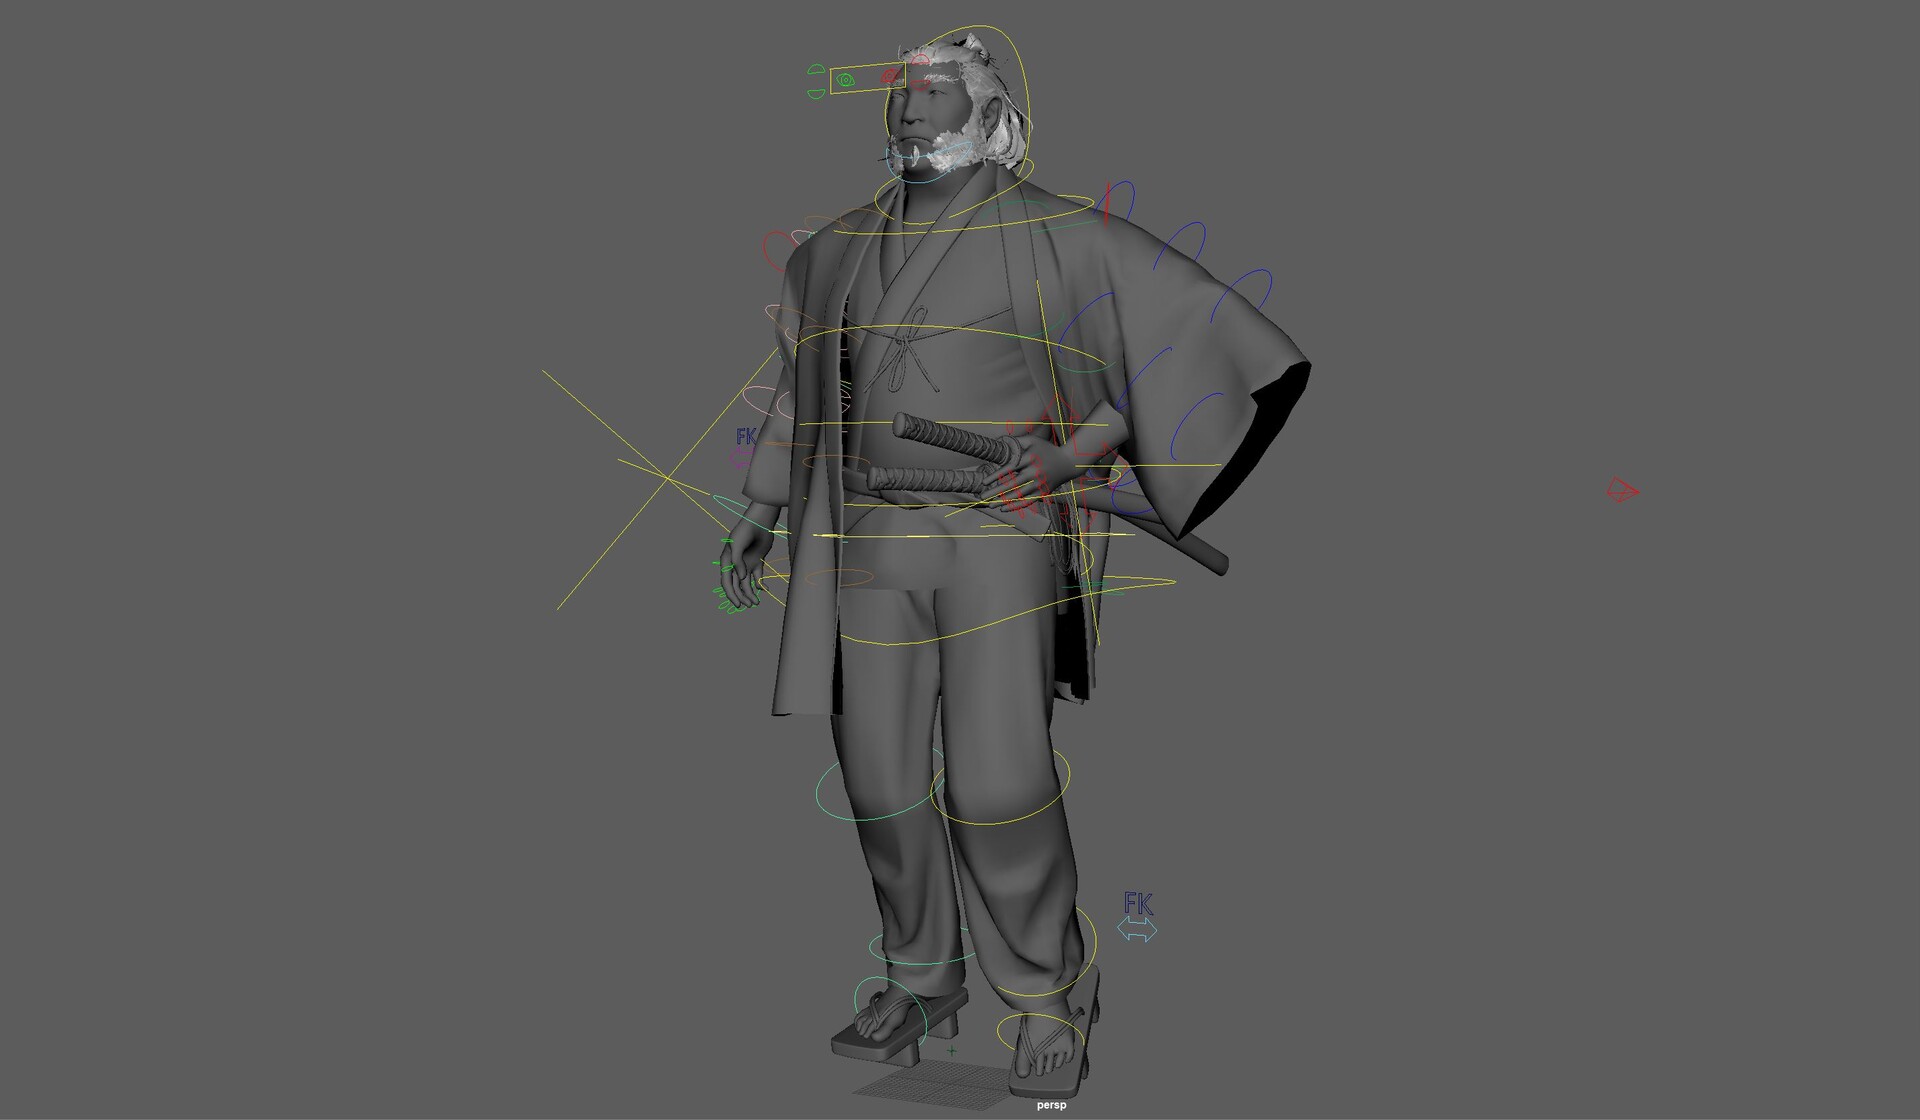
After doing a ton of study from AntCGI, I decided to plunge into a really ambitious project: making Master Koi walk. I used some motion capture data to guided my work as I'm not a pro animator by any stretch. I got the hands and the feet working OK. But a big stumbling block came up in regards to the long drapery of his coat. You can see the trouble here: it's such a loose garment that it's very difficult to control. I know there are systems that can do this sort of thing but I wasn't equipped to manage that level of complexity.
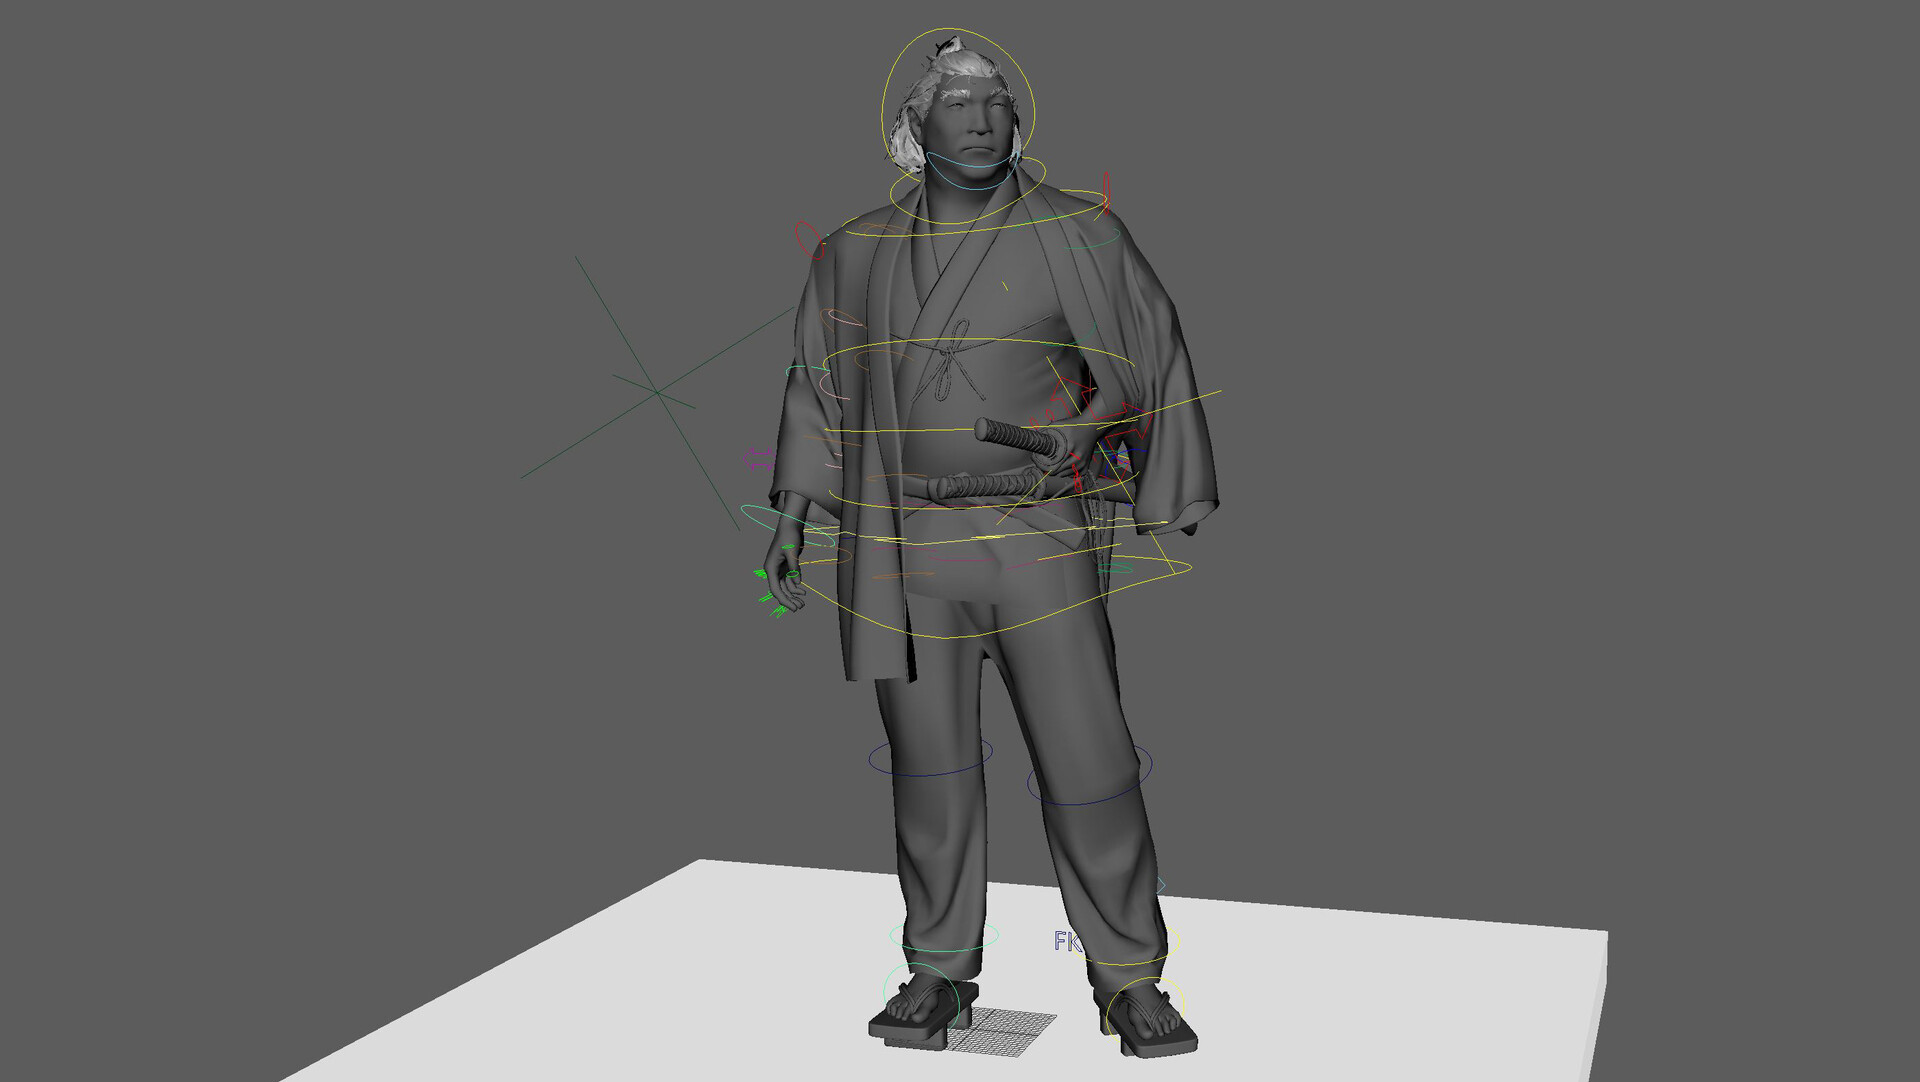
In the end I settled on a idle pose for him, just subtle movements of him flexing his fingers, subtly moving back and forth and blinking his eyes. That's really the thing you notice in the end: the eyes. Such a small thing from weeks of work! I think this is one really important lesson in that it's important to allow yourself to fail when learning new skills. There were many times when I was ready to throw in the towel and abandon rigging altogether. I learned a tremendous amount though and that's what I can take into my next project: all the ways NOT to approach rigging.
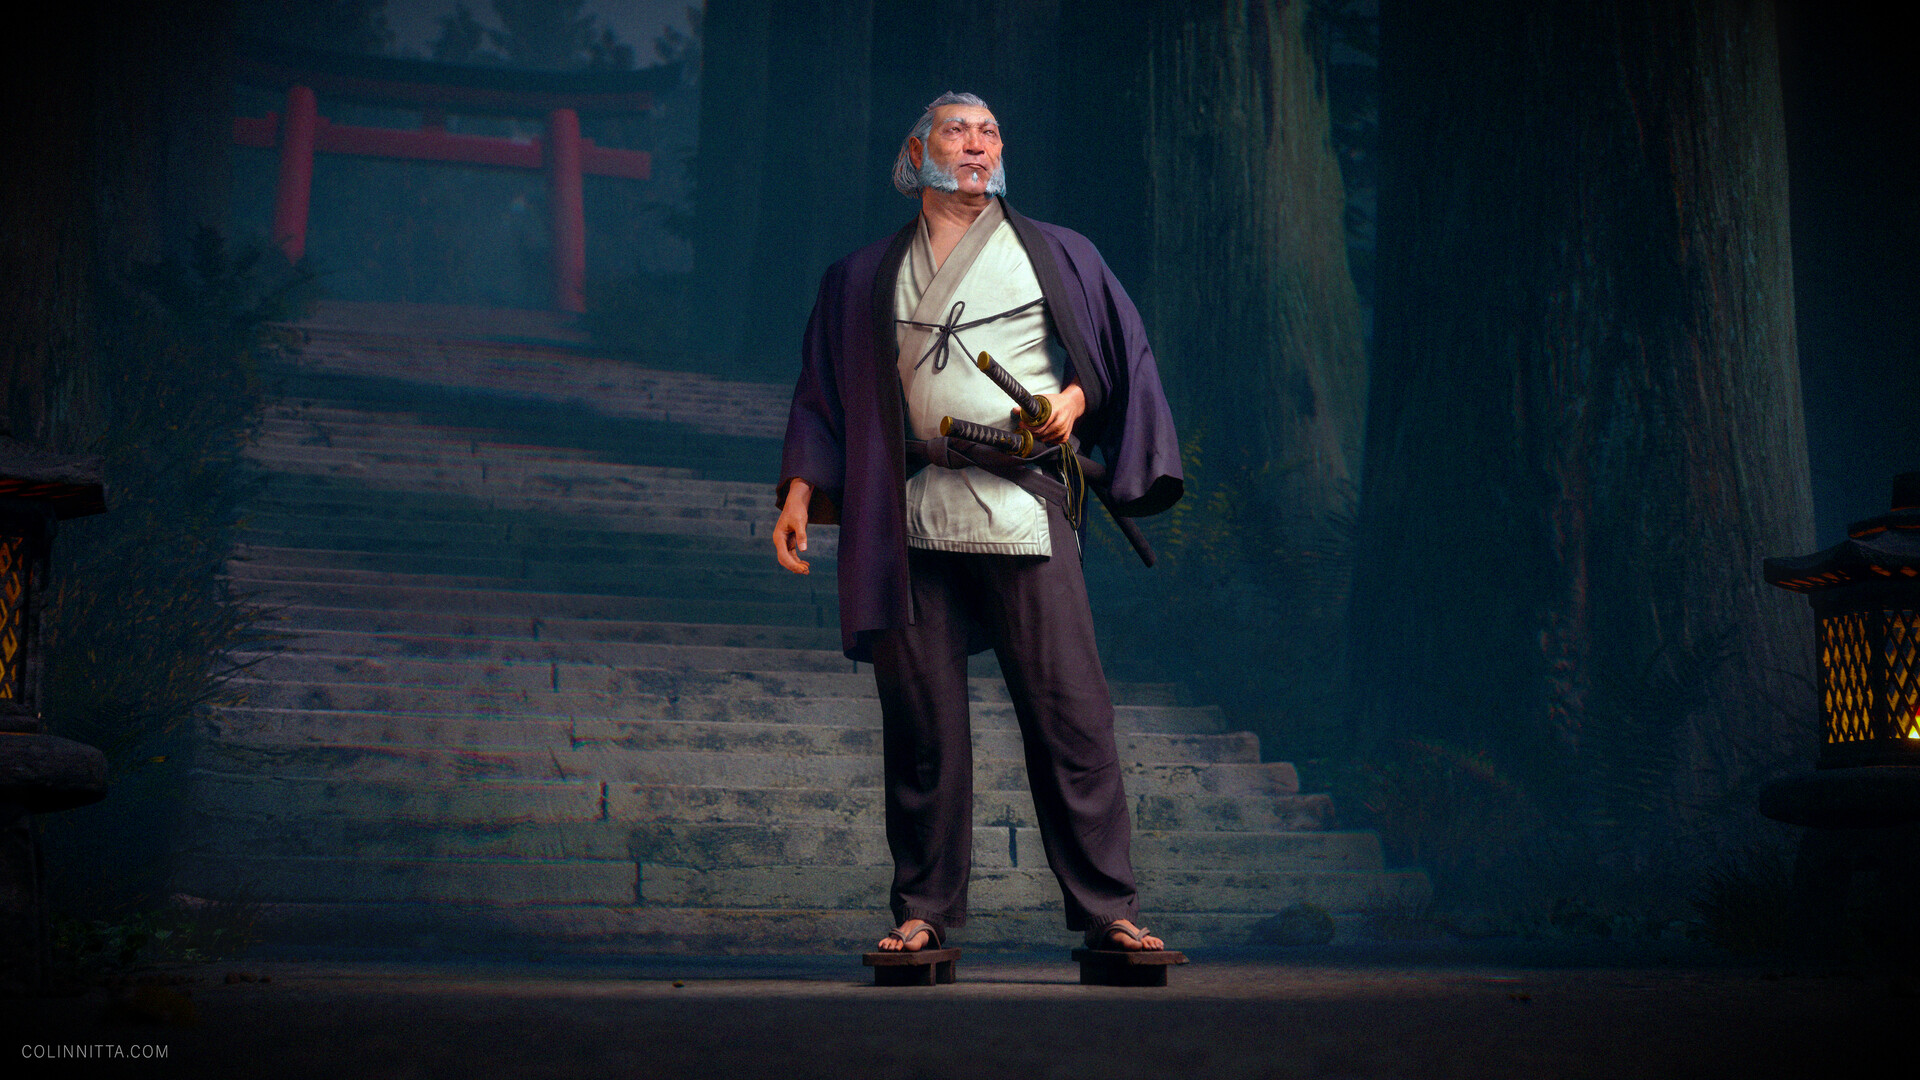
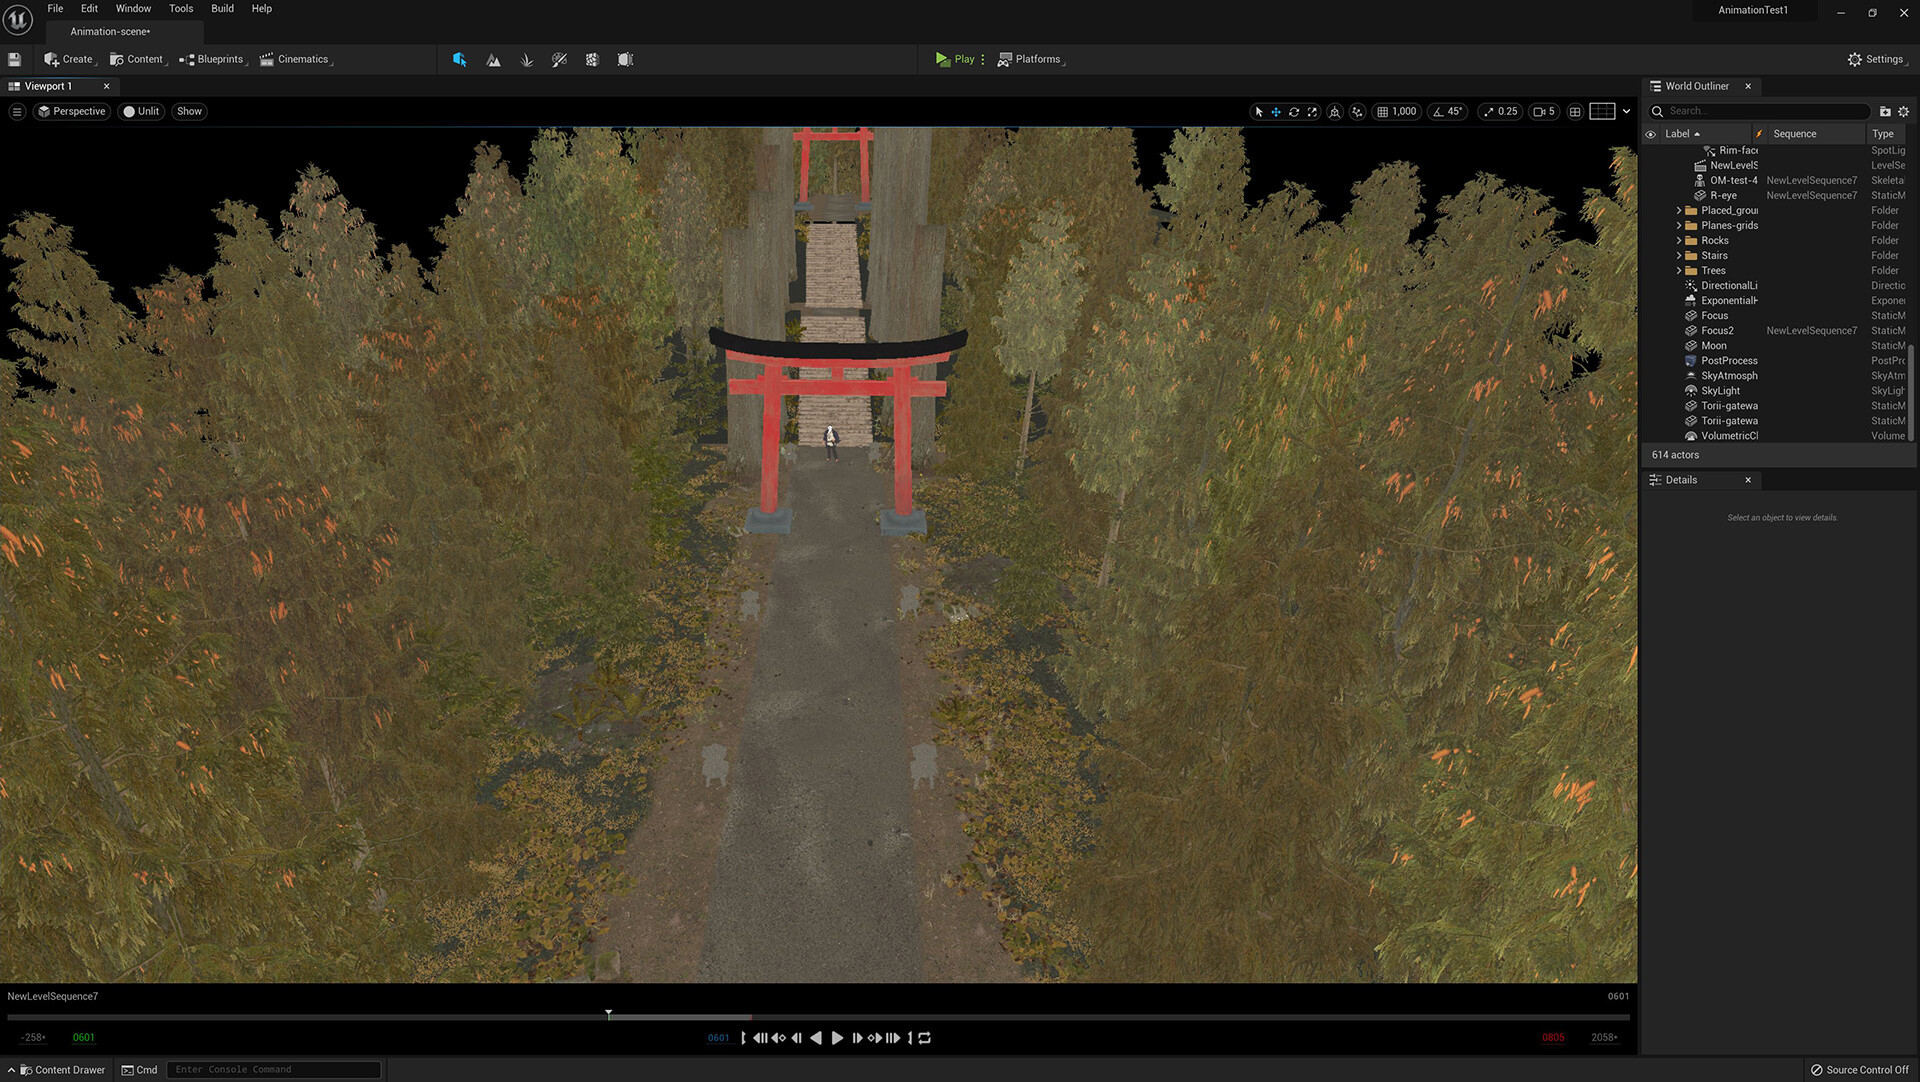
Following my rigging travails, I was finally ready to put it all together in a scene in Unreal. I knew I wanted Master Koi to be in an exterior environment and after doing more research I settled on entrance to a Shinto temple.
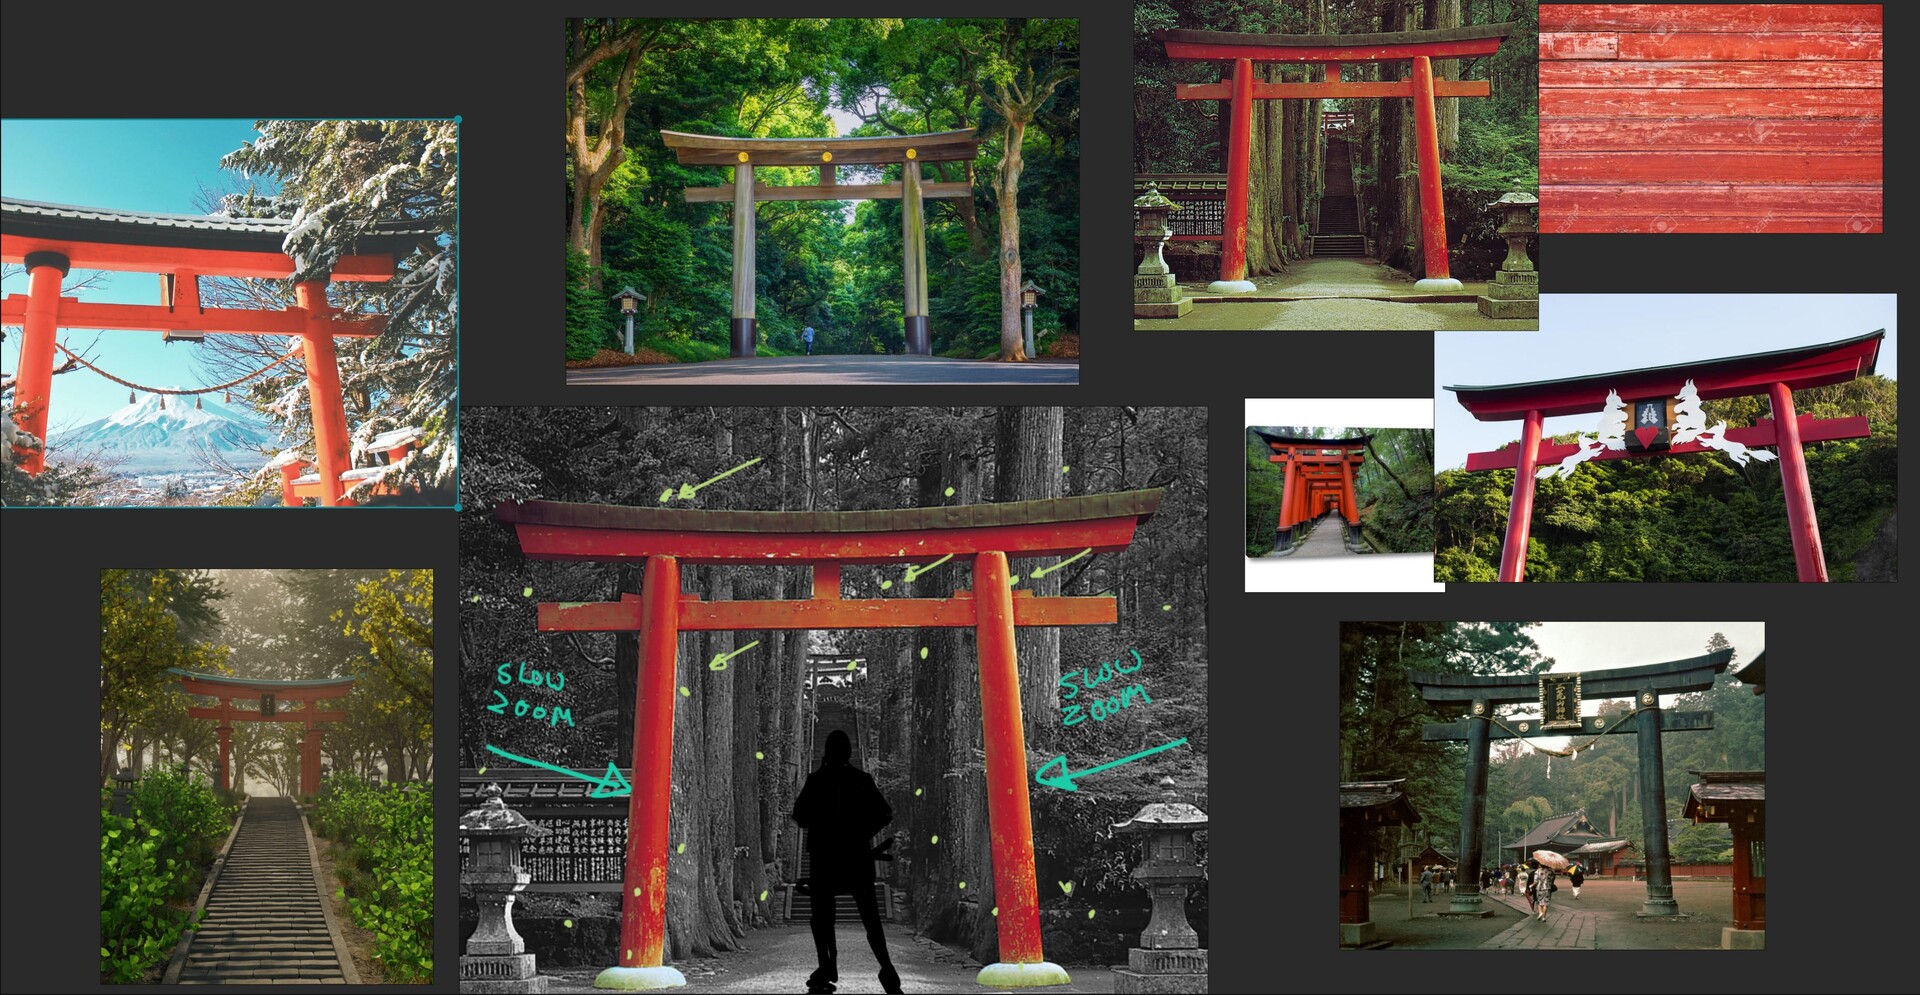
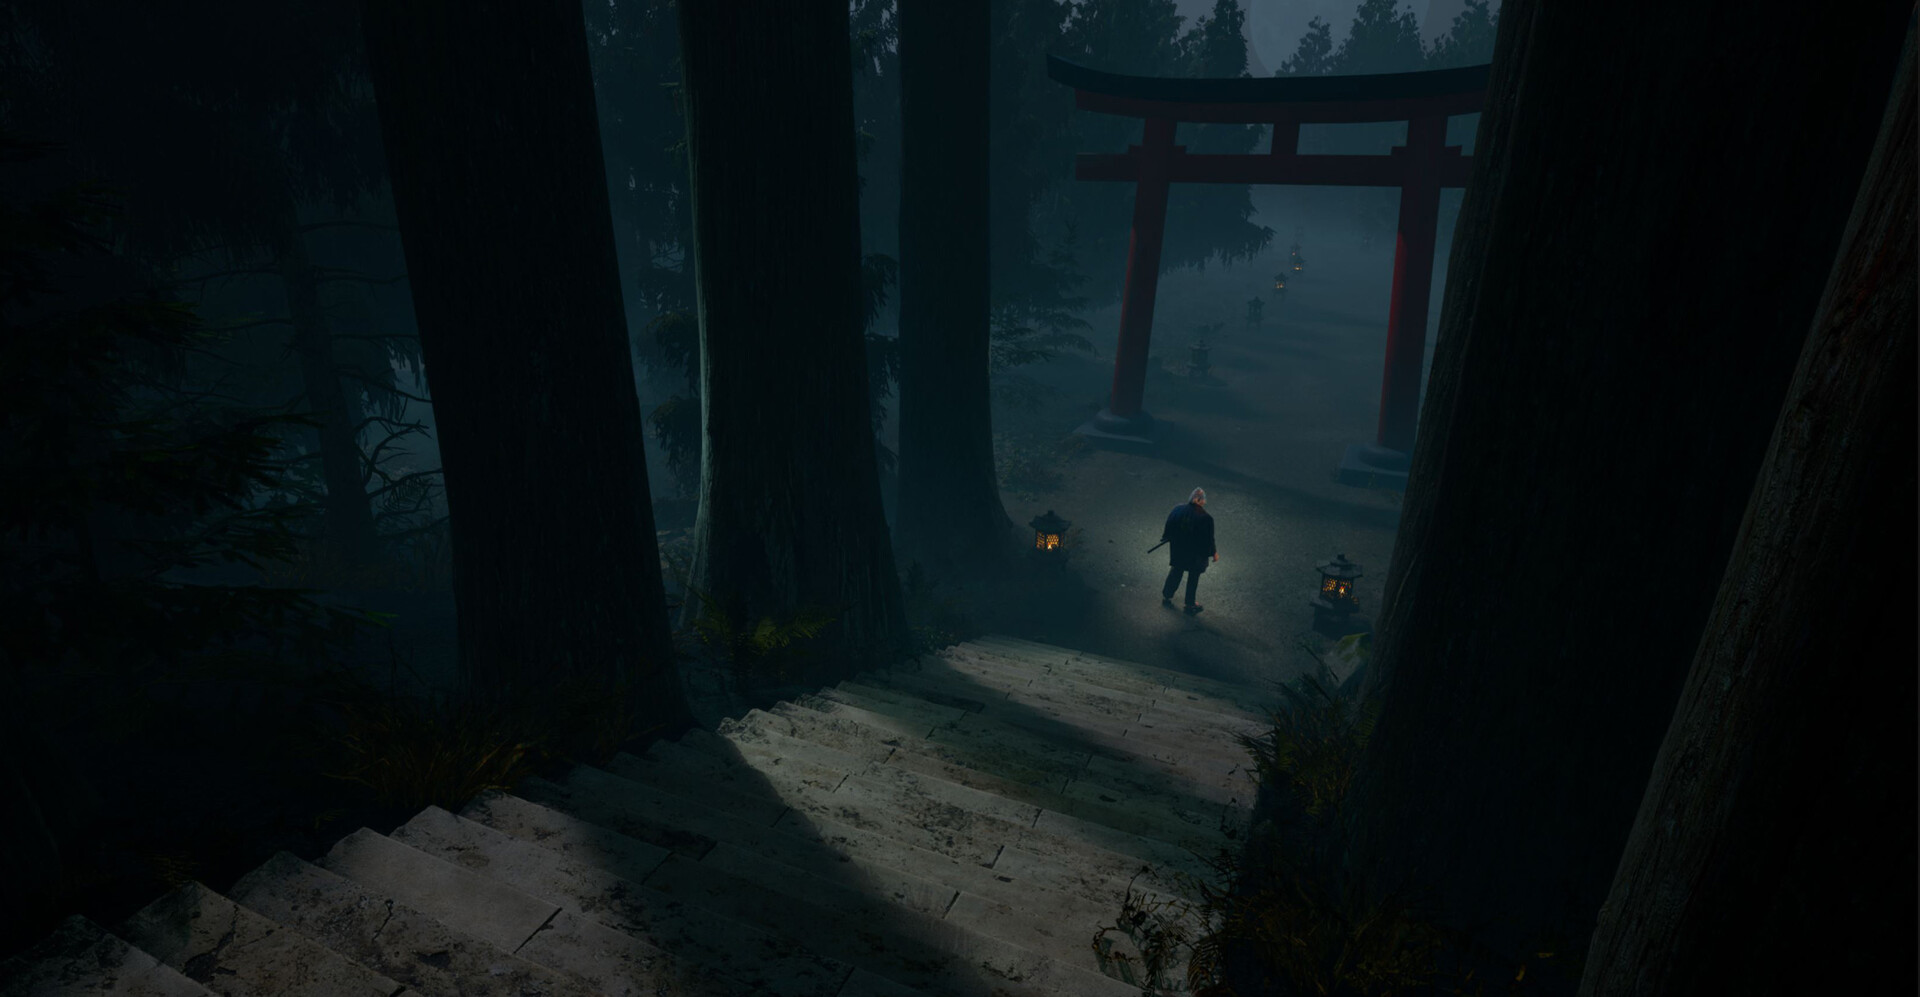
I liked the compositional idea of him standing beneath a sweeping gateway and I found a photo I really liked of a gateway in front and another in the back, past a staircase in a grove of trees. It had the right feeling and I imagined he was waiting here for an old student, someone who has lost their way. The two have agreed to meet at the entrance to the temple at midnight - to settle the score, perhaps?
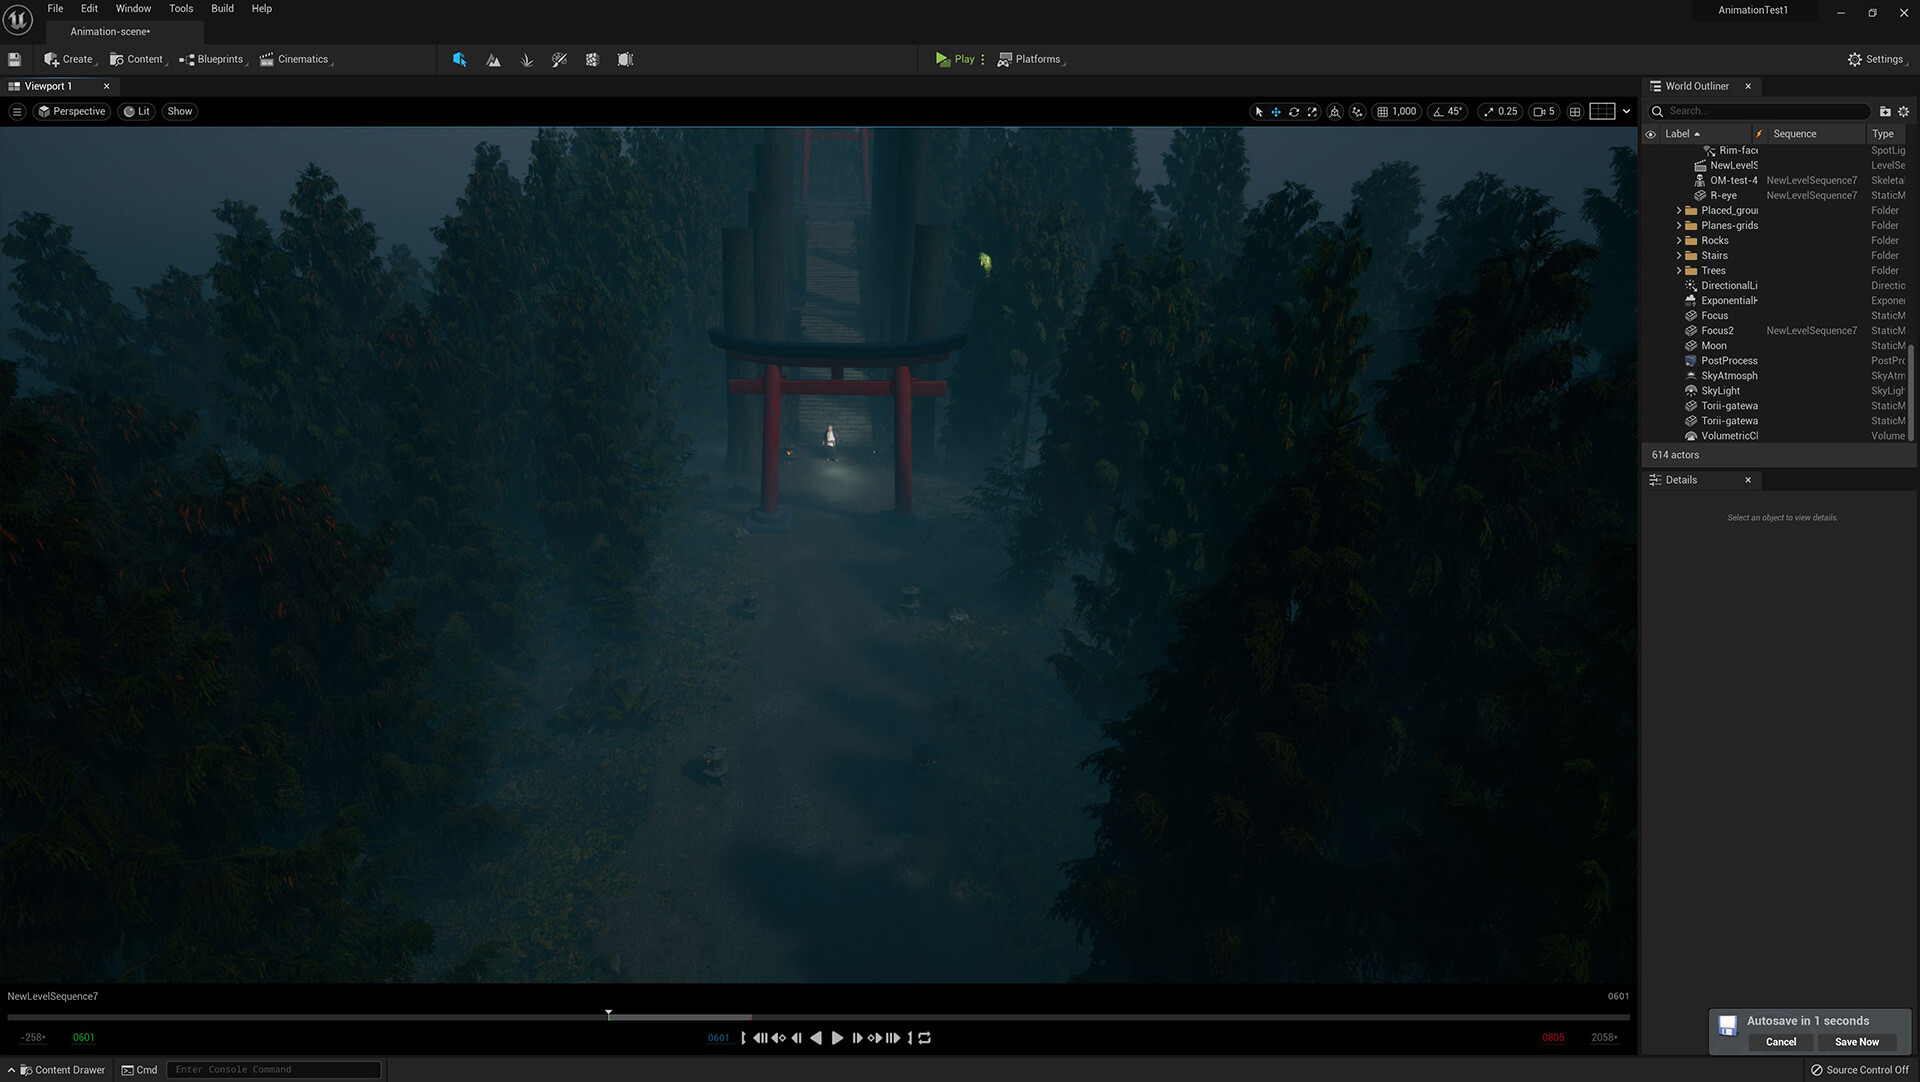
I had a lot of fun building out this environment. Instead of a simple backdrop, I opted for something I could orbit around and keep the immersive feeling going. It took more work but it was worth it because it made my final animation much easier to shoot. This is a throwaway shot I didn't even use and even it looks pretty cool.
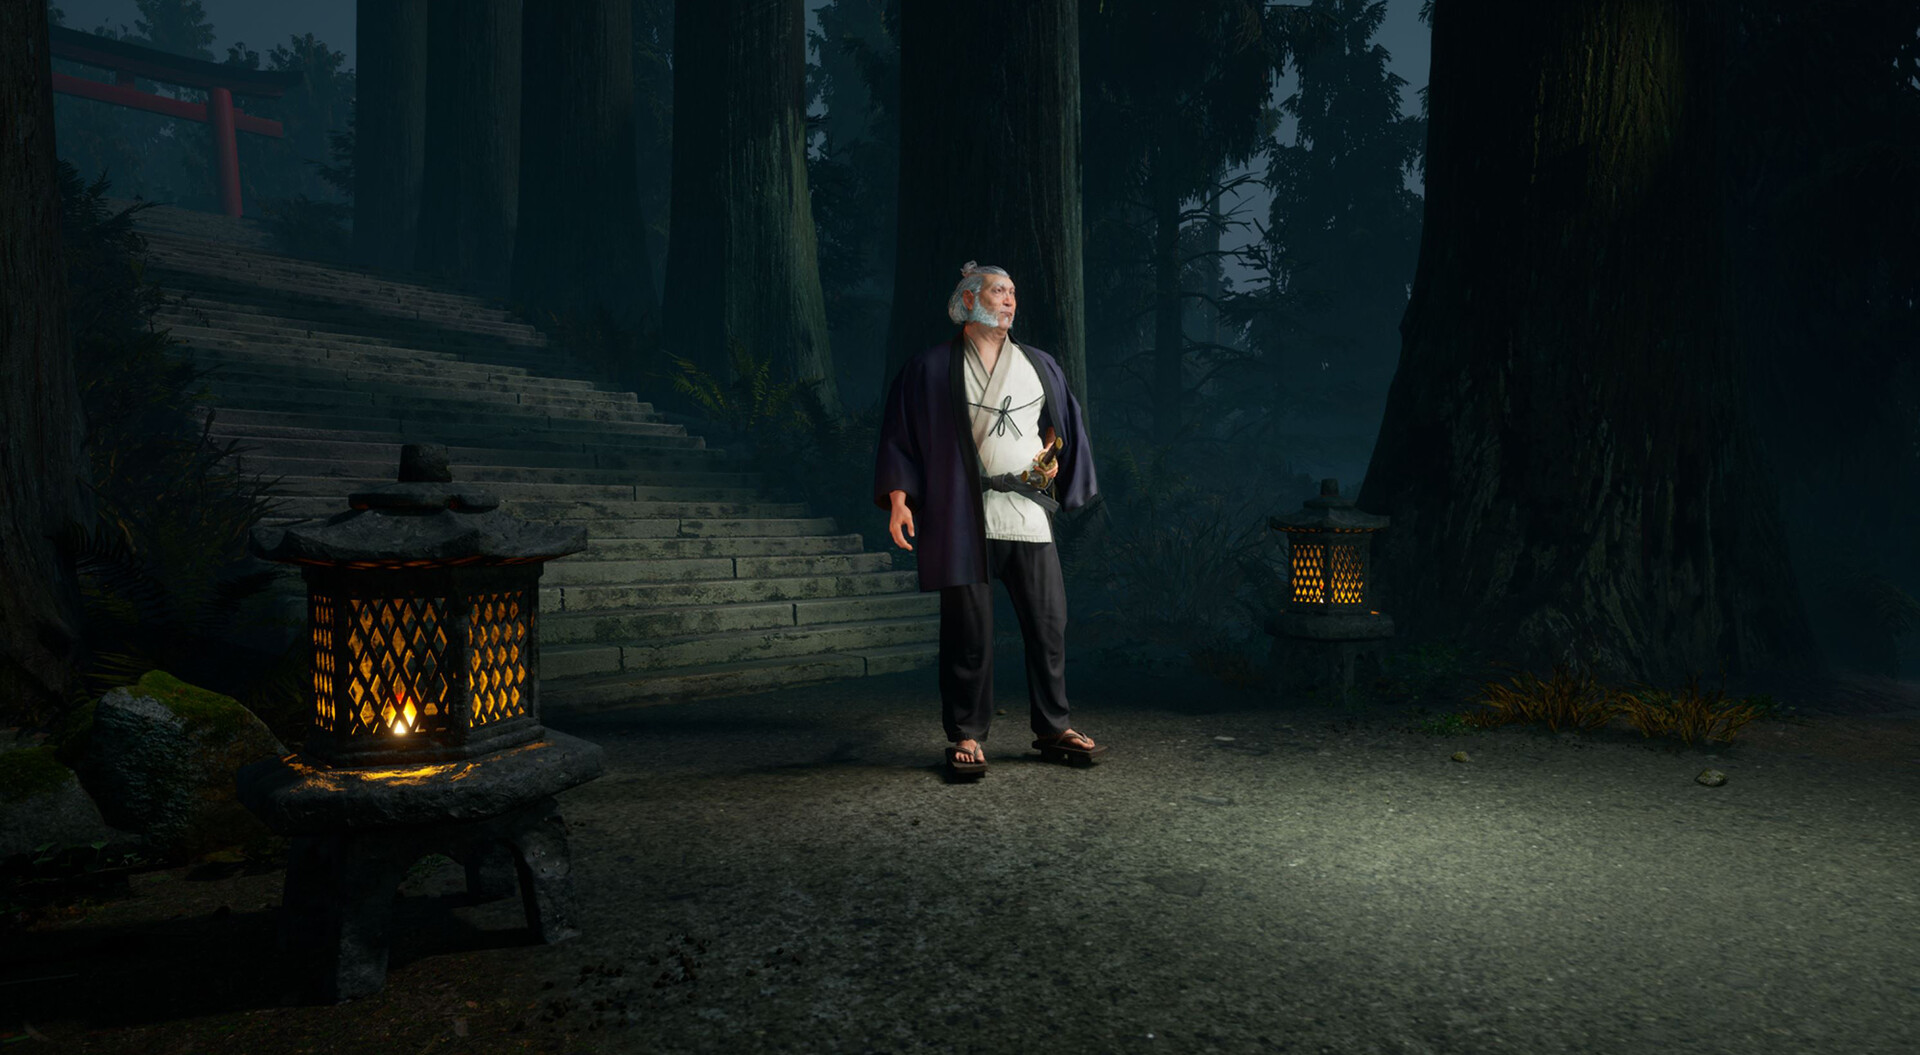
There were a lot of random things I threw around just to get organic noise into the scene. I placed scatterings of rocks, loose leaves, tufts of grass, etc., all to create some junk to make it look less clean. The trees and shrubs are sourced from the Medieval Game Environment project and most of the other shrubs, rocks, grasses and the stairways are from the Quixel Megascan library. I modeled the gateways and lanterns because I had more specific needs for those assets.
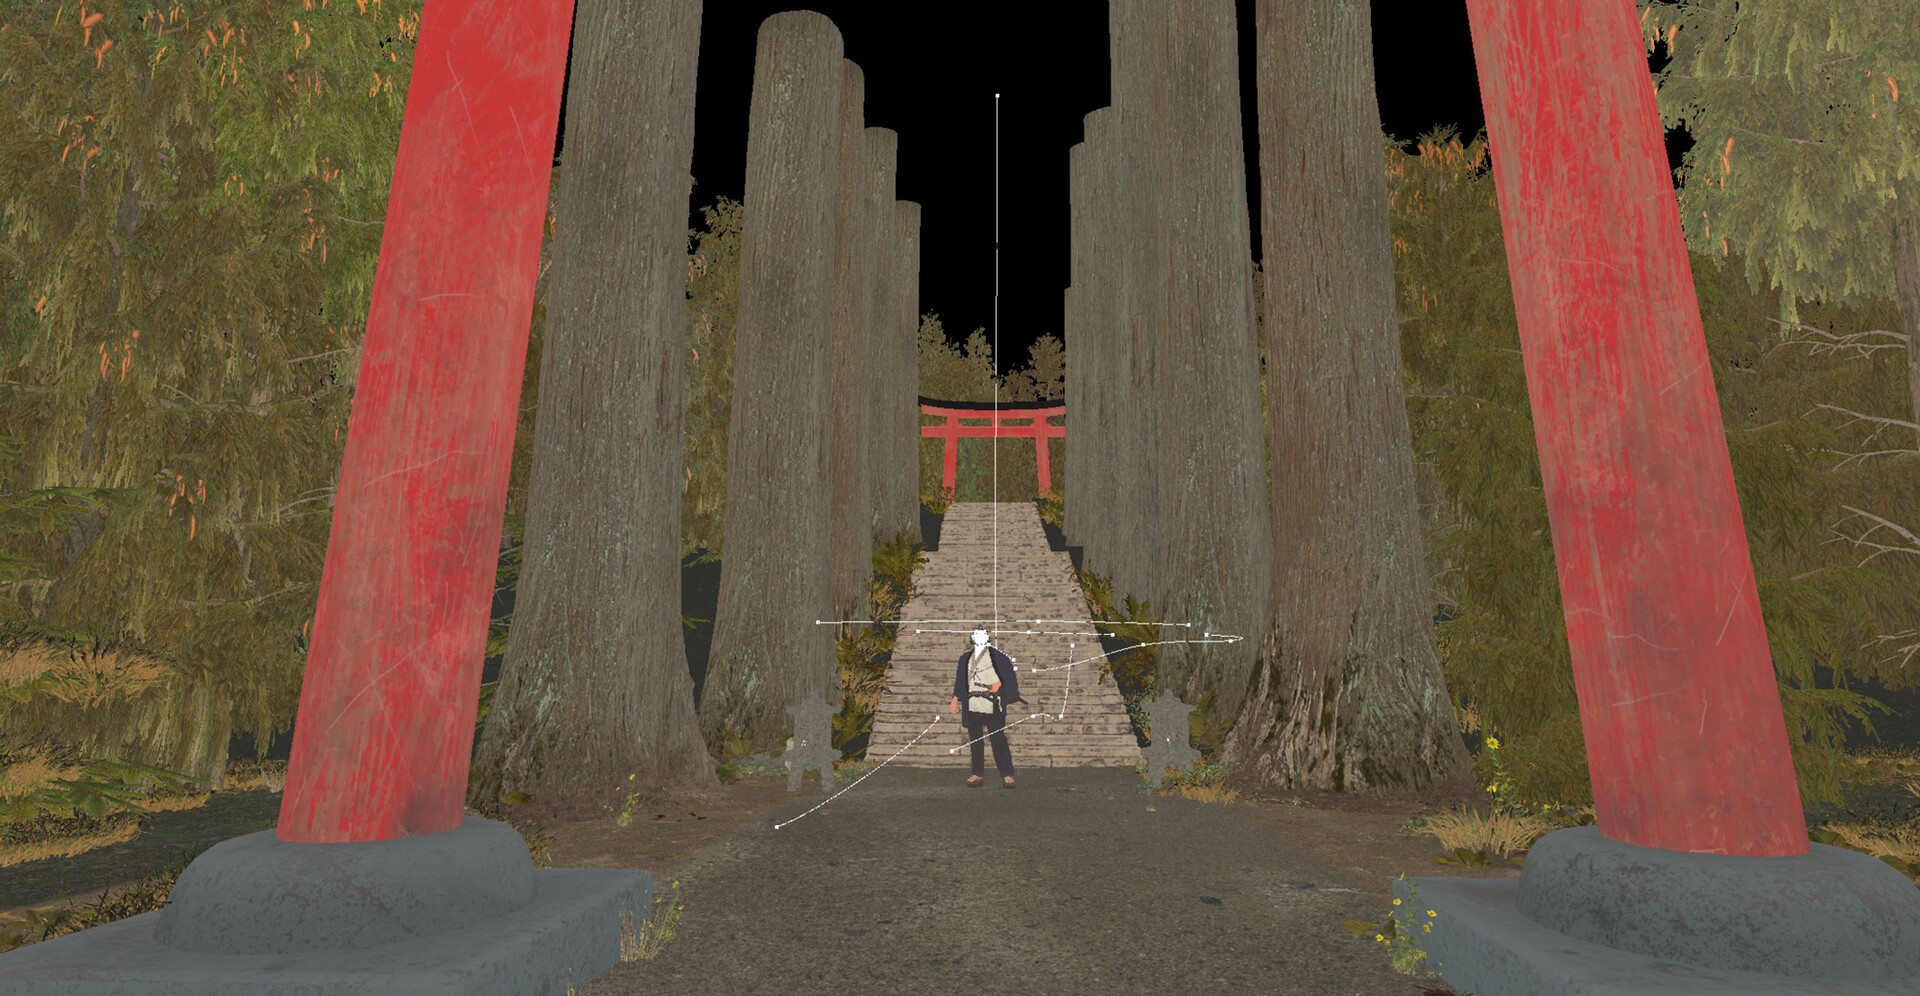
This was my first time using Unreal's Cine Camera Actors and their associated Cine Rig Rails for panning shots. These tools are so much fun! I spent way too much time tweaking the exact arc of each Cine Rig Rail vector path. Add to that the complexity of having the camera track the subject and you can spend hours getting just the right shot. Unreal continues to leave me flabbergasted with its sheer depth of realism and the associated functionality built into the engine.
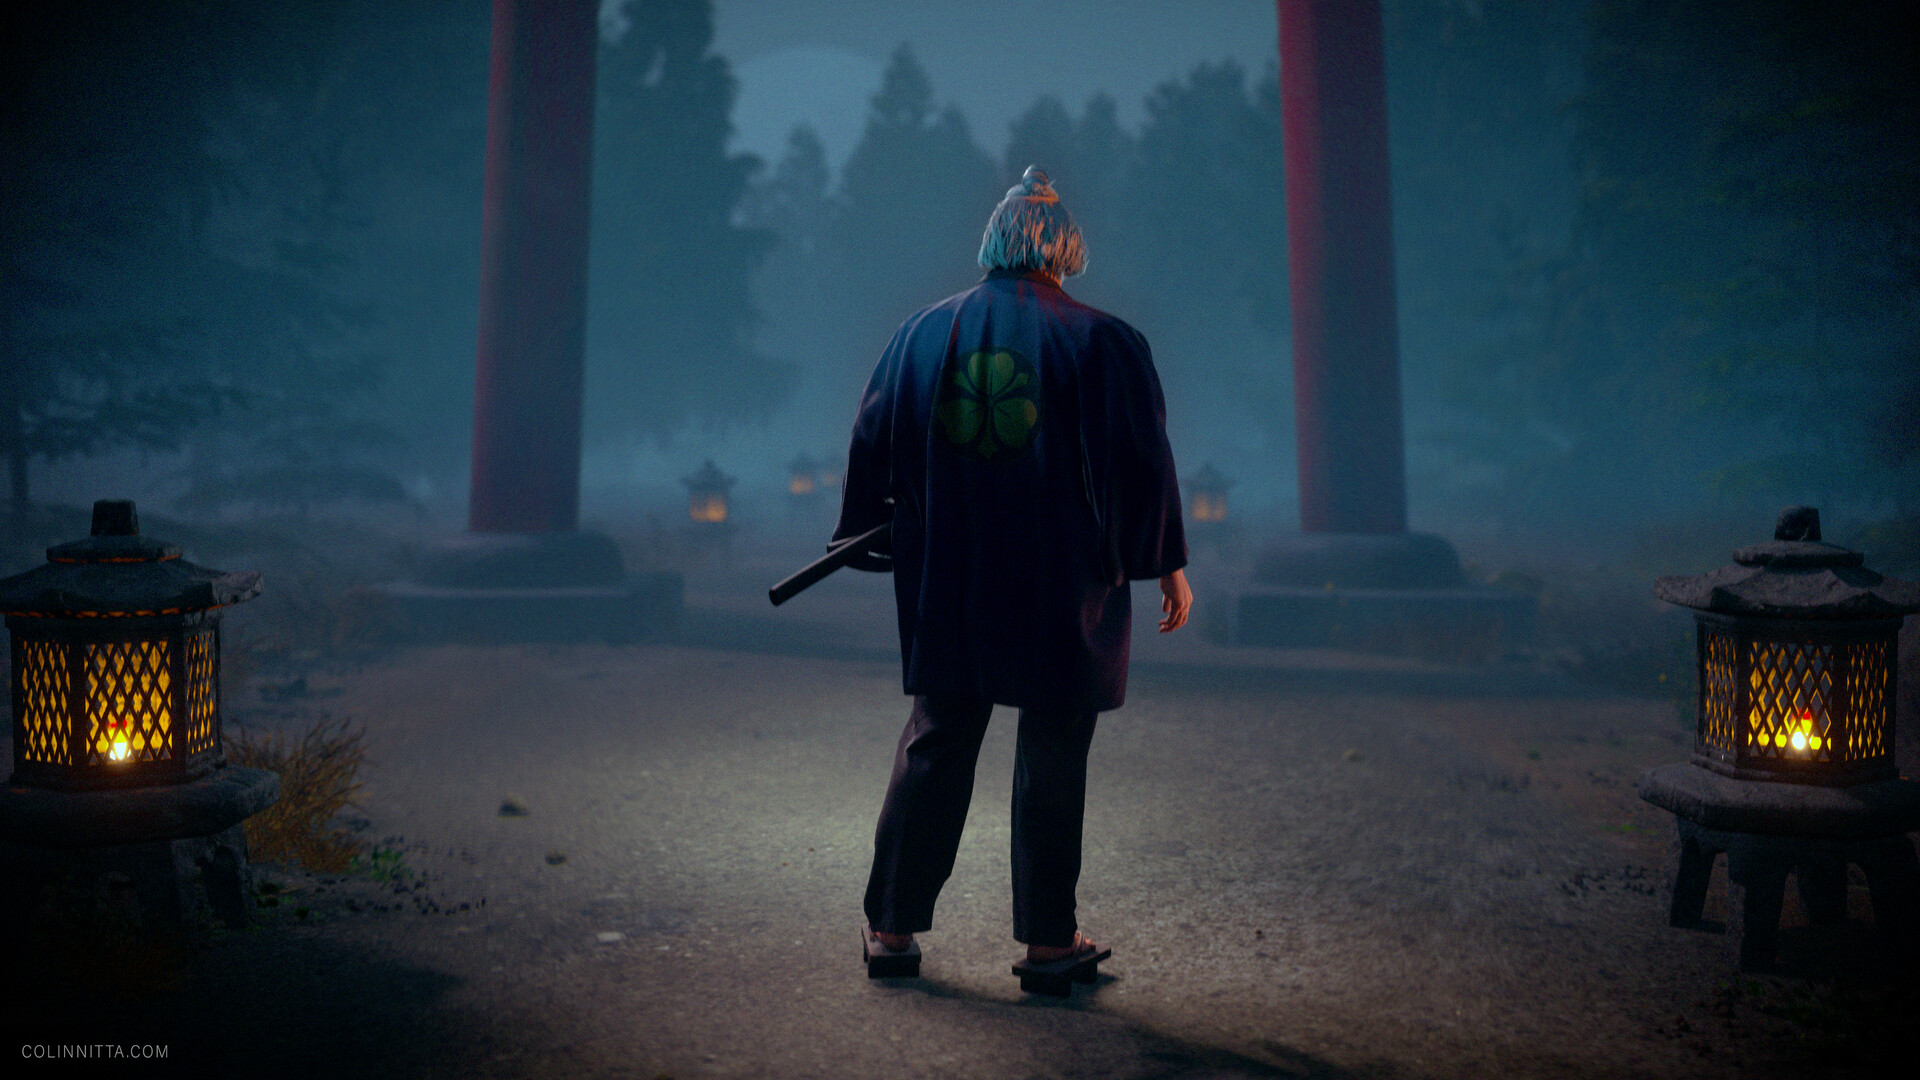
In this shot from the final animation, you can see much of the environmental detail ls completely obscured by depth of field, motion blur and grain. But it comes through nonetheless as breakup that helps things look less digital. My hope is that you don't notice at all, but are instead immersed in the experience :)
There is always an odd feeling of emptiness at the end of big projects like these. I simultaneously feel elated to finally have this thing off my chest and at the same time, a little disappointed to being saying goodbye. I remember thinking at the beginning, "this guy is all about the face, all I have to do is nail that and we're good." That was true to some degree; however, I wasn't considering all of the other unforeseen challenges and some new things I decided to jump into. It comes back to the old truism that it's better to reach outside your comfort zone and fail spectacularly than stay inside your limits and achieve modest success. If you don't push your boundaries, you won't know where they are!