Endless Anatomy Quest: From Micro to Macro

General / 09 October 2020

The longer you continue to study something in detail, the more important it becomes to step back, take stock and analyze the big picture. I’ve been studying anatomy for an extended period at this point. I started with the skeleton last August and have been sticking with daily practice, albeit with a few breaks here and there for holidays and vacations.

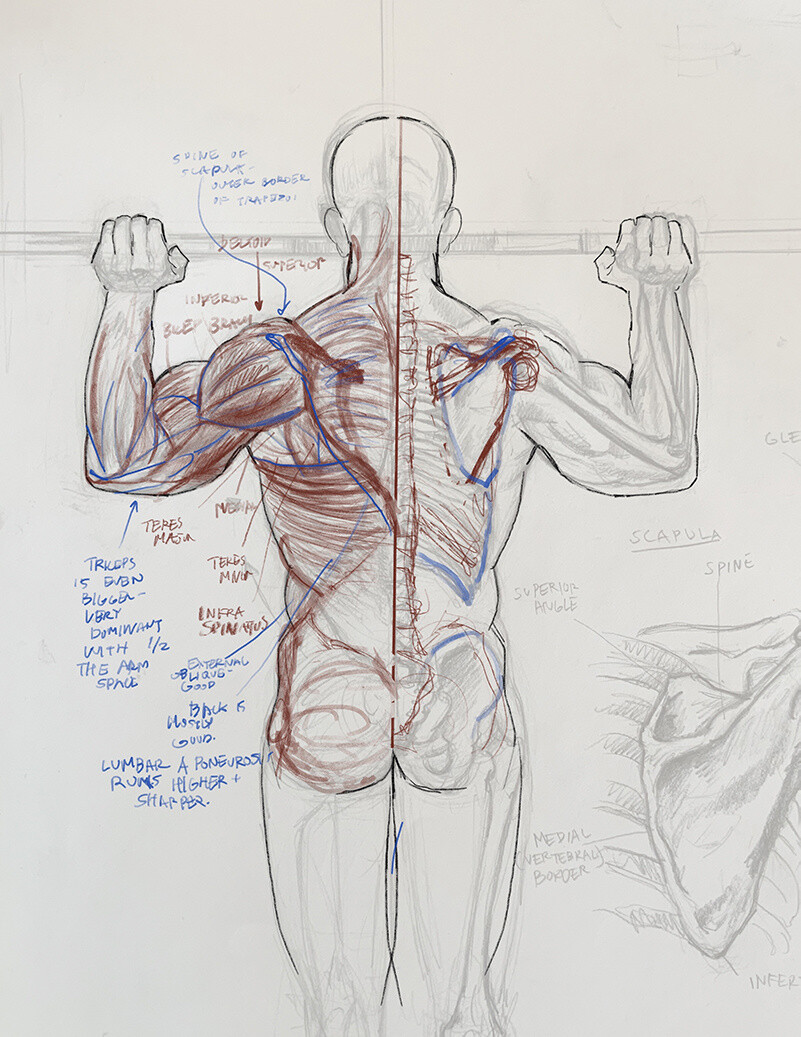
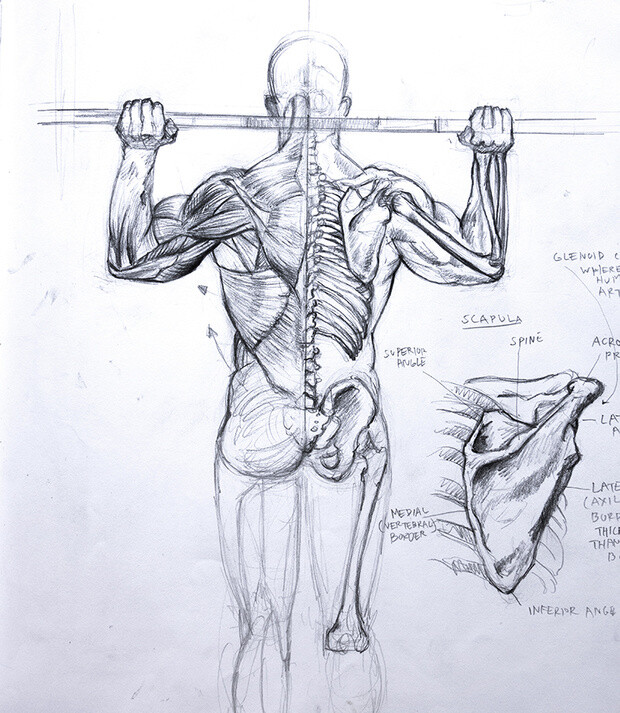
For the past few months I’ve had a steady diet of highly detailed muscular breakdown drawings from books that I then try to recall with memory studies. I make a lot of notes as I move through these studies, with specific breakdowns of where each muscle originates and inserts and how they change through motion and stress. It’s an exhausting, yet fascinating subject!

Sometime in the beginning of my pursuits I started an anatomy specific sketchbook with the goal of filling it up completely. Having this sketchbook has been a great incentive to keep going and track my progress. You can see here that it’s getting halfway full, with all the pages I’ve drawn on looking considerably gnarlier as they are covered in graphite and workable fixative.

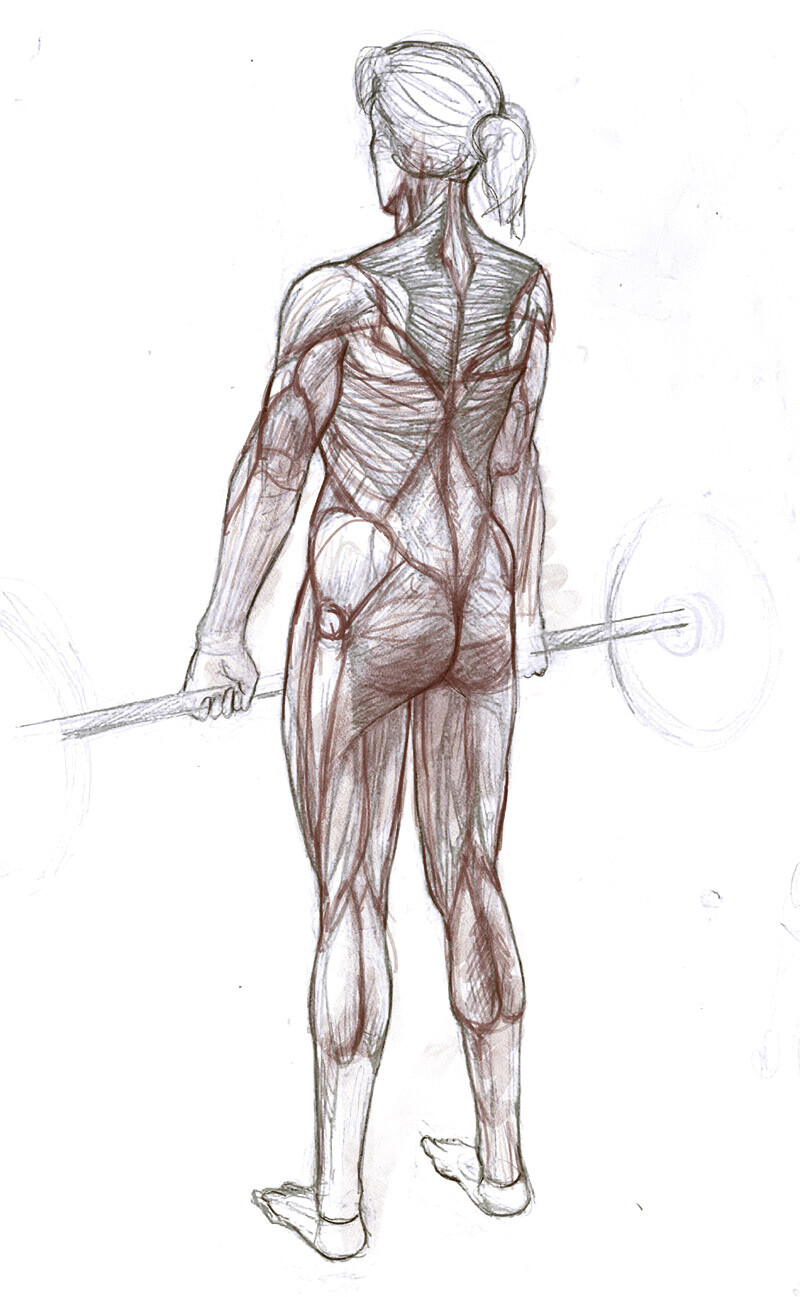
As I continued to study musculature this past March and April, I got around to covering all the major groups and the arms and legs from the major angles. There is so much to discover here and I found myself wanting to know more about the individual actions and movements of each distinct muscle and every time I did so, there was more to think about.

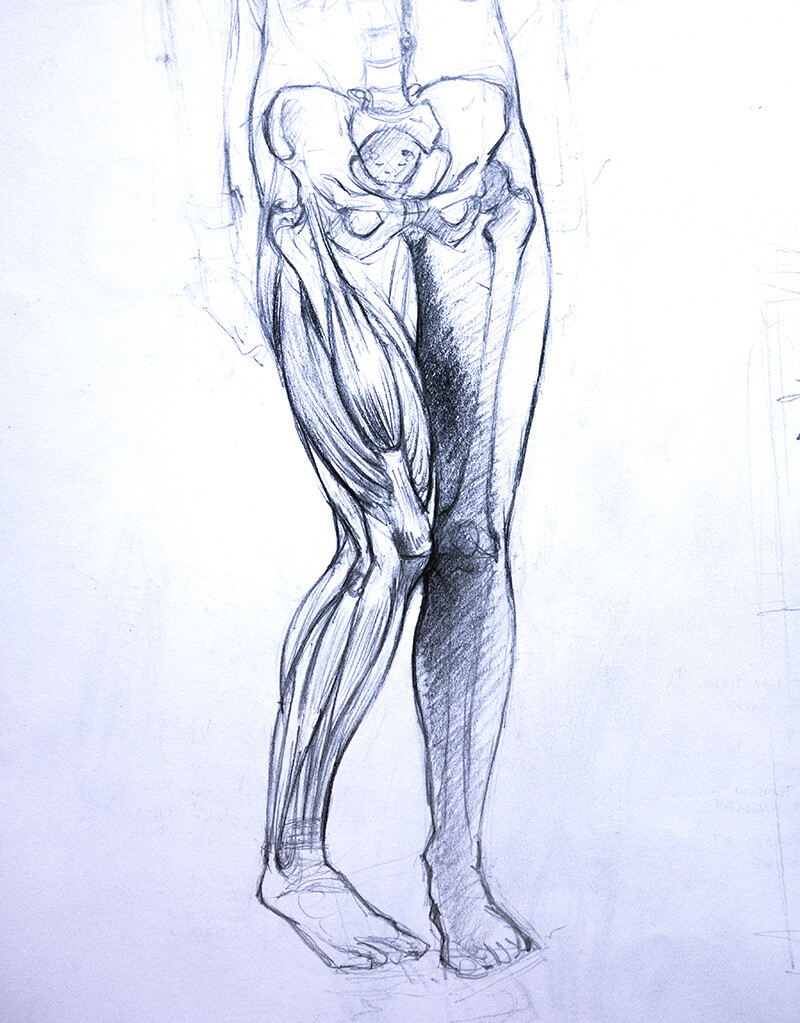
This is a great way to learn about specific details of human anatomy. But how does it apply to illustration and character design? What can we take from this micro study and apply to broad concepts?

To aid in answering this question, I’ve begun to take a closer look at one of the classic books on anatomy in illustration: Figure Drawing for All It’s Worth by Andrew Loomis.

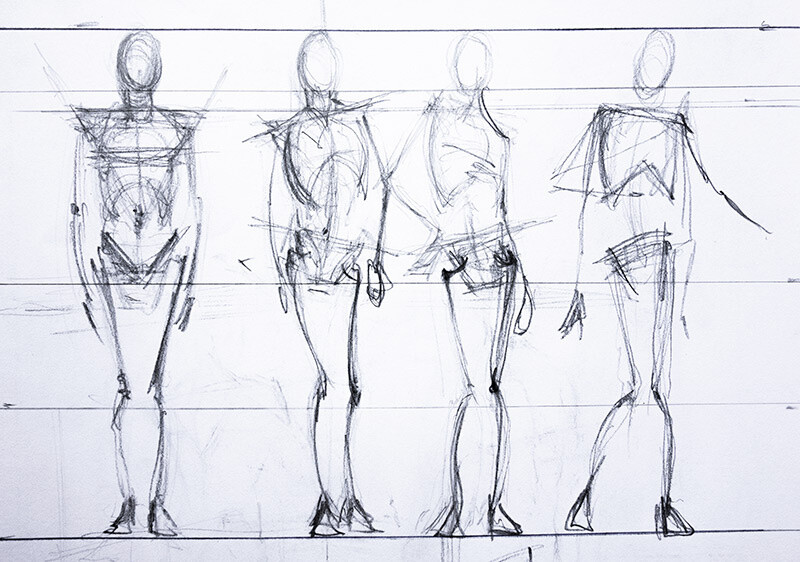
It turns out that the best way to start applying these specific lessons is to turn to the most general of drawing ideas: the mannequin.

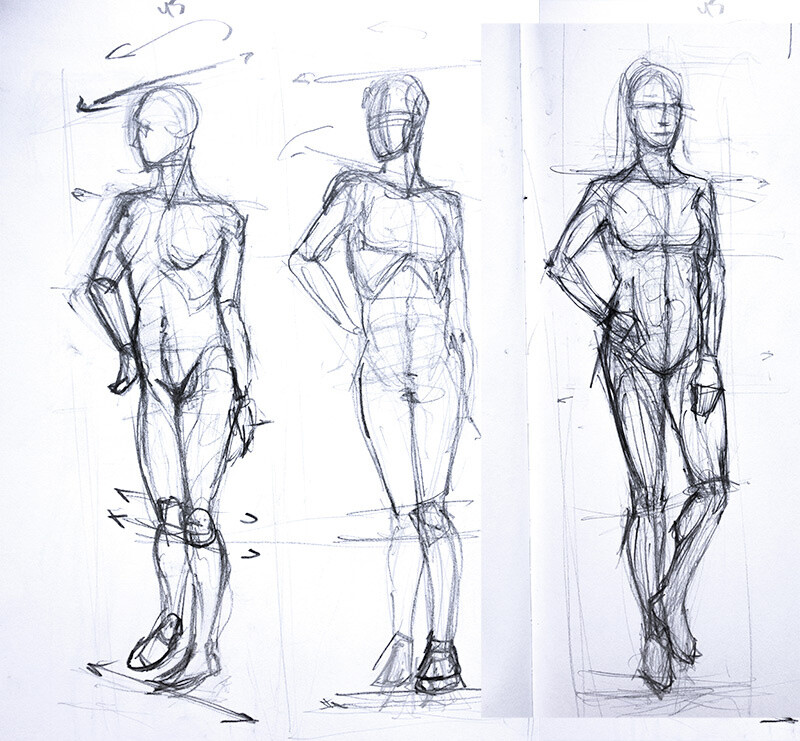
The mannequin is essentially a very stripped down version of the anatomical models I’ve been drawing this whole time. The general idea is that the mannequin allows a simplification of all the complexities that are happening in human anatomy and just covers the simple basics with a straightforward proportional scale.

I have seen this mannequin technique, but it never really gelled for me because I was unaware of the base structure that it is founded upon. Essentially, the mannequin draws upon the shape of the skeleton, but then extrapolates it out for movement, attitude and gesture.

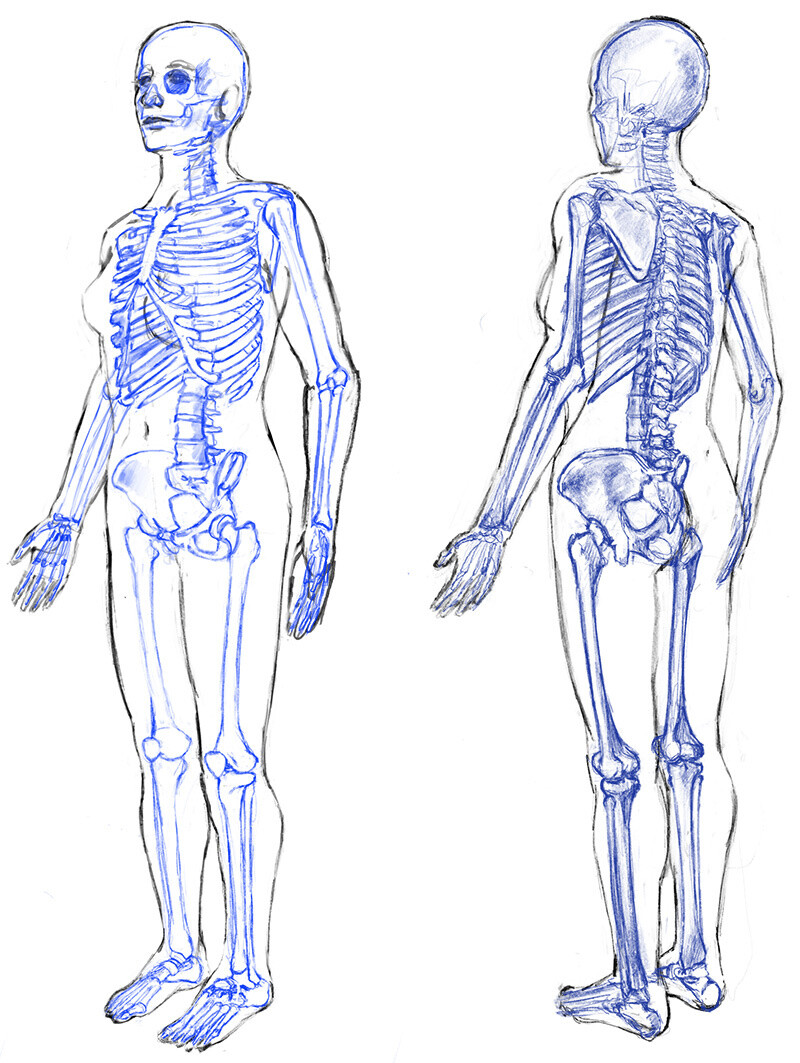
I’ve done dozens of these skeletal studies at this point. When I came across the mannequin idea again in Loomis’ book, it finally clicked. I understood his overall proportional scale because I saw how it matched the actual skeleton.

This is what I mean when moving from “micro to macro” in terms of artistic anatomy. The micro level of detail, such as the relationship between the the deltoid, triceps and biceps – is just as important as the macro level, such as a basic mannequin that is used in establishing overall proportion and gesture.

This micro versus macro dichotomy is what makes anatomy such a tricky subject for so many artists. I hope to sharpen both points of view as I continue to make discoveries in my endless anatomy quest!

How to Be Your Own Guide in the Land of 3D

General / 09 October 2020

I’ve talked about the free 3D program Blender in the past. About a year and a half ago, I made a first attempt at learning the software. With a subject as complicated as 3D modeling, there is really a right way to learn – and a wrong way! Back then, I used a wikipedia manual called Blender 3D: Noob to Pro. Looking back, I am surprised I even made as much progress as I did with that book. Learning from a manual is just really tough and that book in particular omitted some huge lessons that I’ve now gone back and learned, correctly. I discovered that the more I know about realism, the better my foundational skills in 3D will become. In turns out that if you follow the right tutorial channels on Youtube you can establish a really good baseline for skill improvement.

I’ve found Andrew Price’s Blender 2.8 tutorials to be a lifesaver. He is a great teacher and his donut tutorial has become somewhat famous in educational Blender forums. The great thing about Andrew is that he prioritizes broad concepts and he takes his time doing it. A big problem of online tutorials is when they focus too much on a very small problem – in a very condensed timeline – such as “how to sculpt a pineapple cactus in 2 minutes”. This sort of video is great if you happen to have that exact same problem and you’re trying to sculpt that same cactus. But… it falls short when you’re extrapolating your skills to other subjects – like plants, trees, man made objects, etc.

This anvil tutorial from Andrew taught me so much that I had very little information on before, such as UV unwrapping, sculpting and texture painting. As a more complex object, the anvil really put me through a steeper learning curve but I’m so glad that I went through all the pain. It takes time but it really is worth it in the end!

Modeling the anvil really increased my confidence levels. The donut, while a very friendly way to approach 3D, felt a bit basic for me at the end. The skills I have begun to develop while working on the anvil are starting to feel more applicable to actual problems.

Since completing the anvil, I’ve taken on a project of my own, separate from following a tutorial video. Working independently like this has been tough, I must admit! The tutorial videos are like a set of training wheels that keep you on course and the moment they’re off, it’s really easy to get lost in a rabbit hole.

I chose the subject of this medieval knight’s helm for a few reasons. Firstly, I felt it would be a good transition from the anvil study as it’s also a hard surfaced object. Also, I am often stuck when it comes to painting armor – it is really hard to find a good reference for it, so a 3D model makes total sense for this kind of use case. And last of all – I wanted a challenge. And boy, has it been a challenge.

The lobster plates and interlocking helmet components make for multiple objects overlaying each other, compounding the amount of modeling involved. I struggled with the precise nature of the steel edges and really had to work to get them just right. The face visor has a very unusual shape, which also caused me a lot of problems, forcing me to correct mistakes multiple times.

It’s still a work in progress, but I’m proud of what I’ve accomplished so far. Blender is starting to feel less like a completely foreign land and more like a program that is just incredibly flexible – like a swiss army knife with a thousand attachments. I can’t wait to find out what else it can do!